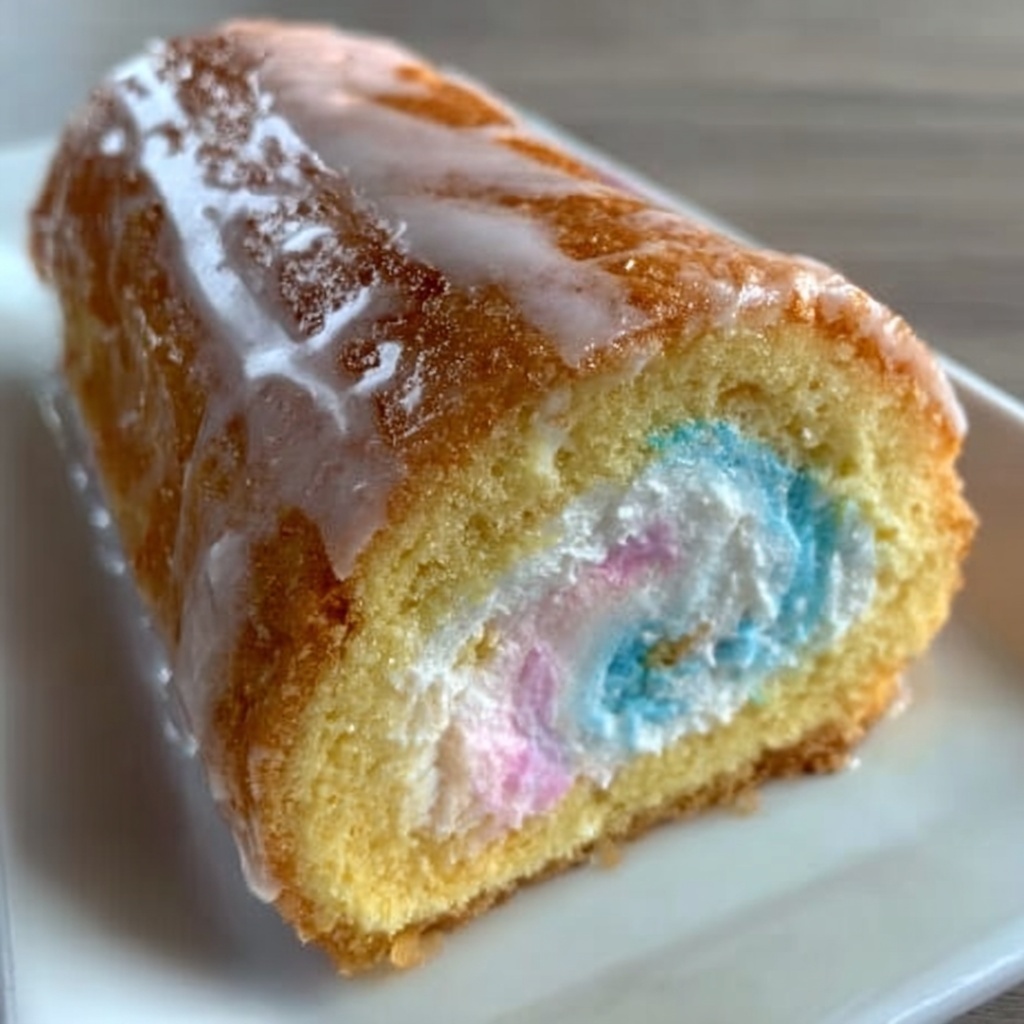
There is something truly magical about the Japanese Cotton Candy Cake Roll Recipe that captures the lighthearted spirit of a fairground treat inside the cozy comfort of a homemade cake. This delicate roll blends airy sponge with sweet, fragrant whipped cream infused with cotton candy flavor, making every bite feel like a fluffy cloud of joy. It is both visually charming and deliciously soft, perfect for delighting friends at any gathering or treating yourself to a whimsical dessert moment.
Ingredients You’ll Need
Gathering the right ingredients is key to achieving the perfect texture and flavor in this Japanese Cotton Candy Cake Roll Recipe. Each item plays a vital role, from creating that fluffy base to adding a dreamy sweetness that will transport you straight to a carnival daydream.
- 4 large eggs: The foundation of your sponge, eggs provide structure and lift for that airy texture.
- 100 grams (1/2 cup) granulated sugar: For sweetness and help in creating a stable, fluffy batter.
- 80 grams (2/3 cup) cake flour: The lighter flour type ensures the sponge stays tender and soft.
- 40 ml (1/6 cup) milk: Adds moisture, keeping the cake from drying out and enhancing softness.
- 30 ml (2 tablespoons) vegetable oil: A subtle fat that keeps the roll moist without weighing it down.
- 1 teaspoon vanilla extract: Classic flavor that complements the cotton candy essence perfectly.
- 1 teaspoon cotton candy flavoring: The star ingredient that brings that authentic candy floss taste.
- A pinch of salt: Elevates all the flavors and balances the sweetness.
- Whipped cream: Light and smooth, it’s the luscious filling that makes the roll dreamy.
- Food coloring (pink and blue, optional): For adding playful pastel hues to the whipped cream or batter, enhancing the fun factor.
How to Make Japanese Cotton Candy Cake Roll Recipe
Step 1: Beat Eggs and Sugar to Fluffy Perfection
Start by beating the large eggs together with the granulated sugar until the mixture is thick, pale, and fluffy. This step is crucial because incorporating plenty of air here sets the stage for the light, spongy texture that defines the Japanese Cotton Candy Cake Roll Recipe. Using a hand mixer or stand mixer makes this process easier, but don’t rush—take a good 5 to 7 minutes to get it just right.
Step 2: Sift Flour and Salt, Then Fold Gently
Sifting the cake flour and salt together aerates the flour and removes lumps, ensuring a silky batter. Gently fold the dry ingredients into your egg mixture with a spatula using a light hand, preserving as much air as possible. This delicate folding is what keeps the sponge so tender and cloud-like, the perfect base for your roll.
Step 3: Add Milk, Vegetable Oil, and Flavors
Next, combine the milk, vegetable oil, vanilla extract, and cotton candy flavoring, then gently fold this mixture into the batter. These liquids enrich your cake and infuse it with the whimsical taste reminiscent of freshly spun cotton candy. If you’re feeling creative, you can even stir in a few drops of pink or blue food coloring here for a playful swirl effect.
Step 4: Bake Until Light and Springy
Pour your smooth batter into a prepared rectangular baking pan lined with parchment paper. Bake at 180°C (350°F) for 12 to 15 minutes, keeping a close eye so it doesn’t brown too much; the cake should be pale and spring back when touched. This gentle baking preserves the delicate softness essential to the Japanese Cotton Candy Cake Roll Recipe.
Step 5: Whip the Cream Filling
While the cake cools slightly, whip the cream until stiff peaks form. Add a touch of sugar and a hint more cotton candy flavoring if you want to double down on that sweet carnival vibe. If you like, gently fold in a tiny splash of food coloring to match the cake or create a pastel ombre effect.
Step 6: Roll with Care and Chill
Once the cake has cooled to room temperature, spread an even layer of your fluffy cotton candy whipped cream over the surface. Carefully roll the cake into a log shape starting from one short edge, using the parchment paper to guide you. Seal the roll tightly, then wrap it well and chill in the refrigerator for at least 30 minutes. This resting time allows the flavors to meld and the roll to firm up for easy slicing.
How to Serve Japanese Cotton Candy Cake Roll Recipe

Garnishes
For a charming finishing touch, consider decorating your cake roll with a dusting of powdered sugar or a drizzle of pastel glaze. Fresh berries or edible flowers can add a burst of color and enhance its whimsical look, making it perfect for sharing at birthdays or tea parties.
Side Dishes
Pair this airy dessert with a simple cup of green tea or a light, fruity iced tea to balance the sweetness. Fresh fruit salad or a scoop of sorbet also works beautifully, keeping the meal refreshing and vibrant alongside the soft roll.
Creative Ways to Present
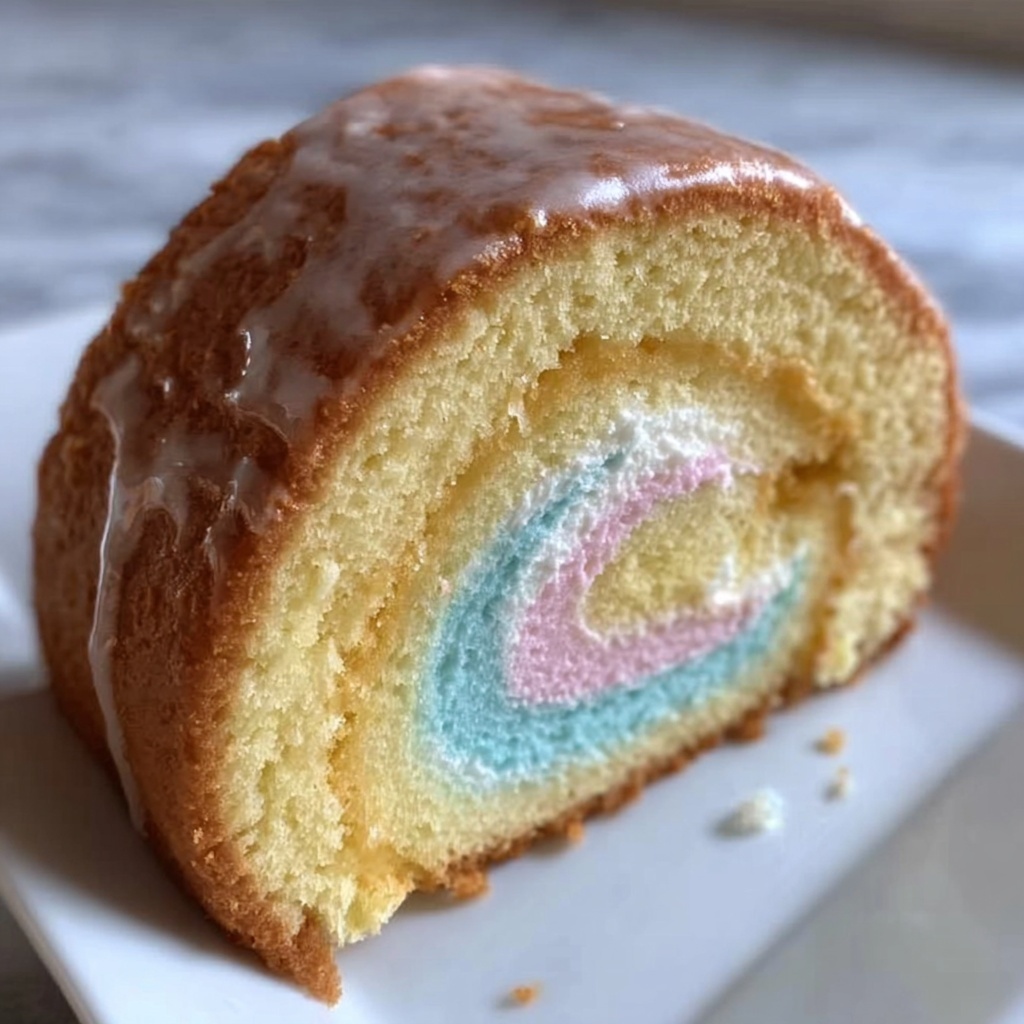
For a fun display, slice the roll into individual pinwheel servings, revealing the beautiful swirl of whipped cream and sponge. Alternatively, create mini rolls with smaller portions for party trays or serve with pastel-colored straws and napkins to echo the cotton candy theme.
Make Ahead and Storage
Storing Leftovers
Keep any leftover cake roll in an airtight container in the refrigerator, where it will stay fresh and moist for up to 3 days. Wrapping tightly helps prevent the sponge from drying out and preserves the delicate cotton candy flavor in the cream.
Freezing
You can freeze the whole roll or individual slices by wrapping them securely in plastic wrap and placing in a freezer safe container. For best texture and flavor, consume within 1 month. Thaw in the fridge overnight before serving for that fresh-out-of-the-fridge feel.
Reheating
The Japanese Cotton Candy Cake Roll Recipe is best enjoyed chilled, so reheating is not recommended. If you prefer, allow it to come to room temperature for 15-20 minutes to enhance the softness and flavor.
FAQs
Can I use a different flavoring instead of cotton candy?
Absolutely! While cotton candy flavoring is the signature here, vanilla, almond, or even fruit extracts can be delightful alternatives to suit your taste preferences.
What if I don’t have cake flour?
You can substitute all-purpose flour by measuring it, removing two tablespoons per cup, and replacing with the same amount of cornstarch to keep the cake light and tender.
Is it necessary to chill the cake roll before slicing?
Chilling helps the filling set and makes slicing easier and cleaner. If sliced immediately, the cream might squish out and the shape could be uneven.
Can I make the cake gluten-free?
Yes, substituting cake flour with a gluten-free flour blend designed for cakes will work, but be mindful it might slightly alter the texture.
How do I avoid cracks when rolling the cake?
Rolling when the cake is still warm (but not hot) using parchment paper can help prevent cracks. Also, handle it gently and avoid overfilling with cream.
Final Thoughts
If you are looking for a dessert that feels like a sweet, fluffy dream brought to life, the Japanese Cotton Candy Cake Roll Recipe is your go-to. Its airy texture, delicate flavor, and playful spirit make it such a joy to bake and share. Give it a try—you’ll find this cake roll quickly becoming one of your favorite treats to whip up whenever you want to add a little magic to your day.
Print
Japanese Cotton Candy Cake Roll Recipe
- Prep Time: 15 minutes
- Cook Time: 15 minutes
- Total Time: 35 minutes
- Yield: 8 servings
- Category: Dessert
- Method: Baking
- Cuisine: Japanese
- Diet: Vegetarian
Description
This Japanese cotton candy cake roll is a light and airy dessert featuring a fluffy sponge cake infused with delicate cotton candy flavoring. The cake is baked to perfection, filled with creamy whipped cream, and gently rolled to form a beautiful log. Optional food coloring in pastel pink and blue adds a whimsical touch, making it as delightful to look at as it is to eat. Perfect for special occasions or a sweet treat with tea.
Ingredients
Cake Batter
- 4 large eggs
- 100 grams (1/2 cup) granulated sugar
- 80 grams (2/3 cup) cake flour
- 40 ml (1/6 cup) milk
- 30 ml (2 tablespoons) vegetable oil
- 1 teaspoon vanilla extract
- 1 teaspoon cotton candy flavoring
- A pinch of salt
Filling
- Whipped cream (quantity as desired for filling)
- Optional: Food coloring (pink and blue)
- Optional: Additional sugar for sweetening whipped cream
Instructions
- Prepare the cake batter: In a mixing bowl, beat the 4 large eggs and 100 grams of granulated sugar together until the mixture becomes thick, fluffy, and pale in color. This aeration is key to achieving the light texture of the cake.
- Sift and fold dry ingredients: Sift the 80 grams of cake flour together with a pinch of salt to ensure there are no lumps. Gently fold the dry mixture into the egg and sugar blend, being careful not to deflate the batter, to maintain its airiness.
- Add wet ingredients: Incorporate 40 ml milk, 30 ml vegetable oil, 1 teaspoon vanilla extract, and 1 teaspoon cotton candy flavoring into the batter. Fold gently until just combined, preserving the light texture.
- Bake the cake: Pour the batter evenly into a prepared baking pan lined with parchment paper or greased. Bake in a preheated oven at 180°C (350°F) for 12-15 minutes, or until the cake springs back lightly when touched.
- Prepare the whipped cream filling: While the cake is baking, whip cream until stiff peaks form. Optionally, add some sugar and cotton candy flavoring for extra sweetness and flavor. You may tint portions of the cream with pink and blue food coloring for a decorative effect.
- Cool and assemble: Allow the cake to cool completely on a wire rack. Then spread a generous layer of whipped cream evenly over the cake’s surface.
- Roll the cake: Carefully roll the cake from one edge into a log shape, using the parchment paper to help guide it if needed. Be gentle to avoid cracking.
- Chill before serving: Wrap the cake roll tightly in plastic wrap and refrigerate for at least 30 minutes to set the cream and enhance flavor melding before slicing and serving.
Notes
- Use room temperature eggs for better volume when beating.
- Sift the flour carefully to avoid lumps in the batter.
- Folding technique is critical; fold gently to maintain airiness in the batter.
- You can customize the filling by adding fruit or different flavors to the whipped cream.
- For a firmer roll, chill the cake briefly after baking before adding whipped cream.
- Food coloring is optional but adds a fun, playful look to the cake.
- Store leftover cake wrapped in the refrigerator and consume within 2 days for best freshness.


