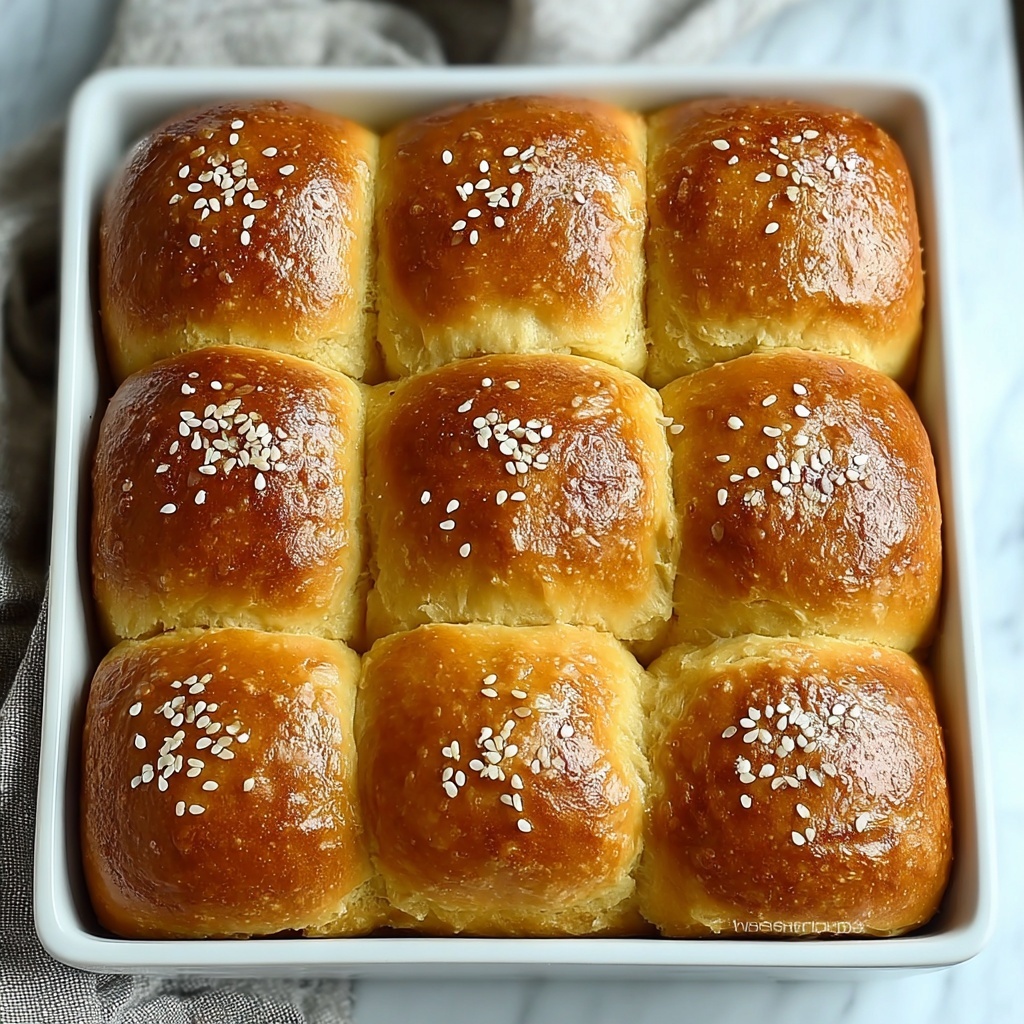
If you have a soft spot for freshly baked bread that’s tender, sweet, and utterly irresistible, then you are going to fall in love with this Pillowy Soft Gluten Free Honey Rolls Recipe. These rolls are a dream come true for anyone avoiding gluten yet craving that classic, buttery, melt-in-your-mouth texture. Sweetened naturally with honey and enriched with eggs and butter, they create a cozy treat perfect for everyday breakfasts or special gatherings. The moment you pull these golden beauties from the oven, your kitchen will fill with the warm aroma of honey and fresh bread, inviting everyone to gather around and savor each bite full of love and softness.
Ingredients You’ll Need
Never underestimate the power of a few simple but essential ingredients. Each component plays a vital role in crafting the perfect texture, taste, and appearance of these rolls. From the gluten free flour blend that forms the delicate base to the honey that adds a gentle sweetness, every item contributes to making these rolls wonderfully tender and flavorful.
- 4 cups gluten free flour blend: Essential for creating the fluffy texture without any gluten.
- 1.25 cups milk or non-dairy milk: Choose your favorite type to add creaminess and help activate the yeast.
- 2 teaspoons active dry yeast: The secret for that perfect rise and light fluffiness in the dough.
- 0.33 cups honey: Adds natural sweetness and depth of flavor that complements the rolls perfectly.
- 0.5 cups unsalted butter: Melted to impart rich, buttery goodness throughout the dough.
- 2 large eggs: Provide necessary structure and moisture to keep the rolls tender but not crumbly.
- 1 teaspoon salt: Balances all the sweetness and enhances the overall flavor.
- 1 large egg (for egg wash): Gives the rolls a shiny, golden finish that’s as beautiful as it is appetizing.
How to Make Pillowy Soft Gluten Free Honey Rolls Recipe
Step 1: Activate the Yeast and Honey Mixture
Start by warming 1 ¼ cups of your chosen milk combined with ⅓ cup honey in a small glass dish. Heat it just until warm to the touch—about 25 seconds—to create the perfect environment for the yeast. Stir the mixture well, then sprinkle in 2 teaspoons of active dry yeast. Allow it to sit for 5 minutes until it becomes bubbly and foamy. This step wakes up the yeast, ensuring your rolls will rise beautifully and have that irresistible fluffiness we’re after.
Step 2: Mix Wet Ingredients
Once your yeast is bubbly, pour this fragrant mixture into the bowl of a stand mixer. Add ½ cup of melted unsalted butter and 2 large eggs. Mix on low speed for a minute until everything comes together in a smooth, creamy blend. This step builds the rich, tender base that makes these rolls so special.
Step 3: Incorporate Dry Ingredients Gently
Next, gradually add 4 cups of gluten free flour blend and 1 teaspoon of salt to the mixture. Start at a low speed to avoid flour clouds, then increase to medium until a soft dough forms. The dough should feel tender and slightly sticky, just like a classic bread dough, ensuring your rolls will be soft and light once baked.
Step 4: Shape the Rolls
Tear off portions of dough roughly the size of golf balls and roll them gently between your palms into smooth, round balls. Arrange the dough balls on a baking sheet lined with parchment paper, leaving plenty of space around each so they can grow during rising.
Step 5: Let the Rolls Rise
Loosely cover your shaped dough balls with plastic wrap and let them rest at room temperature for about 40 to 45 minutes until they double in size. For an extra gentle rise, preheat your oven to 200º F and then turn it off. Place the covered rolls inside to create a warm, cozy environment that encourages perfect rising every time.
Step 6: Prepare for Baking
Before popping the rolls into the oven, whisk the remaining large egg in a small dish. Brush this egg wash gently over the tops of each roll to give them a gorgeous shine and an inviting golden-brown finish once baked.
Step 7: Bake to Golden Perfection
Bake the rolls at 350º F for 20 to 25 minutes. Keep an eye out for that beautiful golden color on top—once they look just right, your rolls are ready to come out and cool slightly.
Step 8: Cool and Enjoy
Transfer the warm rolls onto a cooling rack and let them rest for a few minutes. This helps lock in moisture so every bite remains tender and delightful. Then, gather your loved ones and enjoy the cozy sweetness of these irresistible gluten free honey rolls!
How to Serve Pillowy Soft Gluten Free Honey Rolls Recipe
Garnishes
While these honey rolls are perfect just as they come, a light brush of honey butter or a sprinkle of cinnamon sugar right after baking can take them to the next level. Fresh herbs like finely chopped rosemary or thyme also make unexpected and delightful garnishes that complement the sweet bread without overpowering it.
Side Dishes
Because these rolls are naturally sweet and soft, they pair wonderfully with savory dishes. Think hearty stews, creamy soups, or roasted vegetables. A simple salad or charcuterie board alongside them makes for a balanced and satisfying meal, perfect for family dinners or friendly gatherings.
Creative Ways to Present
For a fun twist, slice your honey rolls almost halfway through and stuff them with your favorite spreads like cream cheese, jam, or nut butters. You can also serve them warm with small dishes of honey and butter on the side for dipping—making every bite an interactive, cozy experience.
Make Ahead and Storage
Storing Leftovers
If you find yourself with leftovers, store them in an airtight container at room temperature for up to 2 days. This helps maintain their soft texture and fresh flavor so you can enjoy them just as much the next day.
Freezing
To freeze your lovely honey rolls, wrap them tightly in plastic wrap followed by aluminum foil or store in a freezer bag. They’ll keep delicious in the freezer for up to 3 months. When you’re ready to enjoy them, simply thaw at room temperature or use the microwave for a quick fix.
Reheating
For the best taste, reheat your rolls by wrapping them in foil and warming in a 300º F oven for about 10 minutes. Alternatively, microwave rolls individually for 20 to 30 seconds to bring back their fresh-baked softness quickly.
FAQs
Can I use a different type of flour for this recipe?
Using a gluten free flour blend specifically designed for baking is key to achieving the pillowy texture in this recipe. Regular flours won’t give the same soft result, so sticking to a gluten free blend is important for best success.
Is it possible to make these rolls dairy free?
Absolutely! Simply substitute the milk with your favorite non-dairy milk like almond, oat, or soy, and replace the butter with a dairy-free alternative. The rolls will still come out wonderfully soft and tasty.
How do I know when the rolls have risen enough?
You’ll want to see your rolls double in size during the rising stage. They should look noticeably puffed and feel soft to the touch, gently springing back when pressed.
Can I make the dough by hand without a stand mixer?
Yes! It might take a bit more muscle, but you can mix everything by hand in a large bowl. Just be sure to combine ingredients thoroughly and knead gently until you get a soft dough.
What’s the best way to store leftover baked rolls?
Place any extras in an airtight container at room temperature for a day or two, or freeze for longer storage. Properly stored, they stay soft and delicious.
Final Thoughts
There’s something truly magical about pulling a batch of freshly baked, pillowy soft rolls right out of the oven, especially when they’re naturally sweetened and gluten free. This Pillowy Soft Gluten Free Honey Rolls Recipe has been a cherished favorite in my kitchen, bringing smiles and comfort to every meal. I can’t wait for you to try it and discover the joy these tender, sweet rolls can bring to your table. Happy baking, my friend!
Print
Pillowy Soft Gluten Free Honey Rolls Recipe
- Prep Time: 20 minutes
- Cook Time: 25 minutes
- Total Time: 1 hour 30 minutes
- Yield: 12 rolls
- Category: Bread
- Method: Baking
- Cuisine: American
- Diet: Gluten Free
Description
These Pillowy Soft Gluten Free Honey Rolls are perfect for sweet moments and celebrations, offering a fluffy texture with natural honey sweetness. Made with a gluten-free flour blend and enriched with eggs and butter, they bake up golden brown with a shiny egg wash finish. Ideal for those seeking a gluten-free, comforting bread option that rises beautifully and tastes delicious warm or at room temperature.
Ingredients
Wet Ingredients
- 1.25 cups milk or non-dairy milk (use your favorite type for added creaminess)
- 0.33 cups honey
- 0.5 cups unsalted butter, melted
- 2 large eggs
- 1 large egg (for egg wash)
Dry Ingredients
- 4 cups gluten free flour blend
- 2 teaspoons active dry yeast
- 1 teaspoon salt
Instructions
- Activate Yeast: Combine 1 ¼ cups milk or non-dairy milk with ⅓ cup honey in a small glass dish. Heat for 25 seconds and stir. Add 2 teaspoons active dry yeast and let bubble for 5 minutes to activate the yeast for a perfect rise.
- Mix Wet Ingredients: In a stand mixer, pour in the bubbly yeast mixture, followed by ½ cup melted unsalted butter and 2 large eggs. Mix on low speed until blended to combine all wet components evenly.
- Add Dry Ingredients: Gradually add 4 cups gluten free flour blend and 1 teaspoon salt into the mixer. Start mixing on low and increase to medium speed until a soft dough forms, achieving the correct consistency for forming rolls.
- Shape Rolls: Tear off portions of the dough and roll into balls. Place them on a parchment paper-lined baking sheet, spacing them apart to allow room for rising.
- First Rise: Loosely cover the rolls with plastic wrap and let them rise for 40-45 minutes until doubled in size, allowing the dough to develop fluffy texture.
- Warm Oven Proof: Preheat oven to 200ºF and then turn it off. Cover the rolls again and place them inside the warm oven to encourage additional rising in a controlled environment.
- Apply Egg Wash: Whisk the remaining egg in a small dish and brush the top of each roll. This step provides a shiny, golden finish after baking.
- Bake Rolls: Bake rolls in a preheated oven at 350ºF for 20-25 minutes, or until they become golden brown on top, signaling they are perfectly cooked.
- Cool and Serve: Transfer baked rolls to a cooling rack and let cool slightly before serving to enjoy the soft texture and flavor.
- Store Leftovers: Store any leftovers in an airtight container or freeze them. To thaw, microwave for 30 seconds for a warm fresh-baked taste.
Notes
- Use a gluten-free flour blend suitable for baking for best results in texture.
- Milk alternatives such as almond or oat milk can be used to keep the recipe dairy-free.
- Ensure yeast is fresh and active to guarantee the rolls rise properly.
- Brushing with egg wash is optional but recommended for a shiny, golden crust.
- These rolls freeze well; wrap them tightly in plastic wrap and place in a freezer bag.
- Reheat leftovers gently in the microwave to maintain softness.


