
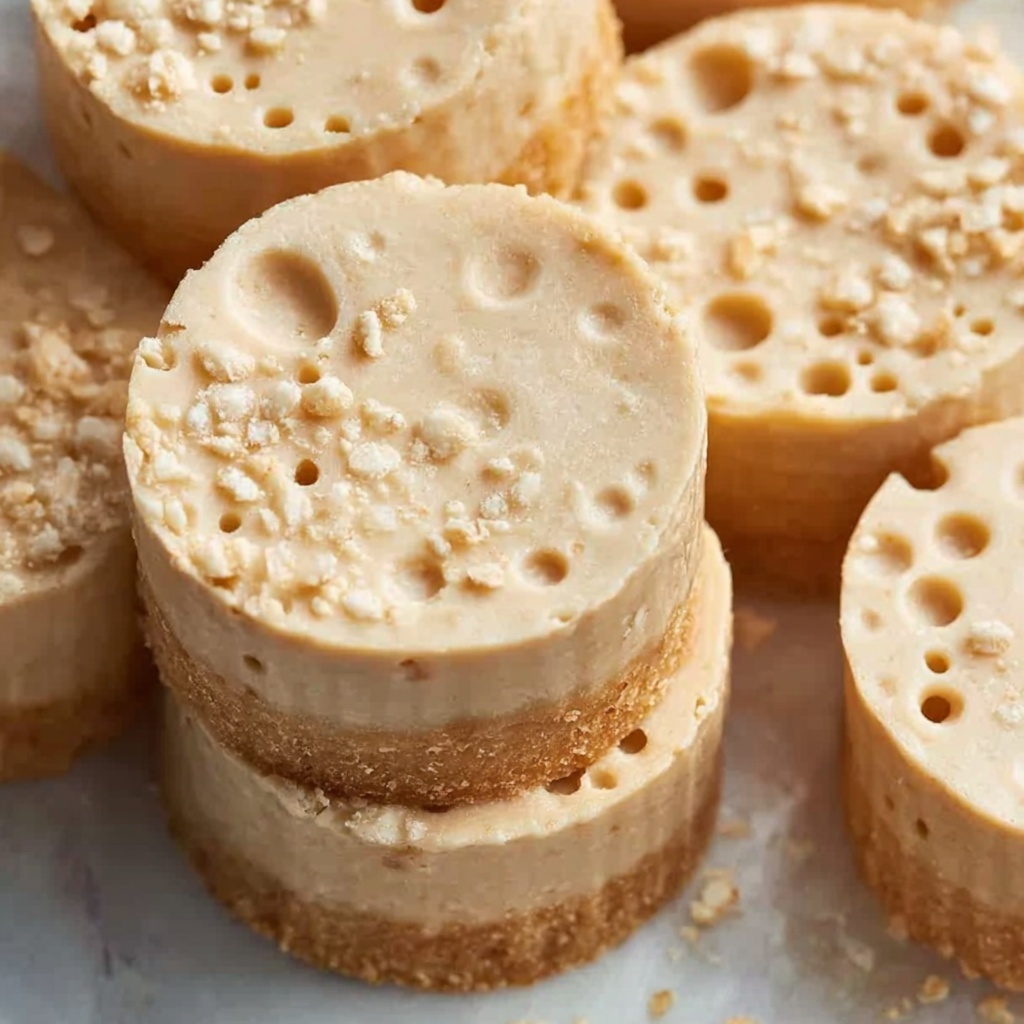
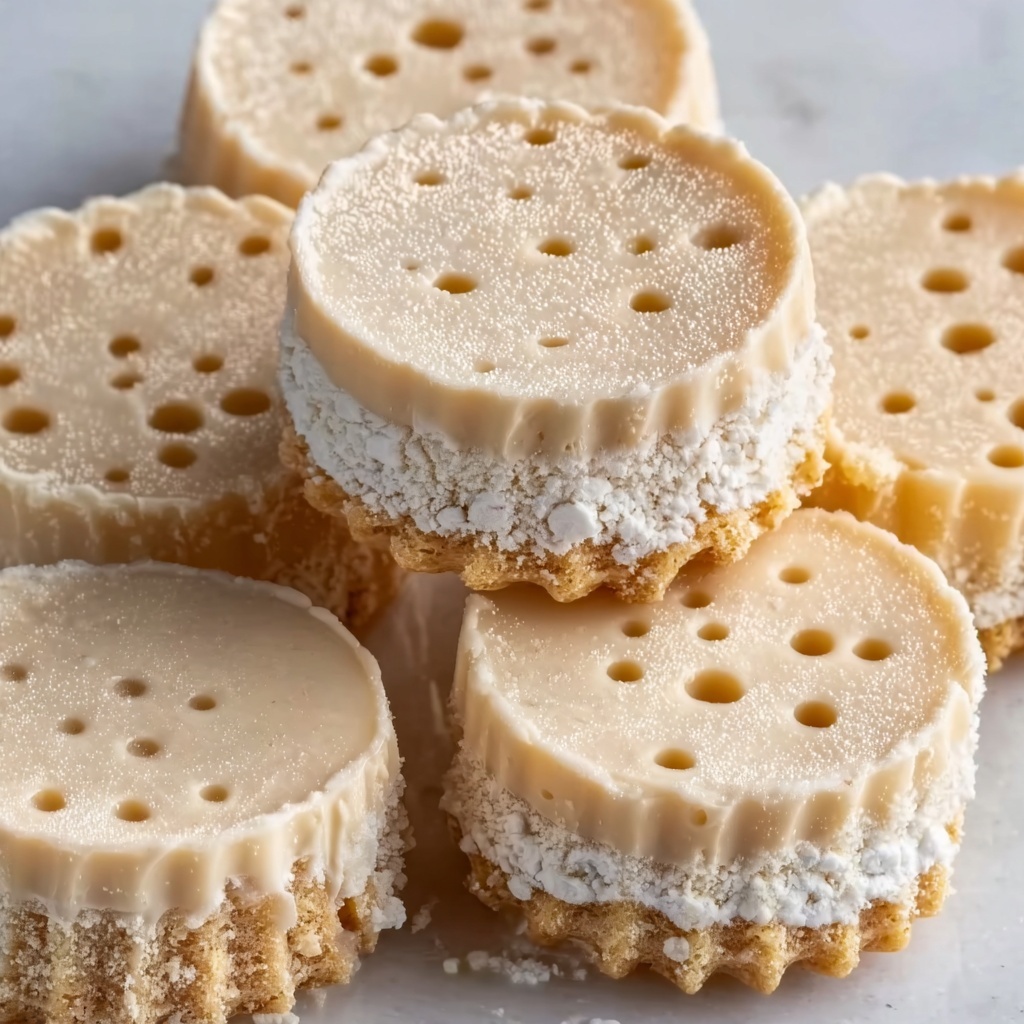
If you’ve been dreaming of a candy that perfectly blends rich creaminess with the deep, natural sweetness of maple, then this Maple Fudge Recipe is going to become your new obsession. It’s a luscious, melt-in-your-mouth treat that captures the warm flavors of pure maple syrup, balanced beautifully with buttery undertones and a hint of vanilla. The process might sound a little fancy, but trust me, it’s straightforward and incredibly rewarding—this fudge holds the kind of cozy charm that makes it the perfect homemade gift or a sweet indulgence any time of year.
Ingredients You’ll Need
All you really need to craft this irresistible fudge are a handful of simple, though carefully chosen ingredients. Each one plays a crucial role: from the maple syrup delivering its iconic flavor and color, to the heavy cream that ensures the perfect creamy texture, and the butter that adds richness and a glossy finish. Let’s look at what’s essential for this Maple Fudge Recipe:
- 2 cups pure maple syrup: The star sweetener gives the fudge its signature flavor and natural sweetness.
- 1 cup heavy cream (or coconut cream for dairy-free): Adds luscious creaminess that makes the fudge smooth and indulgent.
- 2 tablespoons unsalted butter (or vegan butter for dairy-free): Brings a wonderful richness and glossy texture to your fudge.
- 1/4 teaspoon salt: Enhances all the sweet and buttery flavors, balancing the richness perfectly.
- 1 teaspoon vanilla extract: Infuses warmth and depth, rounding out the flavor profile beautifully.
- Optional: Chopped pecans or walnuts for topping: Adds a delightful crunch and nutty dimension that’s completely irresistible.
How to Make Maple Fudge Recipe
Step 1: Mix Your Sweet Ingredients
Start by combining the maple syrup, heavy cream, and salt in a heavy-bottomed saucepan over medium heat. This trio forms the luscious base of your fudge, and heating it gently while stirring occasionally ensures everything blends smoothly without scorching.
Step 2: Achieve the Perfect Soft-Ball Stage
Next, bring the mixture up to a boil, then reduce the heat to medium-low. Here’s the crucial part: use a candy thermometer to measure the temperature carefully as it reaches 238°F (114°C), the “soft-ball stage.” This precise moment guarantees the fudge will set with that classic soft, creamy texture you love.
Step 3: Cooling with Butter and Vanilla
Once you’ve hit the right temperature, remove the pan from heat and stir in the butter and vanilla extract—but don’t stir just yet. Let the mixture cool undisturbed to around 110°F (43°C). This cooling step helps the fudge start its magical transformation to that irresistible creamy consistency.
Step 4: Beat Until Thick and Creamy
When cooled, it’s time to get moving! Beat the mixture vigorously with a wooden spoon or hand mixer for about 5 to 10 minutes. You’ll notice it lighten in color and thicken, which signals that perfect fudge texture is forming right before your eyes.
Step 5: Pour and Add Nuts
Pour your luscious fudge into an 8×8-inch pan lined with parchment or greased, spreading it out evenly. If you love a bit of crunch, sprinkle chopped pecans or walnuts on top and gently press them into the fudge. The nuts will add a wonderful contrast in texture.
Step 6: Let It Set
Allow your fudge to set at room temperature for 1 to 2 hours. This resting time lets it firm up while remaining creamy and easy to cut into those delightful squares. Then, simply slice and enjoy!
How to Serve Maple Fudge Recipe
Garnishes
A simple sprinkle of chopped nuts adds elegance and a lovely crunch to each piece of fudge. If you want to get extra fancy, a dash of flaky sea salt or a drizzle of melted dark chocolate on top can amplify the flavor and visual appeal beautifully.
Side Dishes
Pair your Maple Fudge with a hot cup of coffee or tea to cut through the sweetness, or serve alongside fresh fruit for a balanced contrast. It also shines as a sweet finish to autumn or winter meals, bringing a cozy and comforting note.
Creative Ways to Present
Wrap maple fudge squares in festive wax paper for a delightful homemade gift, or stack them in a decorative jar layered with nuts for a rustic, charming presentation. These touches make it an instant crowd-pleaser at holiday gatherings or potlucks.
Make Ahead and Storage
Storing Leftovers
Stored in an airtight container at room temperature, your Maple Fudge will stay fresh and soft for up to two weeks. Keeping it covered prevents drying out and preserves the gorgeous texture that makes it so enjoyable.
Freezing
If you want to extend the fudge’s life or prepare it ahead of a big occasion, freeze it in an airtight container for up to three months. Just separate layers with parchment paper to prevent sticking, and thaw it slowly at room temperature before serving.
Reheating
Reheating maple fudge is usually unnecessary, but if the texture firms up too much, let it sit at room temperature for a while. For a quick soften-up, a few seconds in the microwave (wrapped loosely) can bring back its creamy softness.
FAQs
Can I make this Maple Fudge Recipe dairy-free?
Absolutely! Swap the heavy cream for coconut cream and use vegan butter to keep the fudge rich and creamy without dairy. The flavor and texture remain wonderfully satisfying.
What is the “soft-ball stage” and why is it important?
The soft-ball stage is a candy-making term referring to gently boiling your mixture until it reaches 238°F (114°C). At this temperature, sugar syrup forms a soft, flexible ball when dropped in cold water, ensuring your fudge will set properly but stay creamy.
Can I add other flavors or mix-ins?
Yes! While this Maple Fudge Recipe is splendid on its own, feel free to add a pinch of cinnamon, a handful of dried cranberries, or even swirl in some chocolate after heating for fun variations.
Why does fudge sometimes turn grainy?
Fudge can get grainy if it cools too quickly or is stirred too soon before cooling enough. Be patient during the cooling stage and beat only after reaching the proper temperature to get that smooth, creamy texture.
How long does it take to make this fudge?
Overall, the process usually takes about 30 minutes plus 1 to 2 hours of setting time. Though it’s a bit of a wait, the wait is well worth it when you bite into the delicious results!
Final Thoughts
There’s something truly special about homemade fudge, and this Maple Fudge Recipe nails that sweet spot of simplicity, flavor, and texture that will have you coming back for seconds. Whether you’re gifting it or keeping it all to yourself, this fudge delivers comfort and joy in every delightful bite. Give it a try and let yourself fall in love with the rich, buttery sweetness of pure maple like never before!
Print
Maple Fudge Recipe
- Prep Time: 10 minutes
- Cook Time: 20 minutes
- Total Time: 30 minutes
- Yield: 25 servings
- Category: Dessert
- Method: Stovetop
- Cuisine: North American
Description
This rich and creamy Maple Fudge recipe is a delightful sweet treat made with pure maple syrup, heavy cream, and a touch of butter. Perfect for maple lovers, it offers a smooth, melt-in-your-mouth texture with an optional nutty topping for added crunch. Ideal for sharing or gifting, this fudge requires just 30 minutes of active prep and sets at room temperature to yield perfectly cut squares.
Ingredients
Main Ingredients
- 2 cups pure maple syrup
- 1 cup heavy cream (or coconut cream for dairy-free)
- 2 tablespoons unsalted butter (or vegan butter for dairy-free)
- 1/4 teaspoon salt
- 1 teaspoon vanilla extract
Optional Topping
- Chopped pecans or walnuts for topping
Instructions
- Combine Ingredients: In a heavy-bottomed saucepan, combine the maple syrup, heavy cream, and salt over medium heat, stirring occasionally to blend the ingredients smoothly.
- Cook to Soft-Ball Stage: Bring the mixture to a rolling boil, then reduce the heat to medium-low. Using a candy thermometer, continue cooking until the mixture reaches 238°F (114°C), known as the soft-ball stage, critical for fudge consistency.
- Add Butter and Vanilla: Remove the saucepan from heat. Add the butter and vanilla extract to the hot mixture but do not stir. Let it cool undisturbed until it drops to about 110°F (43°C).
- Beat the Mixture: Using a wooden spoon or hand mixer, beat the cooled mixture vigorously for 5 to 10 minutes until it thickens and becomes lighter in color, indicating the formation of fudge’s creamy texture.
- Pour and Add Nuts: Pour the thickened fudge into a greased or parchment-lined 8×8-inch pan, spreading it evenly. Optionally, sprinkle chopped pecans or walnuts over the top and gently press them in for added texture.
- Set the Fudge: Allow the fudge to set at room temperature for 1 to 2 hours until firm enough to cut into squares for serving.
Notes
- Use a heavy-bottomed saucepan to prevent burning during cooking.
- Use a reliable candy thermometer to accurately reach the soft-ball stage for perfect texture.
- For a dairy-free version, substitute heavy cream with coconut cream and butter with vegan butter.
- Stirring after removing from heat may affect the fudge texture—avoid stirring until after it cools to 110°F.
- Ensure the fudge is completely cooled and set before slicing to avoid crumbling.
- Store fudge in an airtight container at room temperature or refrigerated for longer freshness.


