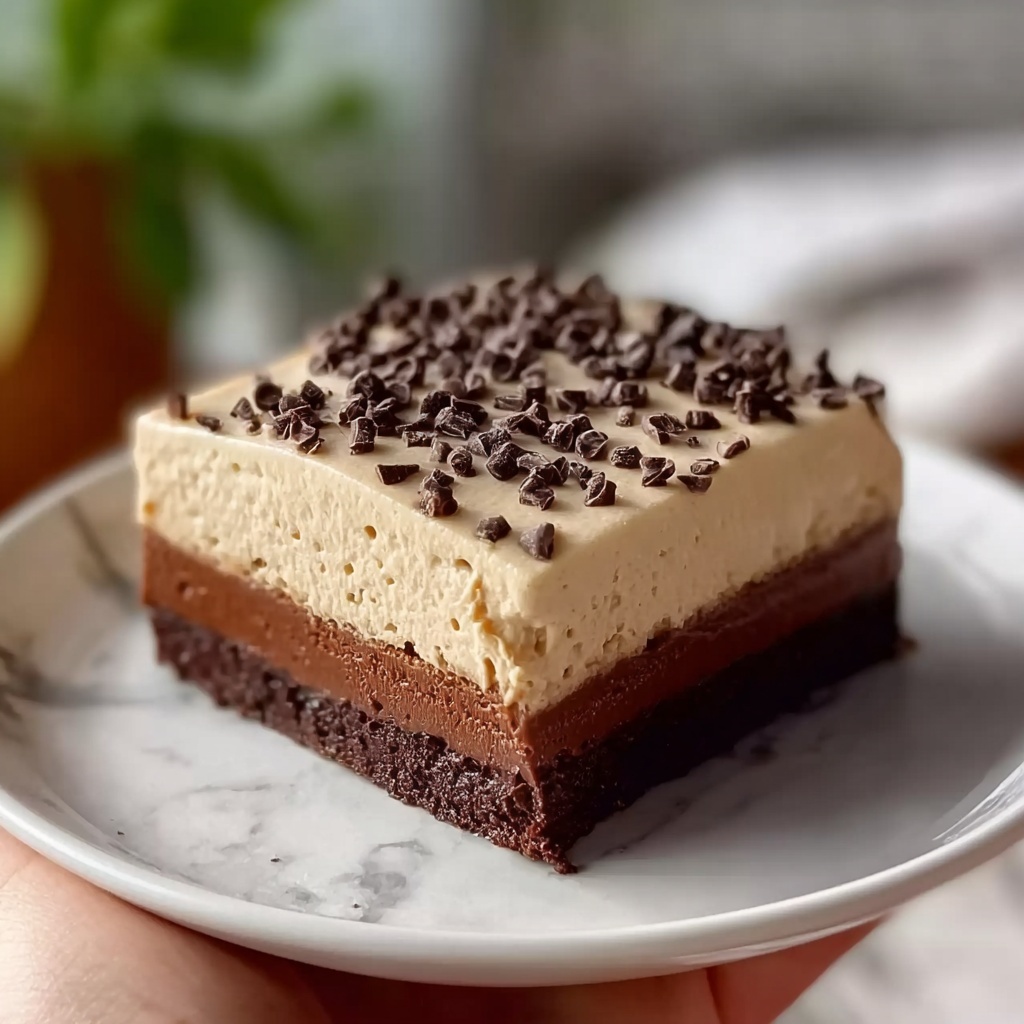
If you’re on the hunt for a dessert that combines the rich decadence of brownies with the light, creamy texture of pudding and whipped topping, then this Brownie Refrigerator Cake Recipe is your new best friend. It’s an effortless crowd-pleaser that layers fudgy brownie crumbles with luscious chocolate pudding and fluffy whipped topping, delivering a beautiful medley of flavors and textures. The best part? It requires no fancy techniques, just simple ingredients and a bit of patience for chilling. Perfect for potlucks, family dinners, or when you simply want to treat yourself to something spectacular with minimal fuss.
Ingredients You’ll Need
Getting great results starts with simple but crucial ingredients that each bring something special to this dessert. From the fudgy brownies to the creamy pudding and light whipped topping, every component plays a role in creating that dreamy texture and rich chocolate flavor that make this cake irresistible.
- Brownie mix (1 box, includes eggs and oil): The base for that fudgy, chewy texture, pre-made makes this recipe a breeze.
- Whipped topping (1 cup): Adds a light, airy contrast to the dense brownie, turning the cake into a fluffy delight.
- Chocolate pudding mix (2 cups, instant): Brings rich, creamy chocolate flavor and smoothness with minimal effort.
- Whole milk (2 cups): Essential for whisking with the pudding mix to achieve that perfect silky consistency.
- Crushed nuts (1/2 cup, optional): A crunchy touch if you’re looking to add texture and a subtle nutty flavor.
How to Make Brownie Refrigerator Cake Recipe
Step 1: Bake the Brownies
Start by preheating your oven according to the instructions on your brownie mix package, then grease a 9×13-inch pan to prevent sticking. Prepare the brownie batter exactly as the box directs, pour it into your pan, and bake until a toothpick inserted in the center comes out clean. Once baked, let the brownies cool completely—this is key to making sure they crumble nicely later without turning into mush.
Step 2: Crumble the Brownies
When the brownies are fully cooled, break them into small, bite-sized pieces. You want the pieces to be small enough to layer smoothly but still substantial enough to taste that chewy brownie goodness in every bite. This step is fun—imagine it as creating the “building blocks” of your refrigerator cake.
Step 3: Prepare the Chocolate Pudding
While the brownies cool, whisk together the instant chocolate pudding mix and whole milk. Use a whisk or electric mixer and blend for about two minutes, until it’s thickened nicely. This pudding layer is where you get that silky texture and deep chocolate flavor that balances the dense brownie crumbs.
Step 4: Layer the Cake
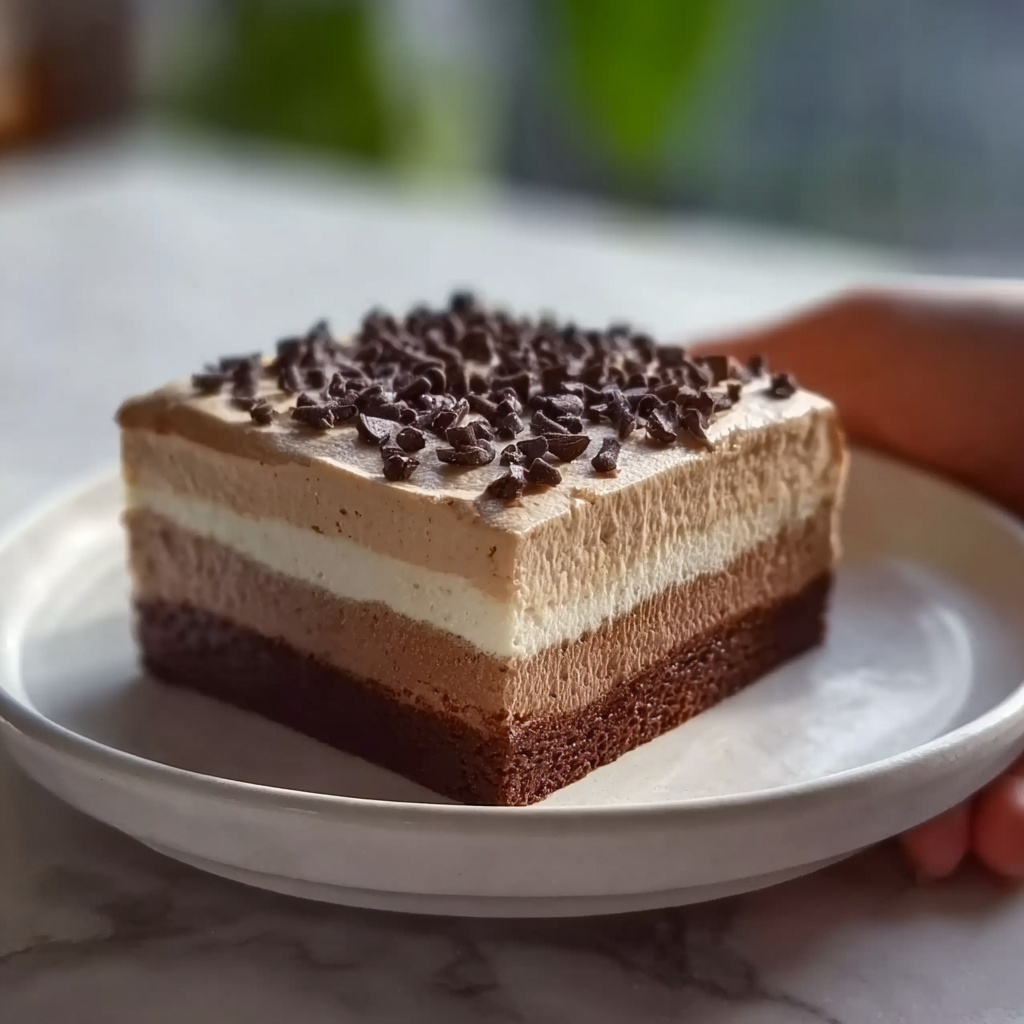
Grab a roomy serving dish and start layering: first spread half of the crumbled brownies evenly on the bottom, then top with half of the whipped topping to add a light, creamy layer. Follow this with half of the freshly made chocolate pudding. Repeat the layering one more time to build height and texture—brownies, whipped topping, then pudding again. If you’re adding crushed nuts, sprinkle them between layers or on top for an extra crunch.
Step 5: Chill and Set
Once layered, cover the cake tightly with plastic wrap and refrigerate for at least four hours, or better yet, overnight. This chilling time allows the flavors to meld and the pudding to set, giving you that perfect sliceable, luscious dessert that’s as delicious as it is pretty.
How to Serve Brownie Refrigerator Cake Recipe

Garnishes
Consider topping your Brownie Refrigerator Cake Recipe with a few decorative touches before serving. Fresh berries, a dusting of cocoa powder, or a drizzle of chocolate syrup work beautifully to elevate the look and add a pop of flavor. Sprinkling some extra crushed nuts on top creates lovely texture contrast and makes your presentation look extra inviting.
Side Dishes
This dessert pairs wonderfully with a scoop of vanilla ice cream or a dollop of freshly whipped cream. If you want to add a fruity balance, a simple fruit salad or sliced strawberries on the side helps brighten the rich chocolate flavors. For a cozy touch, serve alongside a hot cup of coffee or tea.
Creative Ways to Present
If you want to get fancy, serve this cake in clear glass trifle bowls or individual parfait glasses. The beautiful layered look really shines through, making it perfect for dinner parties or special occasions. You can also experiment by adding layers of caramel sauce or peanut butter in between for delightful new flavor twists.
Make Ahead and Storage
Storing Leftovers
Cover your leftover Brownie Refrigerator Cake Recipe tightly with cling wrap or store in an airtight container in the refrigerator. It will stay fresh for about 3 to 4 days, allowing you to enjoy this treat over several sittings without losing any of that rich chocolatey goodness.
Freezing
This cake can be frozen, but be sure to wrap it very well to prevent freezer burn. Use an airtight container or double wrap with aluminum foil and plastic wrap. When properly stored, it freezes well for up to 2 months. To serve, thaw overnight in the refrigerator for best texture and flavor.
Reheating
The Brownie Refrigerator Cake Recipe is best enjoyed chilled, so reheating is not recommended. However, if you prefer a slightly softer texture, you can let it sit at room temperature for 15-20 minutes before serving to take the chill off.
FAQs
Can I use homemade brownies instead of a boxed mix?
Absolutely! Homemade brownies will make this dessert feel even more special. Just bake your brownies as usual, let them cool completely, then crumble and proceed with the recipe as directed.
Is it necessary to use instant pudding mix?
Instant pudding mix works best because it thickens quickly and holds its shape well when chilled. Regular pudding mix that requires cooking won’t have the same consistency or convenience for this layered dessert.
What if I’m allergic to nuts, can I skip them?
Certainly! The crushed nuts are completely optional and only add texture. Feel free to omit them if you have allergies or simply prefer the cake without.
Can this cake be made dairy-free?
Yes, by using dairy-free brownie mix, non-dairy milk (like almond or oat milk), and dairy-free whipped topping, you can create a delicious version suitable for dairy-free diets.
How long does it take to set properly in the fridge?
For the best flavor and texture, allow the cake to chill for at least four hours, but overnight chilling is even better. This resting time helps the layers meld and the pudding to firm up perfectly.
Final Thoughts
There’s something truly magical about the Brownie Refrigerator Cake Recipe—this no-fuss dessert brings together familiar flavors in a fresh, layered way that always delights the crowd. It’s perfect for those moments when you want to whip up something impressive without spending hours in the kitchen. Give it a try, and soon enough, it’ll become your go-to crowd-pleaser as well!
Print
Brownie Refrigerator Cake Recipe
- Prep Time: 15 minutes
- Cook Time: 30 minutes
- Total Time: 4 hours 45 minutes
- Yield: 12 servings
- Category: Dessert
- Method: Baking
- Cuisine: American
Description
This Brownie Refrigerator Cake is a no-bake, layered dessert featuring soft homemade brownies, creamy chocolate pudding, and fluffy whipped topping. It’s an easy and indulgent treat that requires baking the brownies first, then chilling the layered dessert for a few hours to meld the flavors and textures perfectly.
Ingredients
Brownie Layer
- 1 box brownie mix (includes eggs and oil as per package instructions)
Pudding Layer
- 2 cups instant chocolate pudding mix
- 2 cups whole milk
Topping Layer
- 1 cup whipped topping
- 1/2 cup crushed nuts (optional)
Instructions
- Preheat Oven and Prepare Pan: Preheat your oven according to the brownie mix package instructions and grease a 9×13-inch baking pan to prevent sticking.
- Make and Bake Brownies: Prepare the brownie mix following the directions on the box, then bake in the prepared pan until a toothpick inserted in the center comes out clean. After baking, allow the brownies to cool completely to room temperature.
- Crumble the Brownies: Once cooled, break the brownies into small, bite-sized pieces to create the base and layers of the dessert.
- Prepare Chocolate Pudding: In a medium bowl, whisk together the instant chocolate pudding mix and whole milk for about 2 minutes until thickened and smooth.
- Assemble the Cake Layers: In a serving dish, spread half of the crumbled brownie pieces evenly, then layer half of the whipped topping over the brownies, followed by half of the thickened chocolate pudding. Repeat this layering process once more with the remaining brownie pieces, whipped topping, and pudding to build two thick layers.
- Chill to Set: Cover the assembled dessert with plastic wrap or foil and refrigerate for at least four hours or overnight. This chilling allows the flavors to meld and the texture to firm up before serving.
Notes
- For a nut-free version, omit the crushed nuts.
- Use freshly whipped topping or store-bought whipped cream according to preference.
- Make sure brownies are fully cooled before crumbling to prevent sogginess.
- Feel free to add a layer of crushed nuts between the cake layers for extra texture.
- Refrigerate leftovers and consume within 3 days for best quality.


