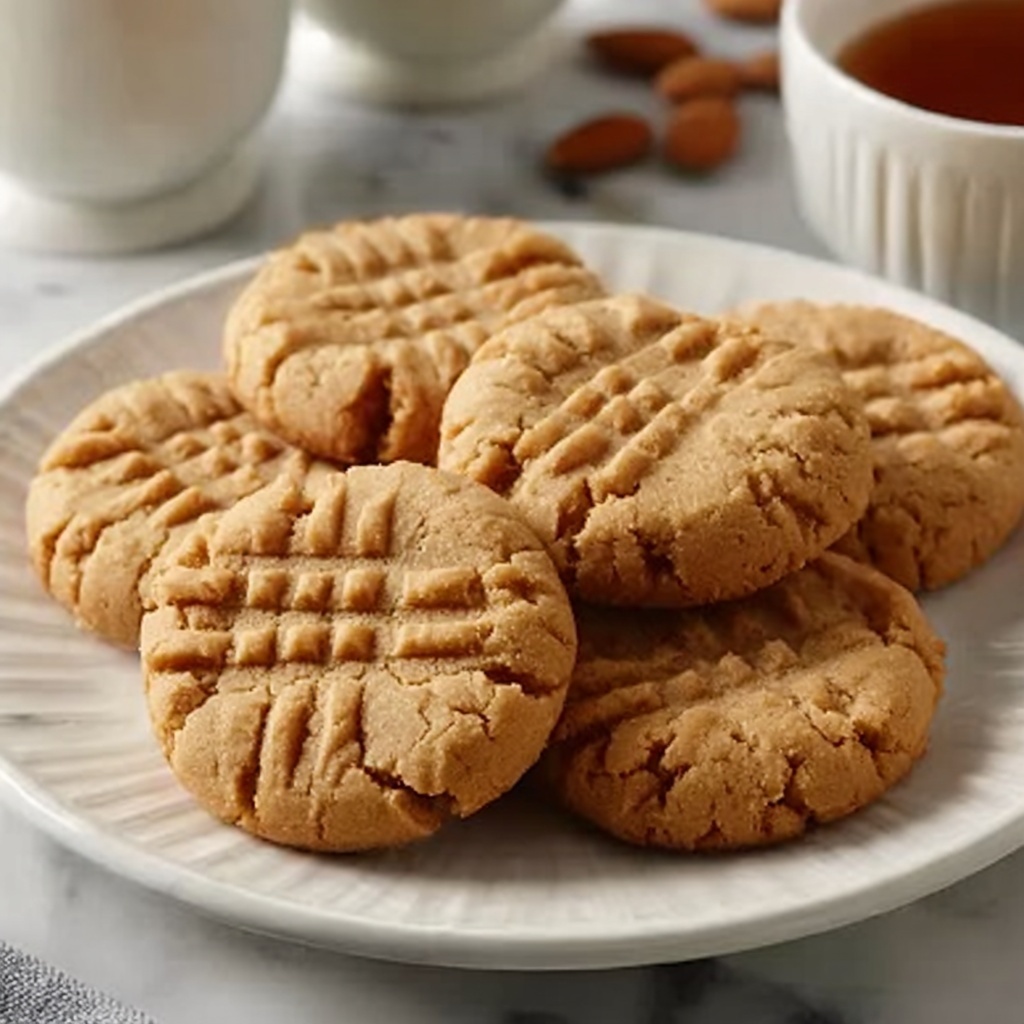
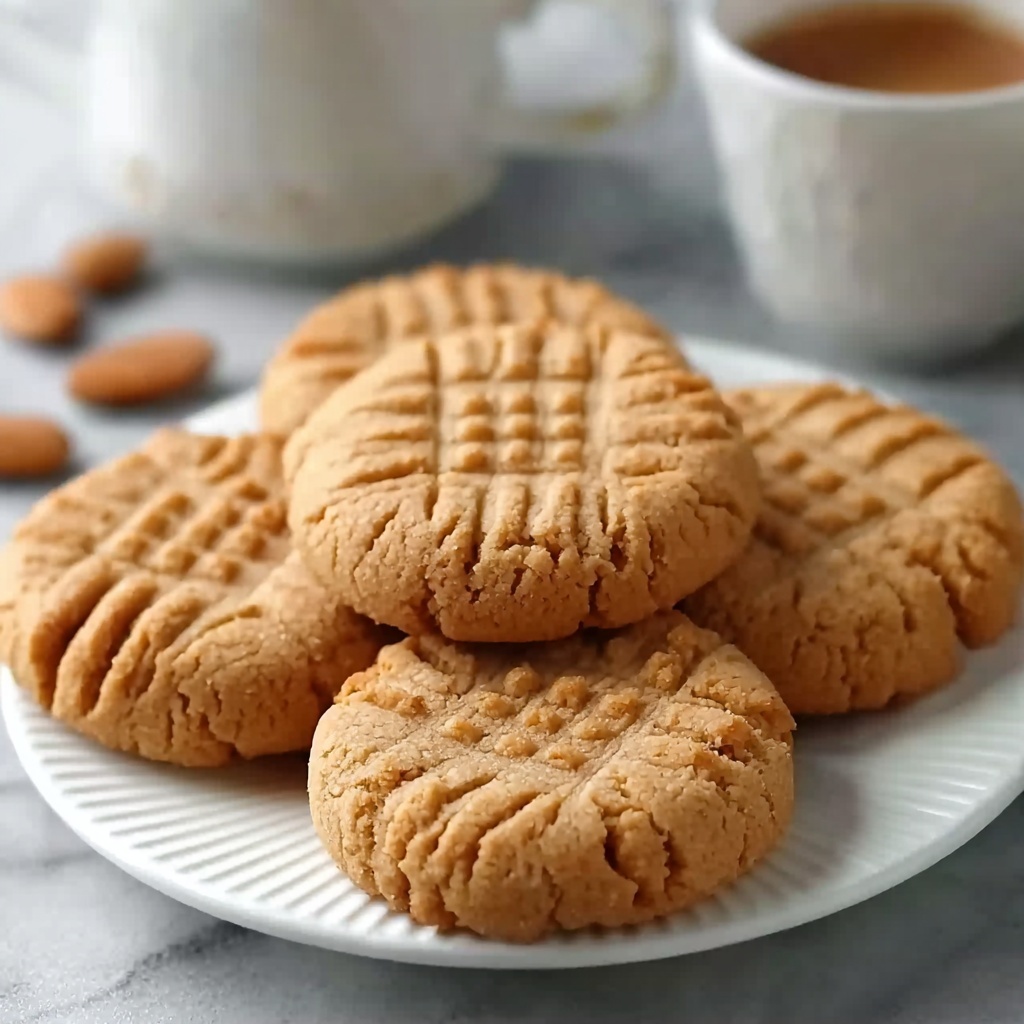
If you’re ready to dive into a cookie recipe that brings a classic Southern charm with every bite, Jimmy Carter’s Grandmother’s Peanut Butter Cookies Recipe is your golden ticket. These cookies are rich, irresistibly peanut buttery, with just the right balance of sweetness and a tender crumb. They carry the warmth of family tradition and offer a straightforward, satisfying baking experience that will fill your kitchen with a nostalgic aroma. Whether you’re an experienced baker or just starting out, this recipe feels like a cozy hug in cookie form.
Ingredients You’ll Need
Gathering simple, pantry-friendly ingredients is the first step to making these beloved cookies. Each one plays a crucial role in building that perfect peanut butter flavor, soft yet slightly crispy texture, and that beautiful golden color that makes the cookies so inviting.
- Peanut butter (1 cup, creamy or chunky): The heart of the recipe, giving the cookies their signature nutty flavor and moist texture.
- Granulated sugar (1/2 cup): Adds sweetness and helps with the cookie’s crisp edges.
- Brown sugar (1/2 cup): Contributes moisture and a subtle caramel richness.
- Butter, softened (1/2 cup): Enhances the richness and ensures a tender crumb.
- Eggs (2 large): Bind the dough together and add lift for that perfect chew.
- Vanilla extract (1 teaspoon): Brings a warm depth of flavor to complement the peanut butter.
- All-purpose flour (1 1/2 cups): The structural base that holds everything together with a soft bite.
- Baking soda (1 teaspoon): Leavens the dough gently to keep the cookies from becoming too dense.
- Salt (1/4 teaspoon): Balances the sweetness and enhances the peanut butter’s natural nuttiness.
How to Make Jimmy Carter’s Grandmother’s Peanut Butter Cookies Recipe
Step 1: Preheat and Prepare
Start by preheating your oven to 350°F (175°C) and lining a baking sheet with parchment paper. This setup ensures your cookies bake evenly and clean up is a breeze afterward.
Step 2: Mix the Sugars and Peanut Butter
In a large bowl, cream together the peanut butter, granulated sugar, and brown sugar until smooth and well combined. This step is where the cookie’s rich peanut flavor begins to shine through, and getting this mixture creamy is key to a delightful texture.
Step 3: Incorporate Butter and Eggs
Add softened butter to the peanut butter mixture and beat until fluffy. Then add the eggs one at a time, mixing thoroughly after each addition. This keeps the dough cohesive and adds moisture, which contributes to the cookies’ tender bite.
Step 4: Stir in Vanilla
Pour in the vanilla extract and mix just until combined. This little touch brings warmth and rounds out the flavors, making each bite a comforting experience.
Step 5: Combine Dry Ingredients and Wet Dough
Whisk together the flour, baking soda, and salt in a separate bowl. Gradually add this dry mixture to the wet ingredients, stirring gently until the dough just comes together. Over-mixing can toughen cookies, so be gentle at this stage.
Step 6: Shape the Cookies
Scoop tablespoon-sized portions of dough and roll them into balls. Place them spaced evenly on your prepared baking sheet, giving them room to spread without huddling too close.
Step 7: Create the Signature Crisscross Pattern
Flatten each dough ball lightly with a fork, pressing in a crisscross pattern. This iconic step not only looks charming but also helps the cookies cook evenly and crispy on the edges.
Step 8: Bake to Perfection
Bake the cookies in your preheated oven for 8 to 10 minutes. Watch for edges turning golden and centers setting while still soft—this means they’re perfectly baked and ready to bring straight joy to your taste buds.
Step 9: Cool and Enjoy
After baking, let the cookies rest on the baking sheet for a few minutes before moving them to a wire rack to cool completely. This helps them set up without breaking apart, so every bite holds that perfect peanut butter goodness.
How to Serve Jimmy Carter’s Grandmother’s Peanut Butter Cookies Recipe

Garnishes
These classic peanut butter cookies shine on their own, but if you want to add a little flair, a light dusting of powdered sugar or a small drizzle of melted chocolate complements their sweetness beautifully. For a fun twist, sprinkle some chopped peanuts on top before baking for added crunch and presentation.
Side Dishes
Serve these cookies alongside a cold glass of milk for the ultimate comfort combo. If you’re looking for something different, try pairing them with a scoop of vanilla ice cream or a spoonful of creamy Greek yogurt to contrast the rich peanut flavor with cool creaminess.
Creative Ways to Present
For parties or gifts, stack cookies tied with rustic twine or arrange them in a pretty tin lined with parchment paper. You can also sandwich cream cheese frosting or marshmallow fluff between two cookies to make delightful peanut butter cookie sandwiches that will wow your friends and family.
Make Ahead and Storage
Storing Leftovers
To keep your cookies fresh, store them in an airtight container at room temperature. They’ll stay soft and flavorful for up to a week, making them perfect for enjoying throughout the week without losing their charm.
Freezing
If you want to keep these treats longer, freeze the baked cookies in a sealed freezer bag or container. They’ll hold their flavor and texture for about 2 to 3 months. You can also freeze unbaked dough balls on a tray, then transfer them to a bag, allowing you to bake fresh cookies whenever the craving strikes.
Reheating
To bring frozen or stored cookies back to life, warm them briefly in the microwave for about 10 to 15 seconds or in a warm oven at 300°F for a few minutes. This revives their soft texture and fresh-baked aroma, making them taste just like the moment they came out of the oven.
FAQs
Can I use crunchy peanut butter instead of creamy?
Absolutely! The recipe works beautifully with either creamy or crunchy peanut butter. Using crunchy will add a delightful texture variation with little bits of peanuts throughout your cookies.
Is it necessary to use both granulated and brown sugar?
Yes, combining both sugars balances flavor and texture. Granulated sugar provides crispness, while brown sugar adds moisture and a subtle caramel flavor that enriches the cookies.
Can I make these cookies gluten-free?
You can substitute the all-purpose flour with a 1-to-1 gluten-free baking flour blend, but be mindful that the texture may vary slightly. It’s best to choose a blend with xanthan gum for the best results.
Why do I need to flatten the dough balls with a fork?
The crisscross fork pattern not only creates a classic look but also helps the cookies bake evenly. Without flattening, the cookies might remain too thick and underbaked in the middle.
How long do the cookies last after baking?
When stored properly in an airtight container at room temperature, these peanut butter cookies stay fresh and delicious for up to a week. You can also freeze them to extend their shelf life.
Final Thoughts
Jimmy Carter’s Grandmother’s Peanut Butter Cookies Recipe is more than just a delightful treat; it’s a slice of history packed with warmth, simplicity, and nostalgia. I genuinely encourage you to try making these cookies—they’re the perfect way to fill your kitchen with love and create sweet moments to share. Once you make them, I suspect they’ll become one of your favorite go-to recipes, just as they have been for generations.
Print
Jimmy Carter’s Grandmother’s Peanut Butter Cookies Recipe
- Prep Time: 10 minutes
- Cook Time: 10 minutes
- Total Time: 30 minutes
- Yield: 36 cookies
- Category: Dessert
- Method: Baking
- Cuisine: American
Description
Jimmy Carter’s Grandmother’s Peanut Butter Cookies are classic, chewy cookies bursting with rich peanut butter flavor. Perfectly sweetened and textured with a soft center and slight crisp edges, these cookies are easy to make and loved by all ages, showcasing a timeless homemade treat.
Ingredients
Wet Ingredients
- 1 cup peanut butter (creamy or chunky)
- 1/2 cup granulated sugar
- 1/2 cup brown sugar
- 1/2 cup butter, softened
- 2 large eggs
- 1 teaspoon vanilla extract
Dry Ingredients
- 1 1/2 cups all-purpose flour
- 1 teaspoon baking soda
- 1/4 teaspoon salt
Instructions
- Preheat Oven: Preheat your oven to 350°F (175°C) and line a baking sheet with parchment paper to prevent sticking and ensure even baking.
- Cream Peanut Butter and Sugars: In a large mixing bowl, cream together the peanut butter, granulated sugar, and brown sugar until the mixture is smooth and well combined for a sweet, creamy base.
- Add Butter and Eggs: Beat in the softened butter until incorporated, then add the eggs one at a time, mixing well after each addition to create a consistent dough.
- Add Vanilla: Stir in the vanilla extract to enhance the cookie’s flavor profile.
- Combine Dry Ingredients: In a separate bowl, whisk together the flour, baking soda, and salt. Gradually add this dry mixture to the wet ingredients, stirring until just combined to form the cookie dough.
- Shape Cookies: Scoop tablespoon-sized portions of dough, roll each into a ball, and place them evenly spaced on the prepared baking sheet.
- Make Crisscross Pattern: Flatten each dough ball gently with a fork, pressing in a crisscross pattern to give the cookies their classic look and even baking.
- Bake Cookies: Bake for 8 to 10 minutes, or until the edges turn golden brown and the centers are set but still soft.
- Cool Cookies: Allow the cookies to rest on the baking sheet for a few minutes before transferring them to a wire rack to cool completely, ensuring they firm up perfectly.
Notes
- For a nuttier texture, use chunky peanut butter.
- Make sure butter is softened, not melted, for best texture.
- Do not overbake; cookies should be just set for a chewy center.
- Store cookies in an airtight container at room temperature for up to one week.
- Can be doubled easily to make a larger batch.


