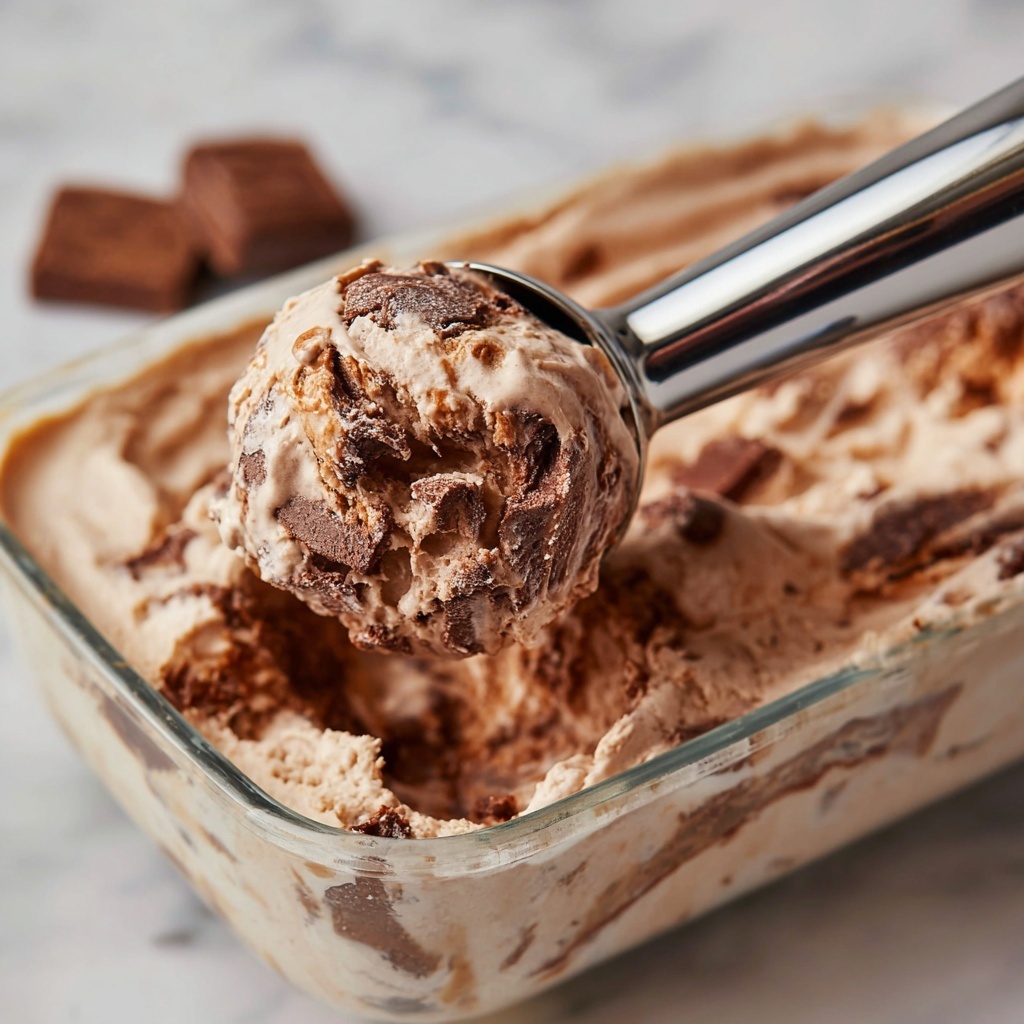
If you have a sweet tooth and love the rich, fudgy charm of brownies combined with creamy, dreamy ice cream, then you are in for a treat with this No Churn Chocolate Brownie Ice Cream Recipe. This delightful dessert brings together indulgent chocolate flavor, luscious creamy texture, and comforting brownie chunks without ever needing an ice cream maker. It’s the perfect way to satisfy any chocolate craving with ease and joyful simplicity.
Ingredients You’ll Need
Every ingredient in this recipe plays a starring role, combining to create a rich, smooth, and wonderfully textured ice cream. From the silky heavy whipping cream to the gooey brownie chunks, each element is simple yet essential for the best No Churn Chocolate Brownie Ice Cream Recipe.
- 2 cups heavy whipping cream: For that luscious creaminess and the perfect fluffy texture when whipped.
- 1 can (14 ounces) sweetened condensed milk: Adds natural sweetness and a thick, creamy consistency without the need for extra sugar.
- 1/2 cup unsweetened cocoa powder: Brings deep chocolate flavor without overpowering sweetness.
- 1 teaspoon vanilla extract: Enhances the chocolate while adding a fragrant warmth.
- 1 cup brownie chunks: Homemade or store-bought, these little bites add chewy, fudgy bites throughout the ice cream.
- 1/2 cup mini chocolate chips: Added texture and little bursts of melty chocolate fun in every spoonful.
- 1/4 teaspoon salt: Balances sweetness and elevates the chocolate flavors.
How to Make No Churn Chocolate Brownie Ice Cream Recipe
Step 1: Whip the Cream to Stiff Peaks
Start by pouring the heavy whipping cream into a large bowl. Use a hand mixer or a stand mixer to whip the cream until stiff peaks form. These peaks should stand tall and not collapse when you lift the beaters, which means the cream is ready to create that smooth, airy ice cream texture.
Step 2: Mix the Chocolate Base
In a separate bowl, combine the sweetened condensed milk, unsweetened cocoa powder, vanilla extract, and salt. Whisk these together until the mixture is velvety smooth and perfectly blended. This step ensures that all the chocolate flavors come alive and blend seamlessly with the creamy whipped cream.
Step 3: Fold the Whipped Cream into Chocolate Mixture
Gently fold the whipped cream into the chocolate mixture. Be careful not to deflate the whipped cream as you combine; you want to keep the airy fluffiness intact for that perfect ice cream consistency. Use a spatula and fold slowly until everything is beautifully incorporated and cloudlike.
Step 4: Add Brownie Chunks and Chocolate Chips
Now for the fun part! Carefully fold in the brownie chunks and mini chocolate chips. These pieces add the delightful texture contrast—soft, fudgy bites of brownies and bursts of chocolate that melt in your mouth.
Step 5: Freeze Until Firm
Transfer the mixture into a loaf pan or a freezer-safe container. Smooth the top with the back of a spoon or an offset spatula. Cover tightly and place it in the freezer for at least 6 hours, or until the ice cream is solid and ready to scoop.
How to Serve No Churn Chocolate Brownie Ice Cream Recipe
Garnishes
To make your No Churn Chocolate Brownie Ice Cream Recipe pop visually and flavor-wise, sprinkle a few mini chocolate chips or crushed brownie pieces on top. A drizzle of warm fudge sauce or a sprinkle of flaky sea salt can elevate the flavor and create a perfect balance of sweet and salty sensations.
Side Dishes
This indulgent ice cream pairs wonderfully with fresh berries like raspberries or strawberries that cut through the richness. You can also serve it alongside a warm brownie or chocolate lava cake for a double chocolate celebration that everyone will love.
Creative Ways to Present
Try scooping this glorious dessert into waffle cones or chocolate-dipped bowls for a stunning presentation. Alternatively, serve it in clear glass cups layered with brownie crumbles and chocolate sauce for an elegant parfait that’s sure to impress friends and family.
Make Ahead and Storage
Storing Leftovers
If you find yourself with extra ice cream, fear not! Store leftovers in an airtight container to prevent ice crystals from forming and keep that creamy texture intact. Ensure the container is sealed well, and the dessert should stay delicious for up to a week in the freezer.
Freezing
The No Churn Chocolate Brownie Ice Cream Recipe freezes fabulously well. Just make sure to give it enough time to freeze completely—at least 6 hours, preferably overnight. This way, every scoop will be perfectly firm yet creamy.
Reheating
You don’t want to actually “reheat” this ice cream, but letting it sit at room temperature for about 5 minutes before scooping makes it easier to serve. This slight softening helps the ice cream scoop out smoothly without losing any of that delightful creaminess.
FAQs
Can I use gluten-free brownies in this recipe?
Absolutely! Gluten-free brownie chunks work just as well and are a great option if you’re catering to dietary restrictions without sacrificing flavor or texture.
How do I make homemade brownie chunks for the recipe?
Bake your favorite brownie recipe, let it cool completely, then cut into small, bite-sized pieces. Cooling is key to prevent the chunks from melting the ice cream mixture.
Can I add nuts or other mix-ins?
Yes! Chopped walnuts, pecans, or even a swirl of peanut butter can add extra crunch and flavor—feel free to customize your No Churn Chocolate Brownie Ice Cream Recipe to suit your preferences.
Is this ice cream suitable for vegetarians?
Definitely! The ingredients are vegetarian-friendly, so it’s a great dessert choice if you follow a vegetarian diet.
Do I need any special equipment to make this ice cream?
No special ice cream maker is needed, which is what makes this recipe so wonderful. Just a mixer for whipping the cream and a freezer-safe container to chill it in.
Final Thoughts
You really can’t go wrong with this No Churn Chocolate Brownie Ice Cream Recipe—it’s simple to make, richly satisfying, and endlessly versatile. Whether you’re new to homemade ice cream or a seasoned dessert lover, this recipe promises a scoop of happiness every time. Grab those ingredients, get whisking, and treat yourself to the perfect chocolatey indulgence!
Print
No Churn Chocolate Brownie Ice Cream Recipe
- Prep Time: 15 minutes
- Cook Time: 0 minutes
- Total Time: 6 hours 15 minutes
- Yield: 8 servings
- Category: Dessert
- Method: No-Cook
- Cuisine: American
- Diet: Vegetarian
Description
Delight in this rich and creamy No Churn Chocolate Brownie Ice Cream, an easy-to-make dessert that combines smooth chocolate ice cream with chunks of fudgy brownies and mini chocolate chips. Perfect for chocolate lovers, this recipe requires no ice cream maker and is ready in just over six hours, making it an ideal treat for any occasion.
Ingredients
Ice Cream Base
- 2 cups heavy whipping cream
- 1 can (14 ounces) sweetened condensed milk
- 1/2 cup unsweetened cocoa powder
- 1 teaspoon vanilla extract
- 1/4 teaspoon salt
Add-ins
- 1 cup brownie chunks (store-bought or homemade, cooled and cut into bite-sized pieces)
- 1/2 cup mini chocolate chips
Instructions
- Whip the Cream: In a large mixing bowl, use a hand mixer or stand mixer to whip the heavy whipping cream until stiff peaks form, ensuring the base is light and airy.
- Mix the Chocolate Base: In a separate bowl, whisk together the sweetened condensed milk, unsweetened cocoa powder, vanilla extract, and salt until the mixture is smooth and fully combined.
- Combine Mixtures: Gently fold the whipped cream into the chocolate mixture, taking care to maintain the fluffiness and prevent deflating.
- Add Brownies and Chocolate Chips: Carefully fold in the brownie chunks and mini chocolate chips, mixing evenly but delicately to preserve the texture.
- Freeze: Pour the mixture into a loaf pan or freezer-safe container and smooth the top. Cover and freeze for at least 6 hours or until firm.
- Scoop and Serve: Once fully frozen, allow the ice cream to sit at room temperature for 5 minutes for easier scooping, then serve.
Notes
- Use fully cooled brownies to prevent melting the ice cream mixture.
- For extra richness, swirl in fudge sauce before freezing for a decadent touch.
- Let the ice cream sit at room temperature for 5 minutes before scooping to make serving easier.

