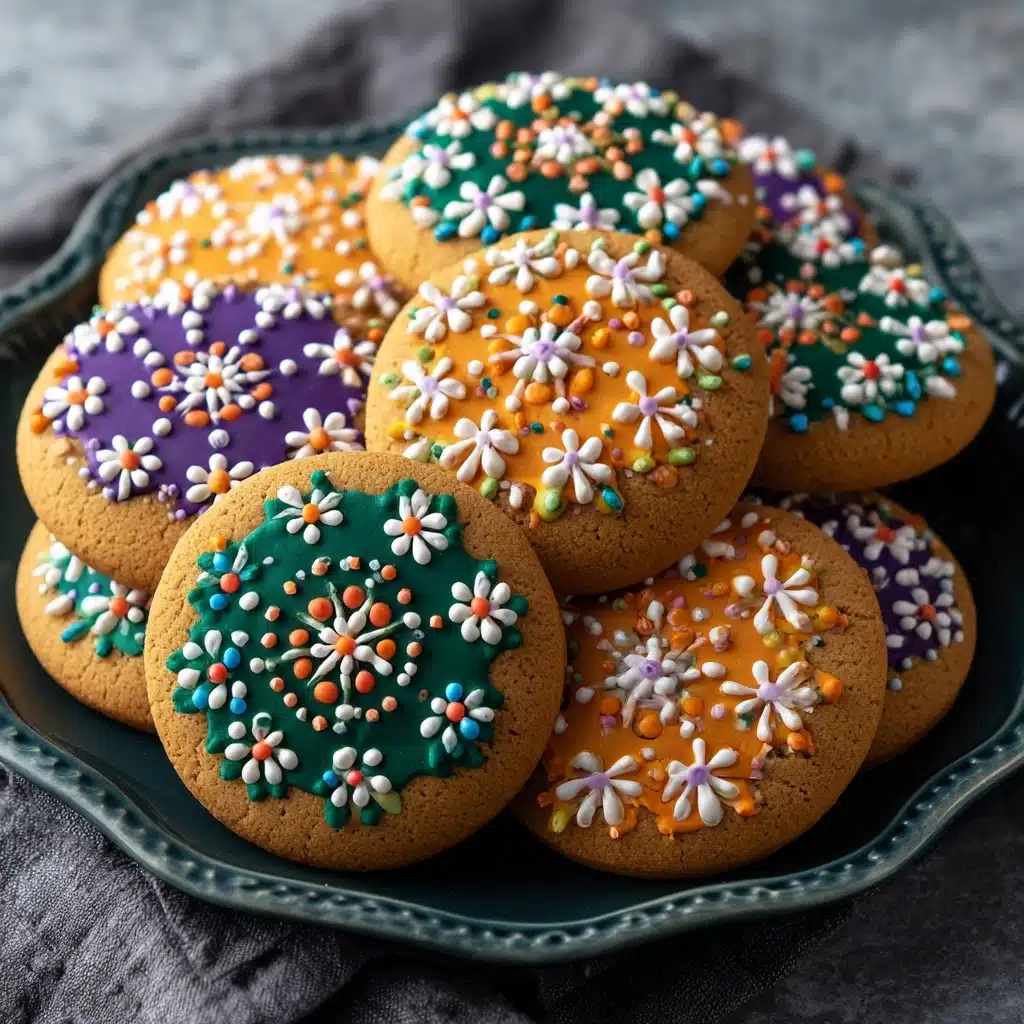
Hocus Pocus Cookies Recipe
If you’re looking to whip up a batch of treats that are as magical as they are delicious, you need to try these Hocus Pocus Cookies. With colorful surprises in every bite, these cookies combine classic chocolate chip nostalgia with hints of festive whimsy, making them absolutely perfect for Halloween or any time you’re craving something fun. They’re delightfully soft inside, sprinkled with sweet candies and bold sprinkles for extra flair—guaranteed to bring a little enchantment and a lot of smiles to your table!
Ingredients You’ll Need
Magic in the kitchen starts with the basics, and every ingredient in this recipe is chosen for its unique role—crisp edges, chewy centers, bursts of color, and a dash of Halloween excitement. No trickery here, just a simple shopping list that leads to sweet, colorful treats!
- Unsalted Butter: Make sure it’s softened for easy creaming and luxurious texture.
- Granulated Sugar: Sweetens the cookies and helps them bake up golden and delicious.
- Packed Brown Sugar: Adds extra moisture and gives that irresistible chewy bite.
- Large Eggs: Bind everything together for that classic cookie crumb.
- Vanilla Extract: A splash of warmth and aroma that rounds out the flavor.
- All-Purpose Flour: The sturdy backbone that holds all those magical mix-ins.
- Baking Soda: Lends lift and a bit of spread for picture-perfect cookies.
- Salt: Just a touch to balance the sweetness and deepen all the flavors.
- Semi-Sweet Chocolate Chips: Classic chips that melt into gooey pockets throughout.
- Halloween Sprinkles: All the festive vibes and a satisfying crunch in each bite.
- Candy-Coated Chocolates (like M&Ms): Pops of color and a bit of kid-in-a-candy-store fun.
- White Chocolate Chips: Creamy contrast to the semi-sweet, adding variety and richness.
- Food Coloring (optional: purple, orange, green): For those show-stopping, Instagram-ready cookies—go wild!
How to Make Hocus Pocus Cookies
Step 1: Prep Your Oven and Pans
Preheat your oven to 350°F (175°C) and line a couple of baking sheets with parchment paper. This step not only prevents sticking, but also ensures those Hocus Pocus Cookies slide right off for perfect presentation every time. Set your ingredients out so everything’s ready to grab—mise en place is the real magic here!
Step 2: Cream Together the Butter and Sugars
In a spacious bowl, beat the softened butter with your granulated and brown sugars. Keep mixing until the combination is fluffy and lighter in color (think soft clouds). This step lays the foundation for a cookie that bakes up tender on the inside and perfectly crisp around the edges.
Step 3: Add Eggs and Vanilla
Crack in your eggs one at a time, blending well after each so the dough is silky smooth. Drizzle in the vanilla extract, letting its warm aroma fill your kitchen—you’ll know you’re in for a treat the moment the scent wafts up!
Step 4: Mix the Dry Ingredients
In a separate bowl, whisk together the flour, baking soda, and salt. This step ensures the leavening and seasoning are evenly distributed in every glorious bite. Gradually add these dry ingredients into your wet mixture, stirring until just combined (don’t overmix—the magic is in the gentleness).
Step 5: Stir In the Mix-Ins
Here’s where the fun and color come out to play! Fold in the chocolate chips, white chocolate chips, candy-coated chocolates, and plenty of Halloween sprinkles. Each stir adds a new spell of flavor and crunchy surprise, transforming everyday cookie dough into something enchanting.
Step 6: Add Food Coloring (Optional for Hocus Pocus Cookies Flair)
If you want that extra pop of color, divide your dough into portions in separate bowls. Add a few drops of your favorite Halloween food coloring—purple, orange, green—and gently swirl for those mystical patterns. Kids especially love this step!
Step 7: Scoop and Bake
Using a tablespoon or cookie scoop, drop rounded mounds of dough onto your prepared baking sheets, spacing them about 2 inches apart so they have room to spread. Bake for 9–11 minutes, just until the edges are golden and the centers are set—remember, they’ll continue to bake a little as they cool.
Step 8: Cool Completely
Let the cookies cool on the pan for a few minutes before sliding them onto a wire rack. This short rest lets them firm up just enough to move without breaking, keeping every bite soft, chewy, and brimming with color.
How to Serve Hocus Pocus Cookies
Garnishes
After baking, you can jazz up your Hocus Pocus Cookies with an extra shower of sprinkles or a light dusting of edible glitter for shimmer. If you’re feeling fancy, drizzle with a few lines of melted white chocolate or colored icing for a bakery-style touch that will dazzle anyone at your table.
Side Dishes
Nothing beats a classic glass of cold milk paired with these cookies, but if you want something even cozier, try freshly brewed coffee or a rich hot cocoa loaded with marshmallows. These sides enhance the sweet, playful flavors and bring a touch of comforting nostalgia with every bite.
Creative Ways to Present
For parties, arrange your Hocus Pocus Cookies on a vivid Halloween platter with themed napkins, or stack them inside a spooky treat jar as a fun centerpiece. You can also gift them in clear cellophane bags tied with colorful ribbons—perfect for trick-or-treaters or friends who deserve a little edible magic!
Make Ahead and Storage
Storing Leftovers
To keep your Hocus Pocus Cookies tasting bakery-fresh, store them in an airtight container at room temperature. They’ll stay soft and chewy for up to five days, so there’s no rush (but trust me, they tend to disappear quickly!).
Freezing
If you don’t plan on enjoying them all at once, these cookies freeze beautifully. Once completely cooled, layer them between sheets of parchment in a freezer-safe container or bag. They’ll hold their magic for up to 3 months—perfect for when you want a sweet treat on demand.
Reheating
Thaw frozen Hocus Pocus Cookies at room temperature or pop them into a low oven (about 275°F) for a few minutes to revive that fresh-baked aroma and slightly gooey texture. Avoid the microwave, as it can cause the cookies to become rubbery or overcooked.
FAQs
Can I use different types of chocolate or mix-ins?
Absolutely! Hocus Pocus Cookies are all about creativity. Swap out the chocolate chips for butterscotch, peanut butter chips, or mini marshmallows. You can mix in your favorite candies or holiday-themed treats to suit any celebration beyond Halloween, too.
How do I make the cookies thicker and chewier?
For extra-thick Hocus Pocus Cookies, chill the dough for at least 30 minutes before baking. This helps prevent excess spreading and gives you taller, chewier cookies that are just as magical as they look.
Can I make these cookies gluten-free?
Yes! Substitute your favorite 1:1 gluten-free flour blend for the regular all-purpose flour. Be sure to check that your mix-ins and decorations are gluten-free as well so everyone can enjoy the festivities worry-free.
Is it necessary to use food coloring?
Not at all. The food coloring is just for added flair. Hocus Pocus Cookies look fabulous with or without extra color thanks to the sprinkles and candy-coated chocolates. Feel free to skip the food coloring if you prefer a more classic cookie appearance.
Why are my cookies spreading too much in the oven?
Often, this happens if the butter is too soft or the dough is over-mixed. Make sure to use room-temperature (not melted) butter, measure your flour correctly, and avoid overworking the dough. A quick chill in the fridge before baking can work wonders for controlling cookie spread.
Final Thoughts
These Hocus Pocus Cookies are more than just festive treats—they’re pure fun baked into every bite. Whether you’re mixing them up for a party, sharing with the family, or just treating yourself to something whimsical, I promise these cookies will vanish before you know it. Go ahead, gather your ingredients, and bring a little magic to your kitchen—you’ll be so glad you did!
Print
Hocus Pocus Cookies Recipe
- Total Time: 25 minutes
- Yield: 30 cookies 1x
- Diet: Vegetarian
Description
Delight your Halloween guests with these colorful and festive Hocus Pocus Cookies. These soft and chewy cookies are studded with a mix of chocolate chips, candy-coated chocolates, and sprinkles, making them a perfect treat for the spooky season.
Ingredients
For the Cookies:
- 1 cup unsalted butter (softened)
- 1 cup granulated sugar
- 1/2 cup packed brown sugar
- 2 large eggs
- 2 teaspoons vanilla extract
- 2 1/2 cups all-purpose flour
- 1 teaspoon baking soda
- 1/2 teaspoon salt
- 1 cup semi-sweet chocolate chips
- 1/2 cup Halloween sprinkles
- 1/2 cup candy-coated chocolates (like M&Ms)
- 1/2 cup white chocolate chips
- Food coloring (optional: purple, orange, green)
Instructions
- Preheat the oven: Preheat the oven to 350°F (175°C) and line baking sheets with parchment paper.
- Cream butter and sugars: In a large bowl, cream together the butter, granulated sugar, and brown sugar until light and fluffy.
- Add eggs and vanilla: Beat in the eggs one at a time, then mix in the vanilla extract.
- Combine dry ingredients: In a separate bowl, whisk together the flour, baking soda, and salt.
- Mix wet and dry: Gradually add the dry ingredients to the wet mixture, then stir in the chocolate chips, white chocolate chips, candy-coated chocolates, and sprinkles.
- Add food coloring: Optionally, tint portions of dough with food coloring for a colorful effect.
- Bake: Scoop tablespoon-sized dough portions onto baking sheets and bake for 9–11 minutes until set. Cool before serving.
Notes
- Customize with your favorite Halloween candies or cookie add-ins.
- Dough can be chilled for thicker cookies or frozen for later use.
- Prep Time: 15 minutes
- Cook Time: 10 minutes
- Category: Dessert
- Method: Baking
- Cuisine: American
Nutrition
- Serving Size: 1 cookie
- Calories: 160
- Sugar: 13g
- Sodium: 95mg
- Fat: 8g
- Saturated Fat: 5g
- Unsaturated Fat: 2g
- Trans Fat: 0g
- Carbohydrates: 20g
- Fiber: 1g
- Protein: 2g
- Cholesterol: 20mg