Deviled Egg Chicks Recipe
Bringing a serious dose of cuteness and flavor to any table, Deviled Egg Chicks are a whimsical twist on a classic favorite. Imagine delicate, creamy yolk filling piped into perfectly upright egg whites, each transformed into an adorable chick with bright carrot beaks and mischievous olive eyes—the sort of appetizer guaranteed to make adults smile and kids absolutely giddy. While these playful bites shine at Easter, the truth is Deviled Egg Chicks are irresistible for brunches, picnics, or any time you want your food to double as a conversation starter. They’re charming, tasty, and surprisingly simple to make!
Ingredients You’ll Need
Ingredients You’ll Need
Pulling off Deviled Egg Chicks takes just a handful of key ingredients, each chosen not just for taste, but for the color, texture, and personality they add to your finished chicks. With the pantry basics and a few fresh accents, your little flock will be hatching in no time!
- 12 large eggs: The star of the show—use fresh eggs for the best flavor and perfectly shaped chicks.
- 3 tablespoons mayonnaise: Adds creamy decadence and binds the yolk mixture together beautifully.
- 1 teaspoon Dijon mustard: Gives the filling a subtle tang and depth of flavor.
- ½ teaspoon white vinegar: Brightens everything up and balances the richness of the yolks and mayo.
- ¼ teaspoon salt: Enhances all the savory notes and brings out each ingredient’s best.
- ⅛ teaspoon black pepper: Adds just enough gentle spice to make every bite pop.
- 2–3 baby carrots (for beaks): Little orange triangles create those unmistakable chick faces—plus a hint of sweetness!
- 6 black olives or whole black peppercorns (for eyes): Completely transforms your eggs with lifelike, edible eyes; choose olives for a savory touch or peppercorns for a tiny, crunchy surprise.
How to Make Deviled Egg Chicks
Step 1: Hard-Boil the Eggs
Start by placing your eggs in a large saucepan and covering them with cold water by an inch. Set the pan over medium-high heat—once boiling, cover, turn off the burner, and set your kitchen timer for 12 minutes. This perfect method yields eggs that are firm but still creamy in the center, ideal for scooping and re-stuffing with that luscious filling.
Step 2: Cool and Peel
Once the timer dings, drain the eggs and immediately transfer them to an ice bath. Giving them this chill guarantees the shells slip right off without pesky clinging bits, keeping your Deviled Egg Chicks as smooth and blemish-free as possible. Peel each egg gently, then rinse off any stray shell, and pat them dry.
Step 3: Slice and Hollow
To help each chick stand upright, slice a thin bit from the base of every egg. Then, cut off the top third (this will be the little “hat”). Gently pop out the yolks, doing your best to leave the white intact so you have the perfect “nest” for your creamy filling. Gather all the yolks in a mixing bowl.
Step 4: Prepare the Filling
With your yolks ready, add mayonnaise, Dijon mustard, white vinegar, salt, and black pepper. Mash everything until the mixture is silky—no lumps if you can help it! The texture should be rich and creamy, with just enough tang and zest. Spoon the filling into a piping bag or a zip-top bag with the corner snipped for easy filling.
Step 5: Assemble Your Chicks
Pipe or spoon the yolk mixture generously into each large egg base, letting it mound up to look like the top of a chick’s head peeking out. Carefully place the egg “caps” you sliced off back on top, slightly askew, as if the chick is lifting its shell. Each one will already be bursting with personality!
Step 6: Add the Features
Next comes the fun part—turning these tasty bites into little faces! Cut tiny triangles from your baby carrots for beaks. Using a straw or paring knife, punch out small circles from black olives, or grab your whole black peppercorns for the eyes. Press these gently into the yolk filling to complete your Deviled Egg Chicks’ charming expressions.
Step 7: Chill and Serve
Arrange your chicks on a platter and refrigerate until you’re ready to share them. This gives the filling a chance to firm up, making them even easier to serve (and admire!).
How to Serve Deviled Egg Chicks

Garnishes
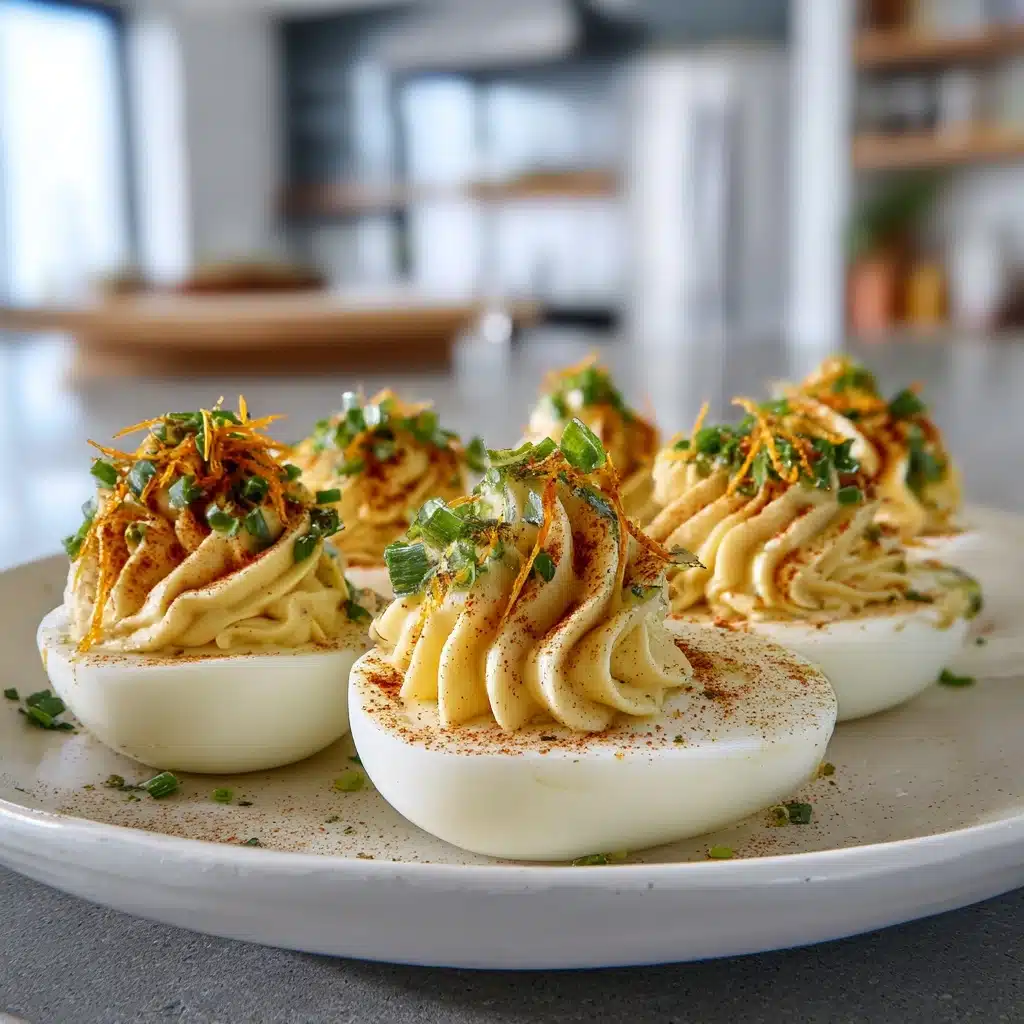
For a show-stopping platter, nestle your Deviled Egg Chicks on a bed of fresh herbs like parsley or dill. Not only do the greens create a striking “nest” effect, but they also give off a lovely aroma and invite guests to dive right in. A sprinkle of paprika over the tops or a few edible flowers will make your presentation pop even more.
Side Dishes
Pair your Deviled Egg Chicks with spring-inspired sides—think crisp asparagus, a light potato salad, or colorful crudités. Fresh vegetable sticks offer a crunchy contrast, and a tangy pickled veggie platter adds zip. They’re also perfect on a brunch board, sitting pretty alongside scones, fruit, and mini sandwiches.
Creative Ways to Present
If you’re making these for a party, give each chick its own “nest” in a cupcake liner or arrange them in an egg carton for maximum charm. For a playful touch, set the platter among edible “grass” made from shredded lettuce. Try grouping them in a wreath formation for a centerpiece that doubles as an appetizer—these Deviled Egg Chicks love to make an entrance!
Make Ahead and Storage
Storing Leftovers
If you’re lucky enough to have Deviled Egg Chicks left over, transfer them gently to an airtight container lined with paper towels to absorb any excess moisture. Store in the refrigerator, where they’ll keep fresh and tasty for up to two days, though the features might soften a bit over time.
Freezing
While these chicks are adorable, unfortunately, deviled eggs don’t freeze well. The yolk filling gets grainy and the egg whites turn watery and rubbery after thawing. For best flavor and presentation, enjoy Deviled Egg Chicks fresh or chilled from the fridge within a couple of days.
Reheating
Deviled Egg Chicks are best served cold or at room temperature. If you need to take the chill off, leave them out on the counter for 15–20 minutes before serving. Avoid microwaving, as it can ruin the texture and make the yolk filling separate.
FAQs
Can I add extra flavors to the yolk filling?
Absolutely! Stir in a pinch of smoked paprika, fresh chives, dill, or a dash of hot sauce to put your personal spin on the chicks. You can even fold in crumbled bacon for a savory upgrade, though they won’t be vegetarian anymore.
How far in advance can I make Deviled Egg Chicks?
They’re best assembled the day you plan to serve them, but you can boil, peel, and prep the eggs a day ahead. Store whites and filling separately in the fridge, then assemble and decorate just before party time for the freshest look and taste.
What’s the best way to fill the egg whites neatly?
If you have a piping bag, use a large round tip for classic, fluffy filling. For an easy DIY method, a zip-top bag with a snipped corner works wonders—plus, it keeps things cleaner than spooning. You’ll get neat, perky little chick heads every time.
Can I use something other than olives or peppercorns for the eyes?
Definitely! Try black sesame seeds, bits of nori, or even tiny pieces of raisins. The key is to keep the eyes small and dark so your Deviled Egg Chicks look lifelike and irresistibly cute.
Are Deviled Egg Chicks gluten-free?
Yes, the traditional recipe is naturally gluten-free! Just be sure any add-ins (like mustard or toppings) are certified gluten-free if you’re cooking for someone with dietary sensitivities.
Final Thoughts
With their creamy filling, playful faces, and irresistible charm, Deviled Egg Chicks are a guaranteed hit for any gathering. Even if you’ve never tried making a “cute food” before, you’ll be amazed at how simple and satisfying these little guys are to whip up—and even more delighted when you see everyone’s faces light up as they spot them on the table. Give them a try and let your kitchen hatch a new tradition!
Print
Deviled Egg Chicks Recipe
- Total Time: 37 minutes
- Yield: 12 deviled egg chicks 1x
- Diet: Vegetarian, Gluten-Free
Description
These adorable Deviled Egg Chicks are a fun and festive twist on a classic appetizer, perfect for Easter or any spring gathering. With a creamy and flavorful filling, they are sure to be a hit at your next celebration.
Ingredients
Ingredients:
- 12 large eggs
- 3 tablespoons mayonnaise
- 1 teaspoon Dijon mustard
- ½ teaspoon white vinegar
- ¼ teaspoon salt
- ⅛ teaspoon black pepper
- 2–3 baby carrots (for beaks)
- 6 black olives or whole black peppercorns (for eyes)
Instructions
- Cook the Eggs: Place eggs in a large saucepan, cover with cold water, and bring to a boil. Let sit for 12 minutes, then cool in an ice bath.
- Prepare the Filling: Remove yolks, mash with mayonnaise, mustard, vinegar, salt, and pepper.
- Fill the Eggs: Spoon or pipe filling into egg whites, top with ‘caps’, and add carrot beaks and olive eyes.
- Serve: Refrigerate until ready to enjoy.
Notes
- For extra flavor, consider adding paprika or fresh herbs to the yolk mixture.
- Best served the same day for optimal freshness and appearance.
- Prep Time: 25 minutes
- Cook Time: 12 minutes
- Category: Appetizer, Snack
- Method: Boiling, Assembling
- Cuisine: American, Easter-Inspired
Nutrition
- Serving Size: 1 deviled egg chick
- Calories: 70
- Sugar: 0 g
- Sodium: 95 mg
- Fat: 5 g
- Saturated Fat: 1.5 g
- Unsaturated Fat: 3 g
- Trans Fat: 0 g
- Carbohydrates: 0 g
- Fiber: 0 g
- Protein: 3 g
- Cholesterol: 95 mg