Easter Dirt Cake Casserole Recipe
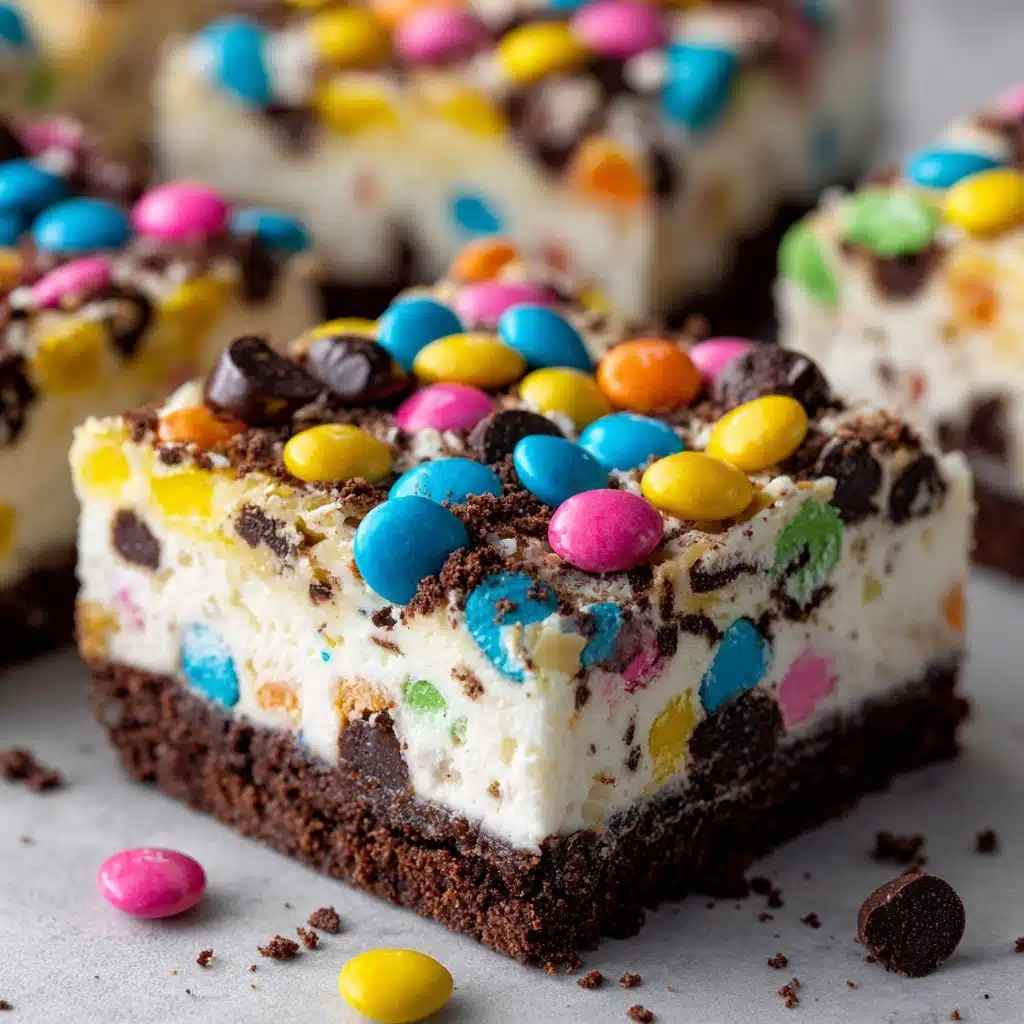
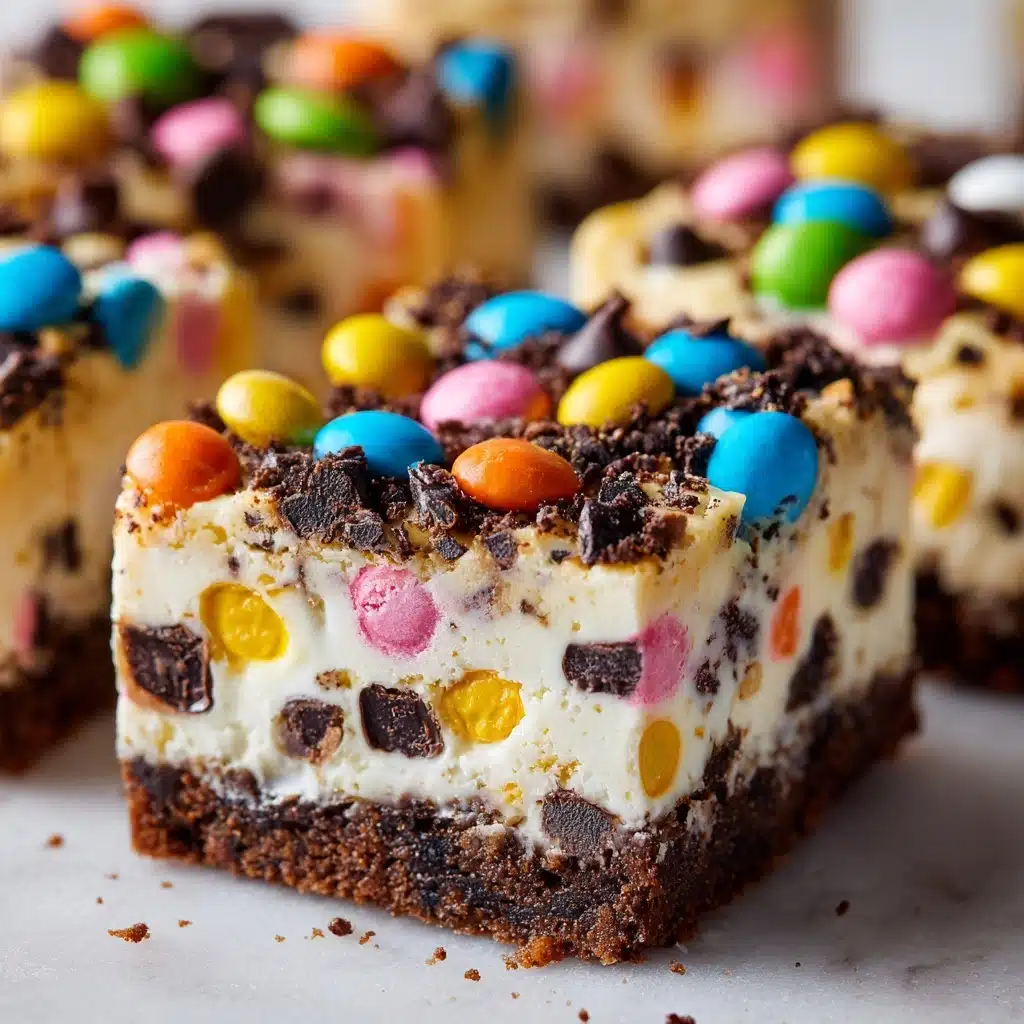
If you’re searching for the ultimate springtime treat that’s equal parts playful, nostalgic, and downright delicious, look no further than this Easter Dirt Cake Casserole. Picture a luscious combination of creamy layers, chocolate cookie crumbles, and festive Easter candy decorations, all coming together in one no-bake wonder. This charming centerpiece is as fun to make as it is to eat, and sure to spark smiles from kids and adults alike at your Easter celebration.
Ingredients You’ll Need
This recipe shines by turning everyday pantry staples into a show-stopping dessert. Each ingredient has its part to play, from adding smoothness to crunch, and bringing gorgeous Easter colors to your table.
- Chocolate sandwich cookies: Crushed to make that classic “dirt” topping and base—opt for your favorite brand for the best flavor.
- Cream cheese: Softened cream cheese adds a rich, tangy element to the creamy filling—make sure it’s at room temperature for best results.
- Unsalted butter: Softened butter gives your mixture a lovely smoothness and helps bind the filling flavors together.
- Powdered sugar: Sifts in delicate sweetness and helps create an ultra-smooth texture.
- Instant vanilla pudding mix: These packs are the secret for unbeatable silkiness—plus, no cooking required!
- Cold milk: Brings the pudding to life by helping it set up thick and dreamy.
- Whipped topping: Folded in for a cloudlike, airy finish that makes every bite irresistible.
- Pastel-colored sprinkles: Bring a playful burst of spring color and a hint of festive crunch.
- Mini chocolate eggs: Scatter them on top for a classic Easter garden look (and a fun chocolate surprise in every spoonful).
- Bunny-shaped candies: These edible cuties instantly make your Easter Dirt Cake Casserole party-perfect and extra adorable.
How to Make Easter Dirt Cake Casserole
Step 1: Make the Creamy Base
Start by grabbing a large mixing bowl. Beat together the softened cream cheese, butter, and powdered sugar until the mixture is completely smooth and creamy. Don’t skimp on this step—a few extra minutes of mixing ensures your base comes out velvety and lump-free, creating the magic foundation for this Easter Dirt Cake Casserole.
Step 2: Prepare the Pudding Layer
In a separate bowl, whisk both packages of instant vanilla pudding mix with the cold milk. After about two minutes, it’ll thicken up nicely. The combination of instant pudding and milk forms a stable, silky layer that holds the whole casserole together without any baking.
Step 3: Combine for the Dreamiest Filling
Gently fold the thickened pudding into the cream cheese mixture. Once that’s well combined, fold in the whipped topping—but use a light hand! This keeps the filling fluffy and light, not dense.
Step 4: Build the Layers
In a 9×13-inch baking dish, scatter half of your crushed chocolate sandwich cookies evenly along the bottom. Spread the creamy pudding mixture over the cookie layer, smoothing it out with a spatula to reach every corner. Top everything with the rest of the cookie crumbs, giving that classic “dirt” effect we all recognize and love from a traditional Easter Dirt Cake Casserole.
Step 5: Decorate and Chill
Here comes the fun part: decorating! Sprinkle pastel-colored sprinkles, nestle in mini chocolate eggs, and arrange bunny-shaped candies however you like—think of it as creating your own edible spring garden. Pop the finished casserole in the refrigerator for at least two hours (or overnight) to let all those wonderful flavors meld together.
How to Serve Easter Dirt Cake Casserole

Garnishes
Adorning your Easter Dirt Cake Casserole with an array of sprinkles, chocolate eggs, and candy bunnies is just the beginning. Consider adding edible flowers, additional cookie crumbles, or even some fresh mint leaves for a burst of color and personality. The more playful and garden-like your garnish, the better!
Side Dishes
This vibrant dessert pairs beautifully with an array of light spring dishes. Serve alongside a fresh fruit salad, tangy lemon bars, or mini quiches for a balanced Easter brunch menu. Its creamy sweetness is especially delightful after savory sides.
Creative Ways to Present
You don’t have to stick with a casserole dish! Try layering portions in individual mason jars or small cups for adorable single-servings, or shape the “dirt” into an Easter bunny silhouette using stencils. Little hands love personalizing their own individual Easter Dirt Cake Casserole cups with candy toppings, too.
Make Ahead and Storage
Storing Leftovers
Cover the baking dish tightly with plastic wrap or an airtight lid and store any remaining Easter Dirt Cake Casserole in the refrigerator for up to four days. The flavors tend to meld and deepen the longer it sits, making it a fantastic make-ahead dessert option for busy holiday weekends.
Freezing
While this dessert is best enjoyed fresh, you can freeze leftovers if needed. Wrap the casserole securely with plastic wrap and foil, then freeze for up to one month. Thaw overnight in the refrigerator before serving—just keep in mind the texture of the whipped topping may soften slightly.
Reheating
Easter Dirt Cake Casserole doesn’t require reheating—just let it come to fridge temperature before serving. If you’ve frozen it, give it plenty of time to thaw in the fridge so the layers are back to their creamy best.
FAQs
Can I use different cookies instead of chocolate sandwich cookies?
Absolutely! Golden sandwich cookies, vanilla wafers, or even graham crackers will work. Try using pastel flavors or colors for a fun twist, especially if customizing your Easter Dirt Cake Casserole.
Can I make Easter Dirt Cake Casserole ahead of time?
Yes! In fact, making it the day before your event allows the flavors to meld and the layers to firm up, resulting in an even tastier and prettier dessert for your celebration.
Is there a way to make this dessert gluten-free?
Swap in gluten-free chocolate sandwich cookies and ensure your pudding mix is also gluten-free. Everything else, including the whipped topping, is typically safe, turning this classic into an allergy-friendly treat.
How do I keep the candies from getting soggy?
For the freshest candy toppings, add the mini eggs, bunnies, and sprinkles shortly before serving. This ensures your garnishes stay crisp and picture-perfect atop your Easter Dirt Cake Casserole.
Can I tint the filling with food coloring?
Yes! Stir in a drop or two of pastel food coloring to the pudding mixture before layering if you want extra festive flair—light pinks, greens, or yellows look especially springy.
Final Thoughts
This Easter Dirt Cake Casserole is a sweet celebration of spring, family, and a little bit of whimsy all in one dish. Whether you’re making it for your kids, your friends, or just yourself, it’s bound to become a cherished holiday tradition. Try it once, and it’ll be an eagerly awaited treat on your Easter table for years to come!
Print
Easter Dirt Cake Casserole Recipe
- Total Time: 2 hours 20 minutes (including chilling time)
- Yield: 12 servings 1x
- Diet: Vegetarian
Description
Indulge in this delightful Easter Dirt Cake Casserole, a fun and festive dessert perfect for spring celebrations. Layers of creamy pudding, crushed cookies, and whimsical decorations make this no-bake treat a hit with both kids and adults alike.
Ingredients
Cream Cheese Mixture:
- 8 oz cream cheese, softened
- 1/4 cup unsalted butter, softened
- 1 cup powdered sugar
Pudding Layer:
- 2 packages (3.4 oz each) instant vanilla pudding mix
- 3 cups cold milk
Additional Ingredients:
- 1 package (14.3 oz) chocolate sandwich cookies, crushed
- 12 oz whipped topping, thawed
- Pastel-colored sprinkles
- Mini chocolate eggs
- Bunny-shaped candies for decorating
Instructions
- Cream Cheese Mixture: In a large mixing bowl, beat cream cheese, butter, and powdered sugar until smooth and creamy.
- Pudding Layer: In another bowl, whisk together pudding mix and cold milk until thickened. Fold pudding into cream cheese mixture, then gently fold in whipped topping until fully combined.
- Assembly: Spread half of the crushed cookies in a 9×13-inch baking dish. Pour pudding mixture over the cookies, smooth it out, and top with remaining crushed cookies.
- Decorate: Add pastel sprinkles, mini chocolate eggs, and bunny candies on top. Refrigerate for at least 2 hours before serving.
Notes
- You can make this dessert a day ahead—it gets even better as it chills.
- For a fun touch, use crushed golden sandwich cookies and tint the pudding with pastel food coloring.
- Prep Time: 20 minutes
- Cook Time: 0 minutes
- Category: Dessert
- Method: No-Bake
- Cuisine: American
Nutrition
- Serving Size: 1 square
- Calories: 320
- Sugar: 25g
- Sodium: 280mg
- Fat: 18g
- Saturated Fat: 9g
- Unsaturated Fat: 7g
- Trans Fat: 0g
- Carbohydrates: 38g
- Fiber: 1g
- Protein: 3g
- Cholesterol: 35mg

