
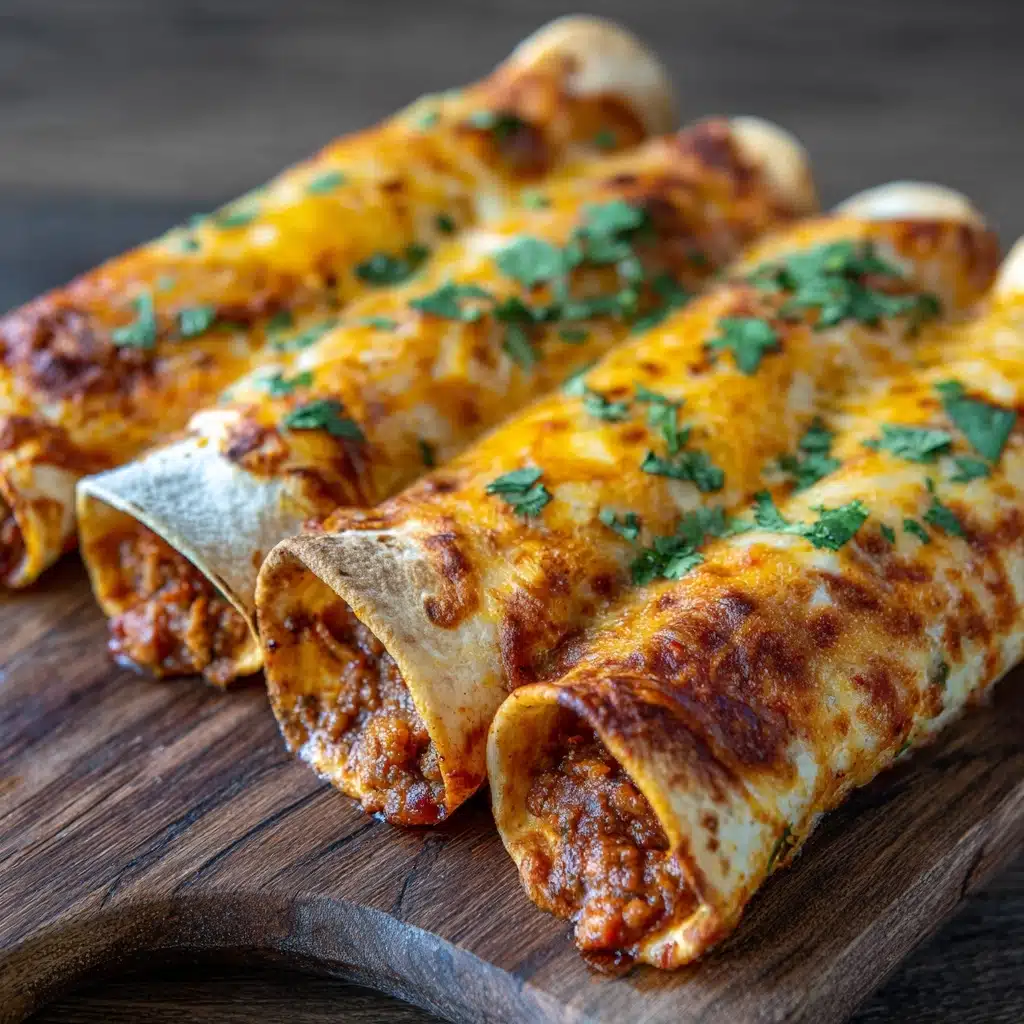
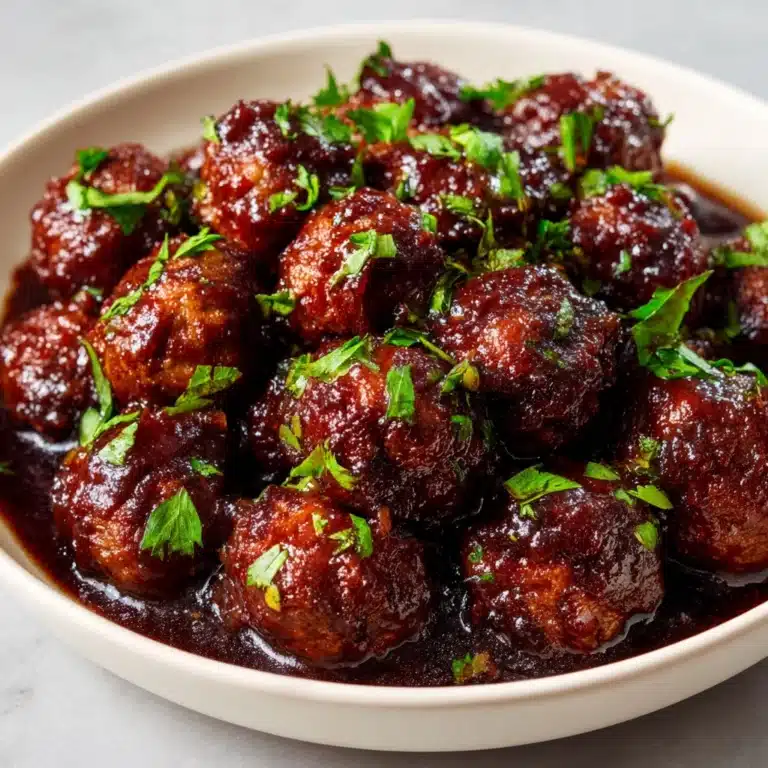
Cheesy Taco Sticks: A Family Favorite Recipe
When you’re craving something that’s hearty, fun, and guaranteed to bring everyone to the table grinning, look no further than Cheesy Taco Sticks: A Family Favorite. Imagine pillowy pizza dough wrapped around savory taco-seasoned beef and melty cheddar, all brushed in garlic herb butter and served warm with your favorite dips—these irresistible bites blend all the best parts of tacos and gooey cheese sticks. Whether you’re feeding hungry kids or hosting a get-together, this dish takes crowd-pleasing to a whole new level and might just become the most-requested snack in your house.
Ingredients You’ll Need
Cheesy Taco Sticks: A Family Favorite come together with a handful of pantry staples and a couple fridge essentials. Each ingredient plays its own special part, from the soft, golden pizza dough to the bold, zesty taco meat and melty cheese. Here’s why every piece matters and how to make each bite shine.
- Ground beef (1 pound): This forms the hearty, savory core of each stick; choose lean ground beef for a less greasy filling or switch things up with ground turkey for a lighter twist.
- Taco seasoning (1 tablespoon): A shortcut to bold, spiced flavor—you can use your favorite store-bought blend or make your own for a custom kick.
- Water (1/3 cup): Helps the seasoning coat every bit of beef, ensuring juicy, flavorful filling in every bite.
- Shredded cheddar cheese (1 cup): The key to ultimate ooey-gooeyness—mild or sharp cheddar both work, or try a spicy blend for some heat.
- Refrigerated pizza dough (1 8-ounce can): The pillowy blanket that bakes up golden and holds everything together; just be sure to thaw if needed.
- Melted butter (1 tablespoon): Brushing this on top ensures a glossy, rich finish.
- Garlic powder (1/2 teaspoon): Provides a subtle, savory hit that pairs perfectly with the buttery crust.
- Dried parsley (1/2 teaspoon): For a pop of color and a touch of herbal flavor that makes the sticks extra inviting.
- Salt (to taste): A finishing sprinkle that lifts all the flavors—you’ll notice the difference.
- Sour cream or salsa (optional, for dipping): These creamy, tangy, or zesty dips take your taco sticks straight over the top.
How to Make Cheesy Taco Sticks: A Family Favorite
Step 1: Prepare Your Baking Sheet and Preheat the Oven
Start by firing up your oven to 425°F, giving it time to get good and hot. Line a baking sheet with parchment paper—this step guarantees easy cleanup and means your Cheesy Taco Sticks: A Family Favorite won’t stick, ensuring a golden crust on the bottom every time.
Step 2: Brown the Meat
In a large skillet set over medium heat, crumble in your ground beef. As it cooks, break it apart with a spatula, making sure to get even, flavorful browning. When there’s no pink left, drain off any extra fat so your filling isn’t greasy.
Step 3: Spice and Simmer the Taco Meat
Sprinkle the browned beef with taco seasoning and pour in the water. Stir well, then let everything simmer for about 2 to 3 minutes. The water will help distribute the spices, turning your beef into a thick, saucy filling. Take it off the heat and let it cool slightly; this helps prevent melty cheese blowouts once you start assembling.
Step 4: Shape and Fill the Dough
Unroll the can of pizza dough onto a lightly floured surface. Gently pat or stretch it into a rectangle. Using a sharp knife or pizza cutter, slice the dough into eight equal rectangles—these are your taco stick “wrappers.” Spoon a bit of the cooled taco meat down the center of each piece, then sprinkle generously with shredded cheddar. Don’t overfill—just enough for a cheesy, meaty core.
Step 5: Seal and Shape Your Sticks
Now comes the fun part! Fold each dough rectangle over its filling and pinch the edges tightly closed, making sure to completely seal in all that goodness. Roll each one gently with your hands to shape them into tidy, stick-like forms. Place them seam-side down on the prepared baking sheet so they don’t unravel during baking.
Step 6: Add Flavorful Toppings
In a small bowl, combine your melted butter with the garlic powder and dried parsley. Brush this mixture liberally over each taco stick. A sprinkle of salt on top makes the flavors pop and gives a professional finish, so don’t skip it!
Step 7: Bake to Golden Perfection
Slide the tray into your hot oven and bake for 10 to 12 minutes. The goal is a golden-brown exterior, with cheese just beginning to ooze out at the seams. If you can’t resist, pop open the oven window and take a peek as the kitchen fills with the scent of tacos and freshly baked bread.
Step 8: Serve and Enjoy!
Let the Cheesy Taco Sticks: A Family Favorite cool for a few minutes before serving. Plate them up with bowls of sour cream and salsa for dipping, and watch them disappear—no fancy presentation needed, just big smiles and happy tummies.
How to Serve Cheesy Taco Sticks: A Family Favorite

Garnishes
For an extra flourish, scatter finely chopped cilantro, a touch more parsley, or even sliced green onions over your platter of Cheesy Taco Sticks: A Family Favorite right before serving. A little drizzle of crema or a dollop of guacamole adds color and even more irresistible flavor.
Side Dishes
Pair your taco sticks with simple sides to round out the meal—a fresh corn salad, crisp coleslaw, or a bowl of black beans fits beautifully. For game day or movie night, classic potato wedges or nachos create a casual feast everyone will indulge in.
Creative Ways to Present
Pile your Cheesy Taco Sticks: A Family Favorite high on a wooden cutting board with toothpicks and assorted dips for a hands-on party treat. Or, slice the sticks into bite-sized pieces and thread on skewers to make an eye-catching appetizer platter that’s perfect for sharing.
Make Ahead and Storage
Storing Leftovers
If you’re lucky enough to have any taco sticks left, cool them completely and tuck them into an airtight container. They’ll keep in the fridge for up to three days, perfect for hearty after-school snacks or a quick lunch you’ll look forward to.
Freezing
Cheesy Taco Sticks: A Family Favorite freeze like a dream. Once baked and cooled, wrap each one tightly in aluminum foil and stash in a freezer bag. They’ll be ready for a snack attack, game night, or unexpected company any time you need them, up to two months out.
Reheating
To recapture the magic, reheat your taco sticks in a 350°F oven for about 10 minutes—this keeps them crispy on the outside and gooey inside. The microwave will do in a pinch (about 30 seconds per stick), but the oven is your best friend for that fresh-baked texture.
FAQs
Can I use ground turkey or chicken instead of beef?
Absolutely! Both ground turkey and chicken work beautifully in Cheesy Taco Sticks: A Family Favorite. They create a lighter take while still delivering big flavor—just be sure to season generously since poultry can be milder than beef.
What other cheeses can I use?
Feel free to get creative with your cheese selection. Monterey Jack melts easily and has a mild kick, while pepper jack adds some spice. A blend of cheddar and mozzarella delivers extra stretchiness and an inviting golden top.
How do I keep the filling from leaking out?
Make sure the edges of your dough are pinched tightly to seal, and always place the taco sticks seam-side down on your baking sheet. Letting the meat cool slightly before assembling also helps prevent melting cheese from escaping.
Can I make these ahead for a party?
Of course! Assemble all your Cheesy Taco Sticks: A Family Favorite up to a day in advance and store them covered in the fridge. When guests arrive, simply bake them off so you can spend more time mingling and less time in the kitchen.
Are there any gluten-free options?
Definitely—look for gluten-free pizza dough in the freezer section or make your own at home. From there, the rest of the ingredients are naturally gluten-free, so everyone can join in on the fun!
Final Thoughts
If you’re looking for a new go-to that’s as fun as it is flavorful, Cheesy Taco Sticks: A Family Favorite are about to win over your whole table. They’re simple, deeply satisfying, and made for sharing—so gather your favorite people and give this recipe a try. Happy snacking!
Print
Cheesy Taco Sticks: A Family Favorite Recipe
- Total Time: 27 minutes
- Yield: 8 taco sticks 1x
- Diet: Non-Vegetarian
Description
Cheesy Taco Sticks are a fun and flavorful twist on traditional tacos. These savory sticks are perfect for a family-friendly meal or as a party appetizer. Filled with seasoned ground beef, melted cheddar cheese, and baked until golden brown, they are sure to be a hit with everyone!
Ingredients
Ground Beef Mixture:
- 1 pound ground beef
- 1 tablespoon taco seasoning
- 1/3 cup water
Other Ingredients:
- 1 cup shredded cheddar cheese
- 1 (8-ounce) can refrigerated pizza dough
- 1 tablespoon melted butter
- 1/2 teaspoon garlic powder
- 1/2 teaspoon dried parsley
- Salt to taste
- Optional: sour cream or salsa for dipping
Instructions
- Preheat the oven: Preheat the oven to 425°F and line a baking sheet with parchment paper.
- Cook the ground beef: In a skillet over medium heat, cook the ground beef until browned. Drain excess fat, then add taco seasoning and water. Simmer until thickened. Remove from heat and let cool slightly.
- Prepare the taco sticks: Unroll the pizza dough and cut it into 8 equal rectangles. Spoon taco meat onto each piece, sprinkle with cheese, fold the dough over, and pinch to seal. Place on baking sheet.
- Bake: Brush sticks with butter, sprinkle with garlic powder, parsley, and salt. Bake for 10-12 minutes until golden brown.
- Serve: Serve warm with sour cream or salsa if desired.
Notes
- You can use ground turkey or chicken as a lighter option.
- Add diced jalapeños or green chilies for extra heat.
- These taco sticks freeze well for a quick snack later.
- Prep Time: 15 minutes
- Cook Time: 12 minutes
- Category: Appetizer
- Method: Baking
- Cuisine: Mexican-Inspired
Nutrition
- Serving Size: 1 taco stick
- Calories: 220
- Sugar: 2g
- Sodium: 360mg
- Fat: 13g
- Saturated Fat: 6g
- Unsaturated Fat: 5g
- Trans Fat: 0g
- Carbohydrates: 14g
- Fiber: 1g
- Protein: 12g
- Cholesterol: 35mg


