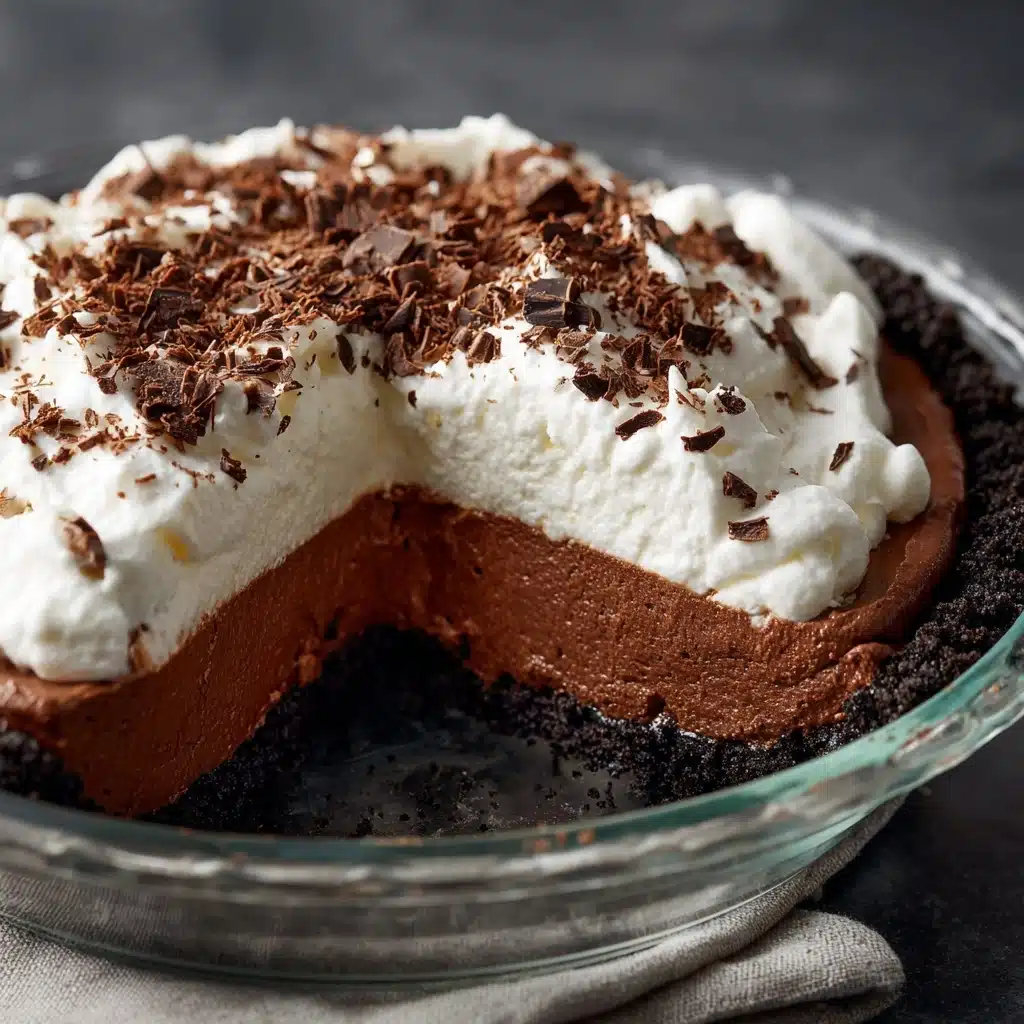
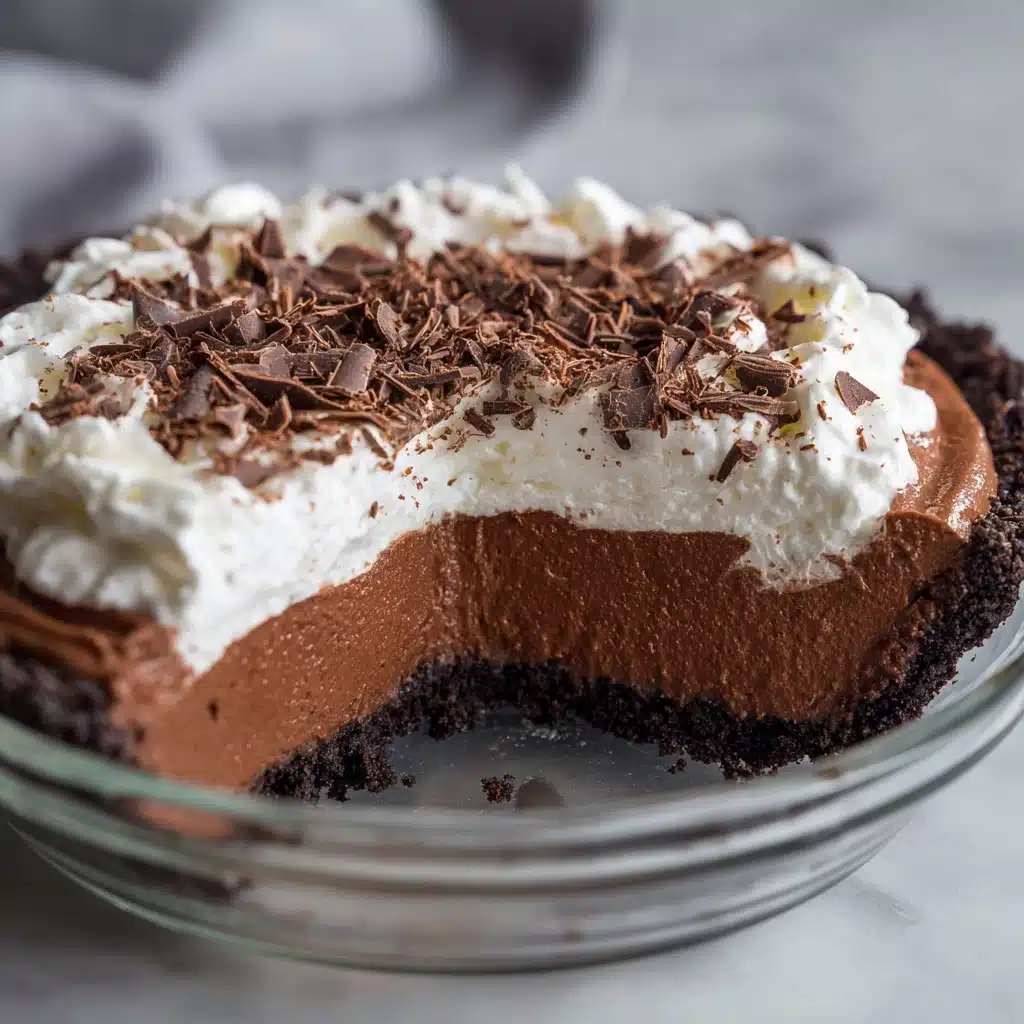
No Bake Chocolate Pudding Pie Recipe
If there’s one dessert that always gets requests for seconds, it’s this No Bake Chocolate Pudding Pie. Silky, dreamy chocolate filling nestled in a buttery graham cracker crust, topped with billowy clouds of whipped cream… and all without ever turning on the oven! This is the dessert I rely on for barbecues, potlucks, and last-minute celebrations—everybody falls in love at first bite. Let me show you just how unbelievably easy it is to whip up this rich, irresistible classic in your own kitchen!
Ingredients You’ll Need
-
Graham Cracker Crust:
- 1 (9-inch) pre-made graham cracker crust
Chocolate Filling:
- 1 (3.9-ounce) box instant chocolate pudding mix
- 1 1/2 cups cold milk
Whipped Cream:
- 1/2 cup heavy cream
- 1/2 cup powdered sugar
- 1 teaspoon vanilla extract
Topping:
- 1 (8-ounce) tub whipped topping, thawed (or homemade whipped cream)
- Chocolate shavings or curls, for garnish (optional)
How to Make No Bake Chocolate Pudding Pie
Step 1: Mix the Chocolate Pudding
Start by grabbing a large mixing bowl and whisking together the instant chocolate pudding mix with the cold milk. You want to whip vigorously until the mixture is completely smooth and starts to thicken, which usually takes about 2 minutes. This is where that deep chocolate flavor comes alive—don’t stop whisking too soon or you’ll have a runny filling!
Step 2: Whip the Cream
In a separate bowl, pour in the heavy cream, sprinkle in the powdered sugar, and add a splash of vanilla extract. Using a hand mixer or sturdy whisk, beat the cream until stiff peaks form and it holds its shape when you lift the beaters. This whipped cream is pure magic—soft, sweet, and so luscious.
Step 3: Combine Pudding and Cream
Gently fold half of your freshly whipped cream into the chocolate pudding mixture. Work slowly and use a spatula to combine, preserving as much of that lovely lightness as possible. This creates a mousse-like, intensely chocolatey filling that’s rich but not too heavy.
Step 4: Assemble the Pie
Spoon the chocolate filling into your pre-made graham cracker crust. Smooth the surface with a spatula, making sure it’s even all the way to the edges (those little swirls look dreamy when sliced!).
Step 5: Top and Garnish
Spread the remaining whipped cream (or whipped topping, if you prefer) over the chocolate layer. For that bakery window wow factor, garnish with chocolate shavings or curls—press just a few onto the whipped cream, or give it a generous snowdrift of chocolate for pure decadence.
Step 6: Chill the Pie
Pop the entire pie into the refrigerator for at least 4 hours. This step is essential for letting the pie set up beautifully, so it slices cleanly without losing its creamy texture. I know it’s tough to wait, but trust me, it’s worth every second!
How to Serve No Bake Chocolate Pudding Pie

No Bake Chocolate Pudding Pie Garnishes
Add a flourish right before serving by grating dark chocolate over the top, drizzling with a little melted chocolate, or even scattering chocolate chips. If berries are in season, a handful of fresh raspberries or strawberries makes each slice pop. Don’t forget a light dusting of cocoa powder if you want it extra elegant!
Side Dishes
This luscious pie is a sweet showstopper on its own, but if you want to make it a full dessert spread, serve slender slices alongside cups of strong coffee or espresso. A tangy fruit salad or a scoop of vanilla ice cream are perfect if you’re craving something fresh and bright to balance that rich chocolate flavor.
Creative Ways to Present No Bake Chocolate Pudding Pie
Why not make mini pies by dividing the filling among individual tart shells or serving it parfait-style in glasses for a party? Layer cubes of this pie with extra whipped cream for trifle-inspired Mason jar desserts, or let everyone customize their own with bowls of toppings to sprinkle on at the table. It’s a crowd-pleaser no matter how you slice (or scoop) it!
Make Ahead and Storage
Storing Leftovers
The No Bake Chocolate Pudding Pie keeps beautifully in the fridge, tightly covered with plastic wrap or foil, for up to 3 days. The crust stays crisp and the filling stays creamy, making it a perfect make-ahead dessert for any busy event.
Freezing
If you need to make your pie well in advance, you can freeze it—just skip the garnish until serving. Wrap the finished pie (crust and filling) in plastic wrap and add a layer of foil. Freeze for up to one month. Thaw in the refrigerator overnight and top with whipped cream and chocolate before serving.
Reheating
This pie is meant to be served cold, so there’s no need to reheat it. If you’ve stored the pie in the freezer, allow it to thaw gently in the refrigerator for a few hours before slicing. Serve straight from the fridge for the best texture!
FAQs
Can I use a homemade graham cracker crust instead of store-bought?
Absolutely! If you love a homemade touch, just mix crushed graham crackers, sugar, and melted butter, then press into your pie pan and chill before filling. Homemade or store-bought, either option will taste fantastic with No Bake Chocolate Pudding Pie.
What type Dessert
The recipe works best with instant chocolate pudding mix, but you can use any brand or even a fudge-flavored mix for a deeper chocolate punch. Just be sure it’s the instant variety, not cook-and-serve, to keep things no-bake and easy.
Can I substitute whipped cream with a non-dairy topping?
Yes! A non-dairy whipped topping can easily swap in for the heavy cream and does a wonderful job with both the folding and topping. This makes the recipe adaptable for various dietary needs without sacrificing any of the luscious texture.
How do I prevent my pie from becoming runny?
Make sure to use very cold milk when making the pudding, and allow enough time for the pie to chill and set—at least 4 hours in the fridge is key. If you’re in a humid climate or want extra insurance, you can add a tablespoon of cocoa powder to help thicken the filling even more.
Is it possible to make No Bake Chocolate Pudding Pie gluten-free?
Definitely! Just use a gluten-free graham cracker crust (readily available in many stores) and double-check your pudding mix to ensure it’s gluten-free. The rest of the ingredients are naturally gluten-free, so everyone can join in the fun.
Final Thoughts
There’s something truly magical about a dessert as effortless and delicious as No Bake Chocolate Pudding Pie. It’s always a hit, no matter the occasion, and I hope it becomes a staple in your own kitchen just like it is in mine. Whip it up this weekend, and get ready for rave reviews!
Print
No Bake Chocolate Pudding Pie Recipe
- Total Time: 4 hours 15 minutes
- Yield: 8 slices 1x
- Diet: Non-Vegetarian
Description
Indulge in the rich, creamy goodness of this No Bake Chocolate Pudding Pie. A luscious chocolate filling nestled in a graham cracker crust, topped with fluffy whipped cream and chocolate shavings – a simple yet decadent dessert that will satisfy any chocolate lover.
Ingredients
Graham Cracker Crust:
- 1 (9-inch) pre-made graham cracker crust
Chocolate Filling:
- 1 (3.9-ounce) box instant chocolate pudding mix
- 1 1/2 cups cold milk
Whipped Cream:
- 1/2 cup heavy cream
- 1/2 cup powdered sugar
- 1 teaspoon vanilla extract
Topping:
- 1 (8-ounce) tub whipped topping, thawed (or homemade whipped cream)
- Chocolate shavings or curls, for garnish (optional)
Instructions
- Mix Chocolate Pudding: In a large bowl, whisk together chocolate pudding mix and cold milk until smooth and thickened.
- Prepare Whipped Cream: In a separate bowl, beat heavy cream, powdered sugar, and vanilla extract until stiff peaks form.
- Combine: Fold half of the whipped cream into the chocolate pudding mixture until smooth.
- Fill Crust: Spoon the chocolate filling into the graham cracker crust and smooth the top.
- Add Topping: Spread the remaining whipped cream or whipped topping over the filling.
- Garnish: Top with chocolate shavings, if desired.
- Chill: Refrigerate for at least 4 hours until set.
- Serve: Slice and enjoy chilled.
Notes
- For a richer flavor, use chocolate fudge pudding or add cocoa powder to the mix.
- Try using an Oreo crust for a more intense chocolate experience.
- Prep Time: 15 minutes
- Cook Time: 0 minutes
- Category: Dessert
- Method: No-Bake
- Cuisine: American
Nutrition
- Serving Size: 1 slice
- Calories: 320
- Sugar: 22g
- Sodium: 280mg
- Fat: 18g
- Saturated Fat: 11g
- Unsaturated Fat: 6g
- Trans Fat: 0g
- Carbohydrates: 37g
- Fiber: 1g
- Protein: 3g
- Cholesterol: 40mg


