
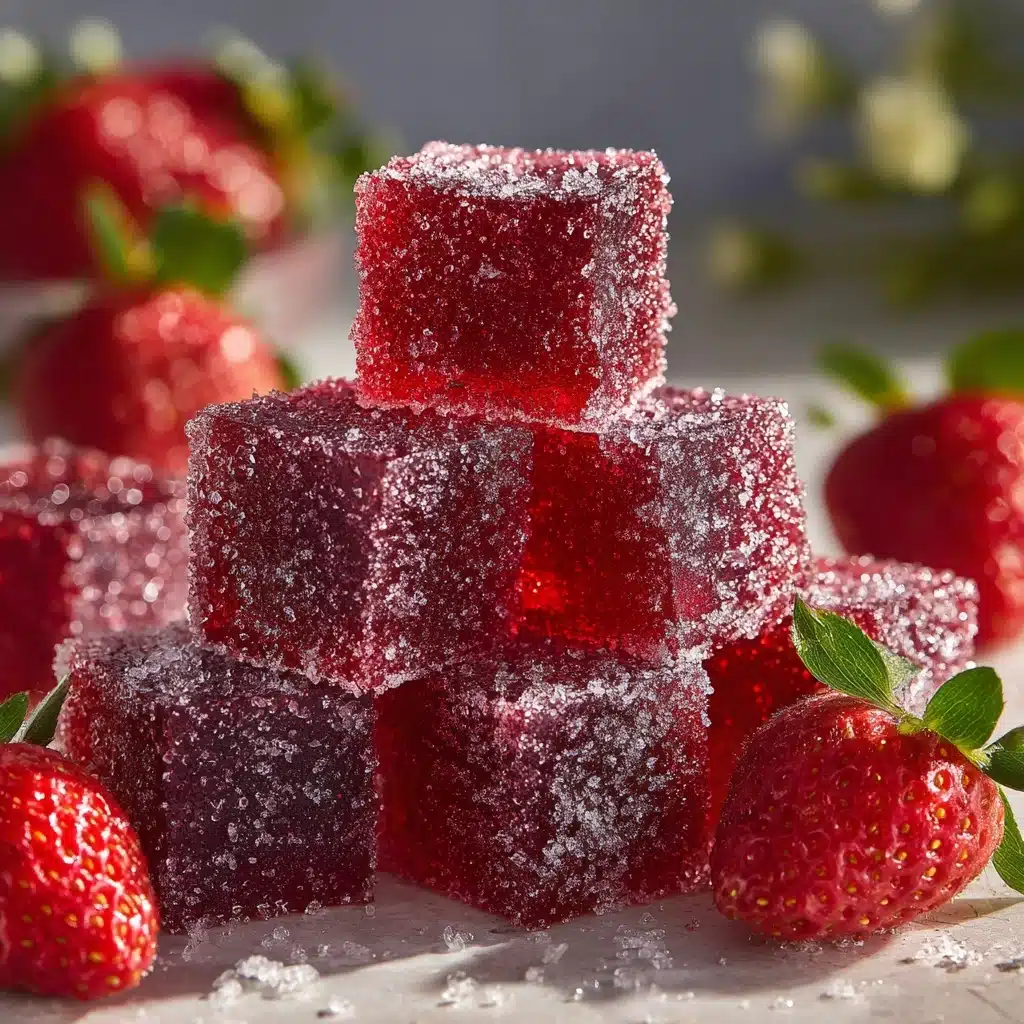
Tangy Homemade Sour Strawberry Gummies Recipe
If you’ve ever wished for a sweet treat that truly captures the brightness of summer and a zippy punch of tartness, these Tangy Homemade Sour Strawberry Gummies will sweep you off your feet. Imagine the juiciest strawberries, the tang of real lemon, and that delightfully gummy chew, all made right in your own kitchen! Whether you love classic fruit snacks or crave a sour-candy bite, these homemade gummies pack a nostalgic flavor and irresistible texture that outshine anything from a package. This recipe is easy, wholesome, and endlessly satisfying for snackers of all ages.
Ingredients You’ll Need
-
For the Gummies:
- 1 1/2 cups fresh or frozen strawberries (hulled and chopped)
- 1/4 cup lemon juice
- 2–3 tablespoons honey or maple syrup (to taste)
- 3 tablespoons unflavored gelatin powder
- 1/4 cup water
For the Coating (Optional):
- 2 tablespoons citric acid
- 2 tablespoons granulated sugar
How to Make Tangy Homemade Sour Strawberry Gummies
Step 1: Puree the Strawberries
Start by popping your hulled and chopped strawberries into a blender or food processor, along with the lemon juice and your chosen sweetener. Blitz it all together until you have a thick, velvety-smooth puree. This creates the vibrant foundation for your Tangy Homemade Sour Strawberry Gummies, and the aroma alone will have you hungry for first bites!
Step 2: Warm the Mixture
Pour that gorgeous strawberry puree into a small saucepan and set it over medium-low heat. Warm it gently just until it’s hot to the touch, but not simmering or boiling. Heating deeply intensifies the flavors, but be careful not to overcook—the fresher, the better here!
Step 3: Bloom the Gelatin
Meanwhile, sprinkle the gelatin powder evenly over a quarter cup of water in a separate bowl. Let it stand for about five minutes. This step “blooms” the gelatin, meaning it soaks up the water and prepares to melt smoothly into your fruit mixture for a perfectly springy gummy base.
Step 4: Combine and Dissolve
Once the gelatin has thickened and looks a bit wrinkly, scoop it into your warm strawberry mixture. Stir patiently until every last speck dissolves—you want the liquid to be totally smooth, glossy, and free of grainy bits. At this stage, you’re looking at the very beginning of homemade gummy delight!
Step 5: Pour and Set
Carefully pour the hot mixture into your favorite silicone gummy molds for the classic shape, or a parchment-lined baking dish for easy slicing. Smooth the top, then pop everything in the fridge for 1 to 2 hours. The anticipation is real, but the chill time ensures each Tangy Homemade Sour Strawberry Gummy is perfectly set and easy to handle.
Step 6: Cut and Coat
If you used a baking dish, cut the set gummies into adorable squares or strips. When you’re ready to serve, whisk the citric acid and sugar together, then toss the gummies until they’re lightly dusted—a burst of sour-sweet sparkle that makes these treats truly addictive.
How to Serve Tangy Homemade Sour Strawberry Gummies

Garnishes
Level up your gummies by giving them a finishing sparkle! After dusting with the citric acid-sugar mix, add a whisper of fresh lemon zest or a sprinkle of freeze-dried strawberry powder for an extra pop of color and tang. Kids and adults alike will love how bright and festive they look.
Side Dishes
These playful gummies are fantastic on their own but also shine as part of a fun snack board. Try them alongside fresh fruit, yogurt dips, or nut clusters for a wholesome after-school treat. For parties, nestle them among other homemade candies or chocolate-dipped goodies to charm every guest.
Creative Ways to Present
Whether you’re pulling out all the stops or keeping it simple, Tangy Homemade Sour Strawberry Gummies make a delightful edible gift. Tuck them into clear cellophane bags with a cute bow, layer them in mason jars for a rustic look, or display them in a bento-style box with contrasting berries. They’re also adorable as cupcake toppers for birthdays or baby showers!
Make Ahead and Storage
Storing Leftovers
If you have the willpower to save some for later, store your Tangy Homemade Sour Strawberry Gummies in an airtight container in the fridge for up to a week. Keep the sour coating off until you’re ready to eat to ensure each bite stays perfectly fresh and zippy.
Freezing
For long-term snacking, you can freeze your gummies! Arrange them in a single layer on a tray, freeze until solid, then transfer to a freezer-safe bag or container. Just thaw them in the fridge when you need a fruity, chewy pick-me-up—no flavor or texture lost.
Reheating
Gummies don’t typically need reheating, but if they seem too firm straight from the fridge or freezer, just let them sit at room temperature for 10 to 15 minutes. They’ll regain their soft, bouncy texture in no time.
FAQs
Can I use other fruits for these gummies?
Absolutely! While Tangy Homemade Sour Strawberry Gummies are unbeatable, raspberries, blueberries, or even mango can be swapped in. Each fruit brings its own color and flavor, though you may need to adjust sweetness and tartness to taste.
Is there a way to make these gummies vegetarian?
Classic gummies rely on gelatin, but you can experiment with agar-agar as a plant-based alternative. Keep in mind, the texture will be firmer and less chewy, but still tasty!
How do I adjust the level of sourness?
The sour kick comes from the citric acid coating. Start with less if you’re cautious, or add a bit more for a super tangy treat. You can sprinkle a pinch into the strawberry mixture for even bolder flavor.
Can I make these without molds?
Definitely! Simply pour the mixture into a parchment-lined baking dish and cut into bite-sized squares or strips once set. The homemade charm is part of the fun here.
Are these gummies suitable for kids?
Yes, these snacks are kid-friendly and made with real fruit and natural sweeteners. For little ones sensitive to tartness, use less citric acid in the coating or skip it entirely for a classic fruit snack flavor.
Final Thoughts
If you’re ready to relive your favorite childhood candy while skipping the artificial stuff, Tangy Homemade Sour Strawberry Gummies are calling your name! They’re juicy, sour, and so easy to make. Gather your berries, grab your molds, and treat yourself and your loved ones to a snack that’s as fun to make as it is to eat. Trust me—one batch won’t be enough!
Print
Tangy Homemade Sour Strawberry Gummies Recipe
- Total Time: 2 hours 20 minutes
- Yield: 40 small gummies 1x
- Diet: Non-Vegetarian
Description
Make your own tangy and sweet strawberry gummies at home with this easy recipe. These homemade treats are bursting with fruit flavor and have a delightful sour coating.
Ingredients
For the Gummies:
- 1 1/2 cups fresh or frozen strawberries (hulled and chopped)
- 1/4 cup lemon juice
- 2–3 tablespoons honey or maple syrup (to taste)
- 3 tablespoons unflavored gelatin powder
- 1/4 cup water
For the Coating (Optional):
- 2 tablespoons citric acid
- 2 tablespoons granulated sugar
Instructions
- Prepare the Strawberry Mixture: In a blender, combine the strawberries, lemon juice, and sweetener. Blend until smooth.
- Heat the Mixture: Transfer the strawberry puree to a saucepan and warm it over medium-low heat.
- Prepare the Gelatin: In a bowl, bloom the gelatin in water for 5 minutes. Then, stir it into the warm strawberry mixture until fully dissolved.
- Pour and Set: Pour the mixture into molds or a dish and refrigerate until firm, about 1-2 hours.
- Add the Coating: For a tangy finish, mix citric acid and sugar. Coat the gummies before serving.
Notes
- Adjust sweetness based on strawberry ripeness.
- Store in the fridge for up to 1 week.
- Coat gummies just before serving to maintain texture.
- Prep Time: 15 minutes
- Cook Time: 5 minutes
- Category: Snack
- Method: No-Bake
- Cuisine: American
Nutrition
- Serving Size: 4 gummies
- Calories: 25
- Sugar: 3g
- Sodium: 5mg
- Fat: 0g
- Saturated Fat: 0g
- Unsaturated Fat: 0g
- Trans Fat: 0g
- Carbohydrates: 4g
- Fiber: 0g
- Protein: 2g
- Cholesterol: 0mg


