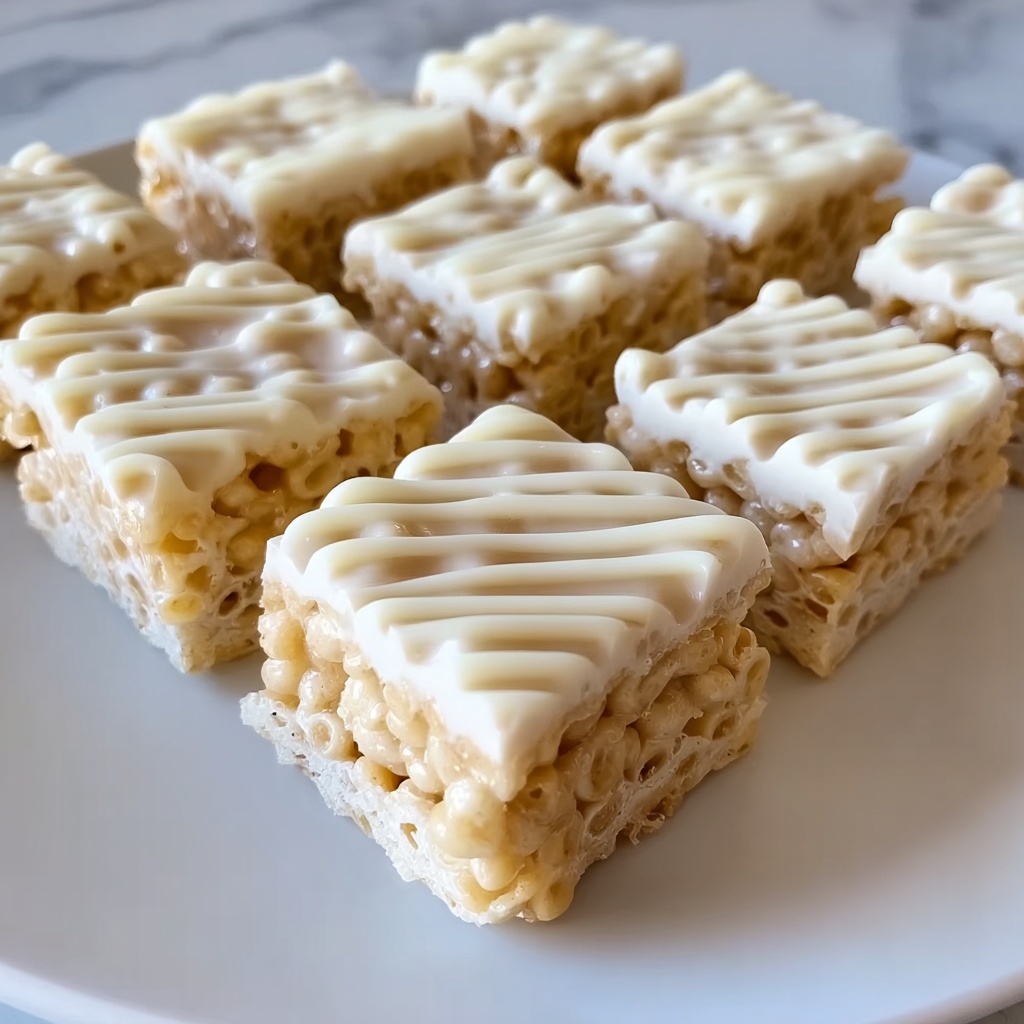
If you are looking for a truly delightful treat that combines the nostalgic crunch of Rice Krispies with the creamy indulgence of cheesecake, then these Cheesecake Rice Krispie Treats: 7 Irresistible Variations Recipe will become your new go-to dessert. This recipe elevates the classic marshmallow rice crispy with a luscious cheesecake twist, creating a perfect balance between fluffy, tangy, and crispy textures. Whether you want a crowd-pleasing party snack or a sweet pick-me-up, these treats offer versatility and sheer deliciousness that will have everyone asking for more.
Ingredients You’ll Need
Getting the right combination of ingredients is key to achieving that melt-in-your-mouth texture and rich cheesecake flavor in these treats. Each ingredient plays a vital role in the taste, texture, and even the look of your final creation.
- Rice Krispies (4 cups): The crunchy base that gives these treats their iconic crispy texture.
- Cream cheese, softened (1 cup): Adds the creamy tang that transforms traditional rice crispy treats into cheesecake delights.
- Powdered sugar (1/2 cup): Sweetens the cream cheese without gritty texture.
- Whipped topping (1/2 cup): Lightens the mixture for a smooth, fluffy finish.
- Butter (1/4 cup): Enhances richness and helps bind the crispy cereal.
- Vanilla extract (1 teaspoon): Adds a warm, aromatic depth to complement the cream cheese.
How to Make Cheesecake Rice Krispie Treats: 7 Irresistible Variations Recipe
Step 1: Prepare the Cream Cheese Mixture
Begin by whisking together the softened cream cheese, powdered sugar, and vanilla extract in a large bowl. This mixture forms the luscious cheesecake base, setting the stage for those irresistible creamy notes that will contrast beautifully with the crunch.
Step 2: Melt and Mix the Butter with Rice Krispies
In a separate bowl, gently melt the butter until silky smooth, then add the Rice Krispies and toss until every crispy piece gets coated. This step ensures that the cereal will stick together nicely without losing any of its signature snap.
Step 3: Combine Both Mixtures
Next, fold the buttery Rice Krispies into the cream cheese mixture carefully. The goal is to gently blend without crushing the cereal, so you maintain that satisfying crunch while enveloping it in creamy softness.
Step 4: Press the Mixture Into a Greased Pan
Once combined, transfer the blend into a greased pan and press down evenly. Taking care to firmly pack it helps the treats hold together when you cut them into squares, making them easier to grab and enjoy.
Step 5: Chill Until Set
Refrigerate the dish for about two hours or until fully set. This chilling time is essential to let the flavors meld and firm up the texture so the treats slice cleanly without falling apart.
Step 6: Cut and Serve
Finally, slice the chilled mixture into squares or your favorite shapes and serve. These treats look as delightful as they taste and will be the star of any dessert table.
How to Serve Cheesecake Rice Krispie Treats: 7 Irresistible Variations Recipe
Garnishes
Sprinkle your Cheesecake Rice Krispie Treats with a dusting of crushed graham crackers or a drizzle of melted white chocolate for an elegant touch. Fresh berries or a few mini chocolate chips on top add a burst of color and flavor that invite guests to dive right in.
Side Dishes
Pair these treats with a dollop of fresh whipped cream or a scoop of vanilla bean ice cream for an extra indulgent dessert experience. They also complement a hot cup of coffee or tea perfectly, making snack time feel special and cozy.
Creative Ways to Present
Consider cutting the treats into fun shapes using cookie cutters for birthdays or holiday celebrations. Layer them in clear glass jars or decorative boxes as charming edible gifts. For a party, stack them on a platter with skewers, alternating with slices of fresh fruit for bursts of freshness.
Make Ahead and Storage
Storing Leftovers
Keep any leftovers in an airtight container at room temperature for up to 3 days or refrigerate for up to a week. This helps maintain the perfect chewy yet creamy texture without drying out or becoming soggy.
Freezing
To make these treats last even longer, wrap individual squares tightly in plastic wrap and place in a freezer-safe bag. They can freeze well for up to a month. When ready to enjoy, simply thaw at room temperature for a few hours before serving.
Reheating
Reheating is not necessary but if you prefer a softer texture, briefly microwave a treat for about 10-15 seconds. Be careful not to overheat or they could become overly soft and lose their structure.
FAQs
Can I use a different cereal instead of Rice Krispies?
Absolutely! While Rice Krispies provide the classic crunch, you can experiment with cereals like Cocoa Krispies, Fruity Pebbles, or even Cheerios for fun variations in flavor and color.
Is it necessary to chill the treats before cutting?
Yes, chilling helps the mixture set firmly so the treats hold their shape and slice cleanly. Without this step, they may be too sticky and fall apart when cut.
Can I make these treats vegan or dairy-free?
To adapt this recipe, substitute cream cheese with a dairy-free alternative and use vegan butter. Make sure to check the cereal ingredients for any hidden animal products as well.
How long do these treats stay fresh?
Stored properly in an airtight container, they stay fresh for about 3-5 days at room temperature or up to a week refrigerated.
Can I add mix-ins like chocolate chips or nuts?
Definitely! Adding chocolate chips, nuts, or dried fruit can add extra texture and flavor, making your Cheesecake Rice Krispie Treats: 7 Irresistible Variations Recipe even more exciting and personalized.
Final Thoughts
This Cheesecake Rice Krispie Treats: 7 Irresistible Variations Recipe is a magical way to bring two timeless favorites together in one scrumptious bite. It’s easy, rewarding, and endlessly customizable to fit any occasion or craving. I promise once you try it, these treats will become a staple you’ll love to share again and again!
Print
Cheesecake Rice Krispie Treats: 7 Irresistible Variations Recipe
- Prep Time: 15 minutes
- Cook Time: 5 minutes (melting butter and mixing)
- Total Time: 2 hours 20 minutes
- Yield: 12 servings
- Category: Dessert
- Method: No-Cook
- Cuisine: American
Description
Delightfully creamy and crunchy, these Cheesecake Rice Krispie Treats combine the classic marshmallow treat with a luscious cheesecake twist. Perfectly soft cream cheese blends with sweet powdered sugar and vanilla, mingling with crispy Rice Krispies coated in melted butter. Chilled to set, these no-bake treats are ideal for easy dessert anytime.
Ingredients
Main Ingredients
- 4 cups Rice Krispies
- 1 cup cream cheese, softened
- 1/2 cup powdered sugar
- 1/2 cup whipped topping
- 1/4 cup butter
- 1 teaspoon vanilla extract
Instructions
- Mix the cheesecake base: In a large bowl, thoroughly combine the softened cream cheese, powdered sugar, and vanilla extract until smooth and creamy, creating the cheesecake mixture.
- Prepare Rice Krispies mixture: In a separate microwave-safe or stovetop-safe bowl, melt the butter completely. Once melted, add the Rice Krispies cereal and gently stir until all the cereal pieces are evenly coated with butter.
- Combine mixtures: Pour the buttery Rice Krispies into the cream cheese mixture. Fold together gently until all the cereal is fully incorporated and the mixture is evenly blended.
- Press into pan: Lightly grease a baking pan and transfer the mixture into it. Using a spatula or your hands, press the mixture firmly and evenly into the pan to form a compact layer for optimal shaping.
- Chill to set: Place the pan in the refrigerator and chill for approximately 2 hours. This step allows the mixture to firm up and meld into chewy, sliceable bars.
- Serve: Remove from refrigerator, cut the set mixture into squares or desired shapes, and serve chilled for a refreshing treat.
Notes
- Use softened cream cheese for easier mixing and smoother texture.
- Press mixture firmly into the pan to help bars hold together after chilling.
- For variations, add mix-ins like chocolate chips, berries, or nuts before chilling.
- Store treats in an airtight container in the refrigerator for up to 3 days to maintain freshness.


