Butterfinger Balls Recipe
If you’re looking for a downright delightful treat packed with peanut butter, chocolate, and crunchy nostalgia, you need to try Butterfinger Balls. This no-bake dessert is outrageously easy to whip up, requires just a handful of familiar ingredients, and delivers that iconic Butterfinger flavor in every irresistibly creamy, chocolate-dipped bite. Perfect for parties, holiday trays, or that late-night sweet tooth, these little morsels are dangerously delicious and bound to become a favorite in your dessert repertoire.
Ingredients You’ll Need
One of the best things about Butterfinger Balls is the simple lineup of ingredients, each playing a starring role in flavor and texture. This recipe proves that you don’t need anything fancy or complicated to make an indulgent treat!
- Nutter Butter cookies: These peanut butter cookies bring soft, crumbly texture and a delicious peanutty backbone to the filling.
- Cream cheese (softened): Creamy and tangy, this ingredient binds everything together and gives each ball that melt-in-your-mouth richness.
- Butterfinger candy bars (crushed): The real magic! These add signature crispity, crunchy, peanut-buttery bursts in every single bite.
- Milk chocolate or semi-sweet chocolate (for coating): Whether you’re a milk chocolate loyalist or love bolder semi-sweet, both give a glorious shell and contrast the interior.
- Coconut oil or shortening (optional): Just a splash makes the melted chocolate silky smooth and easier for dunking.
How to Make Butterfinger Balls
Step 1: Crush the Cookies
Begin by finely crushing your Nutter Butter cookies. You can blitz them in a food processor for super-fine crumbs, or add them to a sealed bag and crush with a rolling pin (great for kids to help!). Aim for a sandy consistency, no big chunks.
Step 2: Mix the Filling
Add the crushed cookies to a mixing bowl along with softened cream cheese and 1 cup of the crushed Butterfinger candy bars. Use a spatula or your hands to thoroughly combine the mixture until it’s smooth, creamy, and speckled with Butterfinger bits. The filling should hold its shape but still feel sticky and pliable.
Step 3: Shape the Balls
Roll the mixture into 1-inch balls using your hands or a small cookie scoop. Place each ball onto a parchment-lined baking sheet, leaving space between them to prevent sticking. You’ll end up with about 30 perfectly-portioned treats, ready for chocolate action.
Step 4: Chill Until Firm
Pop the tray of uncoated balls into the refrigerator for at least 30 minutes, or up to an hour. Chilling firms up the filling and makes dipping so much easier—no sticky fingers, no mess, just tidy little spheres.
Step 5: Melt and Dip in Chocolate
While the balls chill, melt your chocolate (and coconut oil or shortening, if using) in the microwave in short bursts, stirring until glossy and smooth. Working with a fork or dipping tool, dunk each cold ball into the melted chocolate, ensuring it gets a full, luscious coating. Gently tap off any excess before placing back on the tray.
Step 6: Garnish and Set
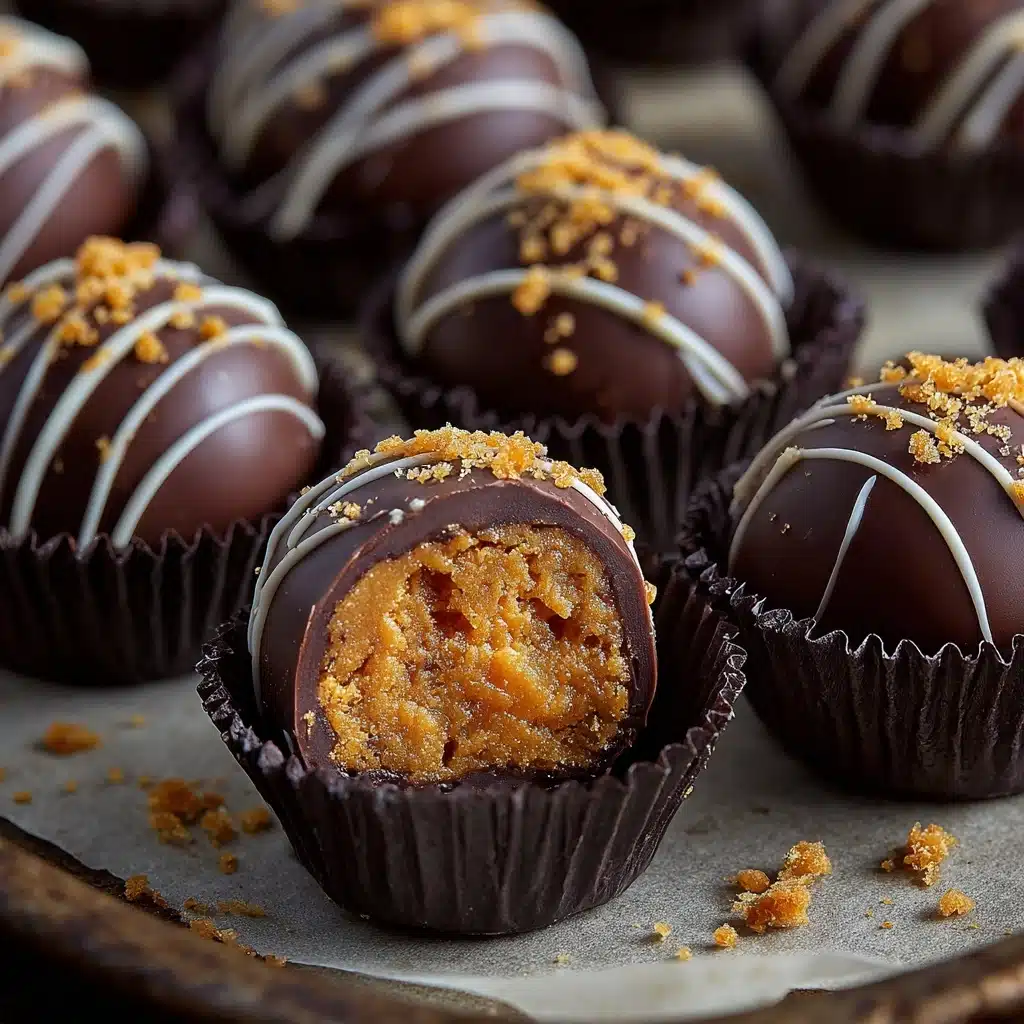
Immediately after dipping each Butterfinger Ball, sprinkle the tops with the reserved crushed Butterfinger candy bars while the chocolate is still wet. This not only identifies what’s inside, but also adds crunch and glorious color. Return to the fridge for the chocolate to set fully—then enjoy!
How to Serve Butterfinger Balls

Garnishes
The beauty of Butterfinger Balls is that they already sparkle with a shower of crushed candy on top! For a bit of flair, you might also drizzle the chocolate coating with a tiny bit of white chocolate or sprinkle with festive colored sugars for special occasions.
Side Dishes
These creamy, crunchy bites pair beautifully with a cup of hot coffee, cold milk, or even a scoop of vanilla ice cream on the side. If you’re hosting, add them to a platter with fresh strawberries, chocolate-dipped pretzels, or mini brownies for dessert variety.
Creative Ways to Present
Show off your Butterfinger Balls by arranging them on tiered cake stands or nestled in cute mini cupcake liners. Try stacking them into a festive tower for celebrations, or packaging them in clear boxes with ribbon for gift-giving—every recipient will think you’re a confectionery genius!
Make Ahead and Storage
Storing Leftovers
Butterfinger Balls store wonderfully in an airtight container in the refrigerator for up to a week. Layer parchment or wax paper between the balls to keep them from sticking together, ensuring every bite stays picture-perfect.
Freezing
If you want to prep ahead or save a batch for a later treat, these freeze like a dream. Arrange the balls in a single layer in a freezer-safe container, separated by parchment paper. They’ll keep well for up to 2 months—plus, they’re delicious straight from the freezer for an extra-cool treat on summer days.
Reheating
No reheating needed for Butterfinger Balls! Simply let any frozen ones thaw in the fridge for 20-30 minutes, or enjoy them chilled straight from the fridge or freezer. The texture stays fudgy and the flavors shine through beautifully.
FAQs
Can I use other cookies instead of Nutter Butter?
Absolutely! While Nutter Butters provide a signature peanut butter flavor, you can swap in golden Oreos, graham crackers, or peanut butter sandwich cookies. Just note the flavor will shift slightly, but the texture will still be great.
What’s the best way to crush Butterfinger bars?
For even pieces and less mess, unwrap the Butterfinger bars and pop them into a plastic bag. Use a rolling pin or meat mallet to crush them to your desired size—you want some powdery bits and some bigger crunchy shards for texture.
Can I make Butterfinger Balls without a food processor?
Yes! While a food processor makes quick work of the cookies, you can easily crush them in a zip-top bag with a rolling pin. The filling will still mix together smoothly by hand or with a sturdy spoon.
Can I make this recipe dairy free or vegan?
You can experiment by swapping in dairy-free cream cheese and using vegan chocolate for the coating. Keep in mind Butterfinger candy bars and Nutter Butters may contain dairy or animal products, so check labels or substitute with your favorite alternatives.
Do Butterfinger Balls need to be refrigerated?
Yes, because of the cream cheese in the filling, they should be kept chilled when not serving. This keeps them fresh, safe to eat, and preserves that creamy, luscious texture everyone loves.
Final Thoughts
If you’re craving a playful, crowd-pleasing dessert, Butterfinger Balls are simply impossible to resist. Give them a try—you might just find yourself making a double batch once friends and family get a taste. Don’t be surprised if these sweet, crunchy, chocolate-dipped treats disappear faster than you can say “Butterfinger Balls”!
Print
Butterfinger Balls Recipe
- Total Time: 1 hour (including chilling)
- Yield: 30 balls 1x
- Diet: Vegetarian
Description
Indulge in these irresistible Butterfinger Balls, a delightful no-bake treat that combines the creamy goodness of Nutter Butter cookies and cream cheese with the crunch of Butterfinger candy bars, all coated in rich chocolate. Perfect for satisfying your sweet tooth!
Ingredients
Nutter Butter Cookie Mixture:
- 1 (16-ounce) package Nutter Butter cookies
- 8 ounces cream cheese, softened
- 1 ½ cups crushed Butterfinger candy bars
Coating:
- 12 ounces milk chocolate or semi-sweet chocolate
- 1 tablespoon coconut oil or shortening (optional, for smoother coating)
Instructions
- Prepare Cookie Mixture: Crush Nutter Butter cookies finely. Combine crushed cookies, softened cream cheese, and 1 cup of crushed Butterfinger candy bars until smooth.
- Form Balls: Roll the mixture into 1-inch balls and place on a parchment-lined baking sheet. Chill for 30–60 minutes until firm.
- Coat Balls: Melt chocolate with coconut oil or shortening. Dip each chilled ball into the melted chocolate, coating completely. Sprinkle with remaining crushed Butterfinger pieces.
- Chill and Serve: Refrigerate until chocolate is set before serving.
Notes
- These Butterfinger Balls can be frozen for up to 2 months and enjoyed straight from the freezer for a refreshing treat.
- For a peanut butter variation, add 2 tablespoons of peanut butter to the filling mixture.
- Prep Time: 30 minutes
- Cook Time: 0 minutes
- Category: Dessert
- Method: No-Bake
- Cuisine: American
Nutrition
- Serving Size: 1 ball
- Calories: 140
- Sugar: 11 g
- Sodium: 90 mg
- Fat: 8 g
- Saturated Fat: 4 g
- Unsaturated Fat: 4 g
- Trans Fat: 0 g
- Carbohydrates: 15 g
- Fiber: 1 g
- Protein: 2 g
- Cholesterol: 10 mg