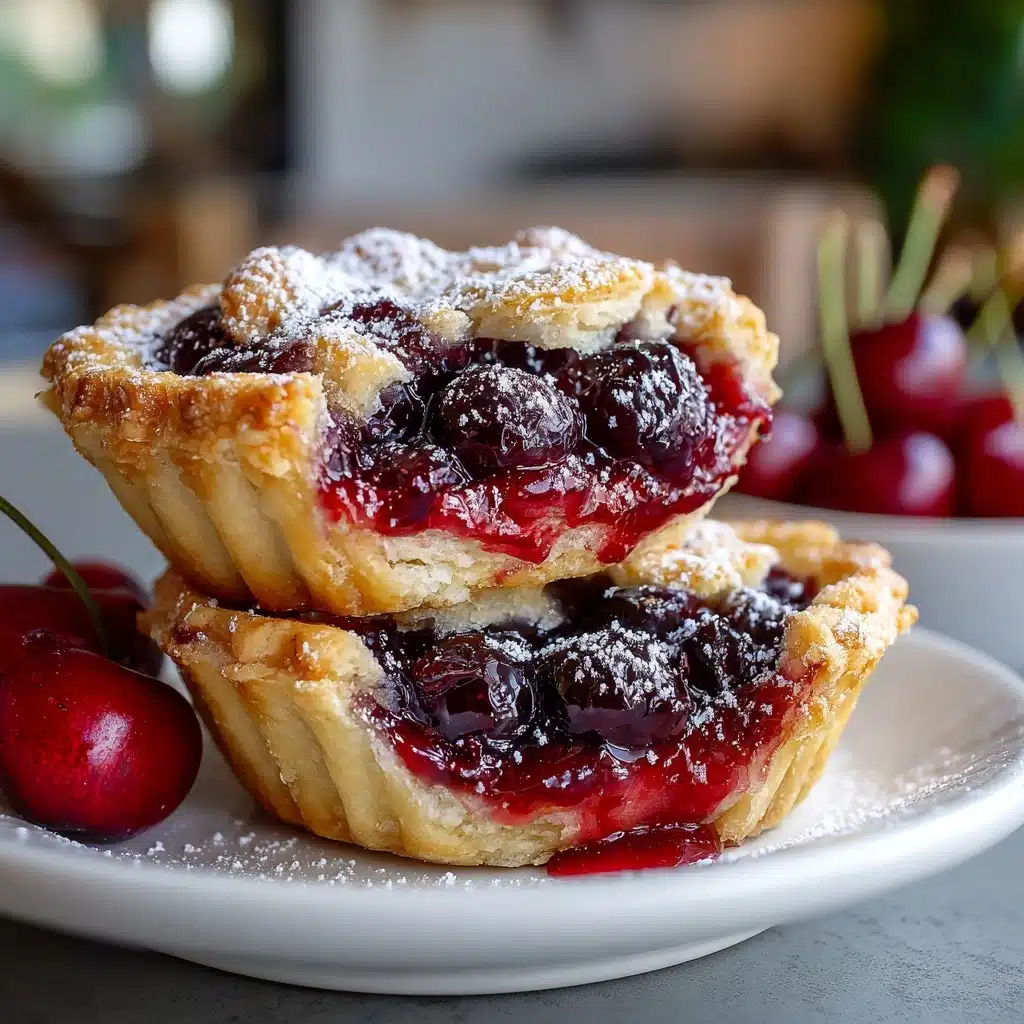
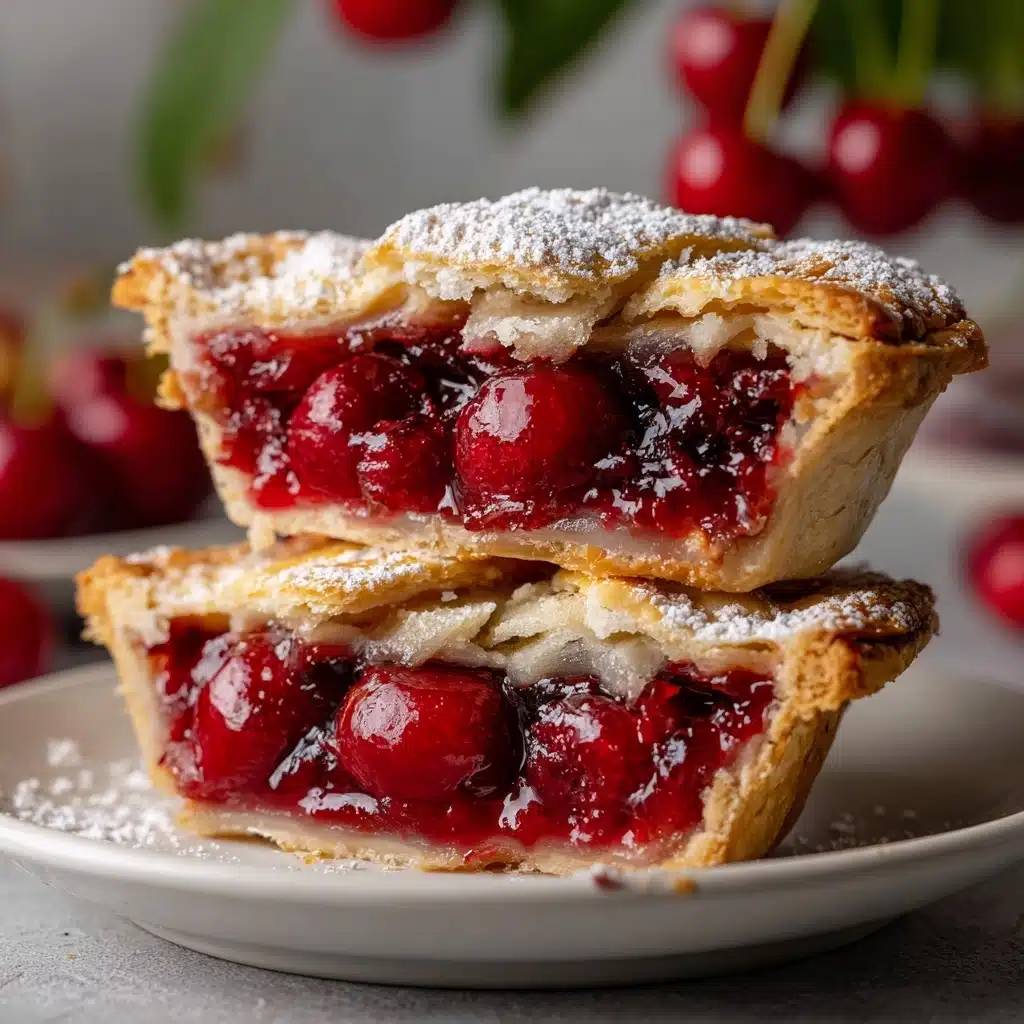
Mini Cherry Pies Recipe
Mini Cherry Pies are the ultimate celebration of sweet summer cherries wrapped up in a golden, flaky crust – all conveniently sized for handheld happiness. Whether you’re looking for a fun baking project, a show-stopping dessert for your next party, or an easy way to charm your family on a weeknight, these pies deliver with their irresistible mix of buttery pastry, glossy cherry filling, and a sparkle of sugar on top. I promise, once you try one, you’ll be as obsessed as I am!
Ingredients You’ll Need
-
Ingredients:
- 1 package refrigerated pie crusts (2 crusts)
- 1 can (21 ounces) cherry pie filling
- 1 egg beaten
- 1 tablespoon water
- 1 tablespoon granulated sugar
How to Make Mini Cherry Pies
Step 1: Prep Your Oven and Tools
Start by preheating your oven to 375°F (190°C), so it’s hot and ready just as your pies are assembled. Lightly flour your work surface to prevent sticking, and get your muffin tin out—this will be the mold for your Mini Cherry Pies’ perfectly shaped crusts.
Step 2: Shape the Crusts
Unroll your refrigerated pie crusts and, using a biscuit cutter or even a drinking glass, cut out circles around 4 inches in diameter. Gently press each circle into the muffin tin cups, making sure the edges rise up the sides to form cute little pie bases. Don’t worry if the crusts aren’t perfectly even—rustic charm is part of the fun!
Step 3: Fill with Cherry Love
Spoon about 2–3 tablespoons of cherry pie filling into each crust-lined muffin cup. The generous filling bubbles up while baking, so don’t skimp—but do leave a little space at the top to avoid overflow. If you’re feeling adventurous, sprinkle a dash of cinnamon sugar at this stage for an extra cozy flavor boost.
Step 4: Top with Lattice or Shapes
Gather up your dough scraps, roll them back out, and cut thin strips for a classic lattice top, or use small cookie cutters for adorable stars or hearts. Lay your chosen design over the filling. No matter which route you take, these Mini Cherry Pies end up absolutely charming.
Step 5: Egg Wash & Sugar Sparkle
In a small bowl, whisk together the egg and water to make your egg wash. Brush the mixture lightly over each crust—this is the secret to that gorgeous golden color. Then, sprinkle a little granulated sugar over the tops for a hint of sweet crunch and irresistible sparkle.
Step 6: Bake to Perfection
Pop the muffin tin into your preheated oven and bake for 20–25 minutes. The crusts should turn a lovely golden brown, and you’ll see the cherry filling bubbling merrily. Your kitchen will smell incredible!
Step 7: Cool and Enjoy
Let the pies cool in the pan for about 10 minutes; this helps them firm up and makes them easier to remove. Carefully transfer each mini pie to a wire rack to finish cooling. If you sneak one while they’re still warm, I wouldn’t blame you one bit!
How to Serve Mini Cherry Pies

Garnishes
For an extra flourish, dust your Mini Cherry Pies with a little powdered sugar, or top with a dollop of softly whipped cream or a scoop of vanilla ice cream. A sprig of mint lends a fresh, pretty contrast and takes these little beauties from homey to totally photo-worthy.
Side Dishes
Serve alongside a scoop of ice cream for that classic pie experience, or pair with a fruit salad for a lighter touch. If you’re doing a dessert buffet, these pies nestle perfectly next to brownies, lemon bars, or an assortment of cookies.
Creative Ways to Present
Try arranging these Mini Cherry Pies in a tiered stand for elegant afternoon teas, or box them up with ribbon as adorable edible party favors. I also love serving them picnic-style, scattered on a rustic wooden board with other hand-held desserts for a casual gathering outdoors.
Make Ahead and Storage
Storing Leftovers
If you’re lucky enough to have leftovers, store these Mini Cherry Pies in an airtight container at room temperature for up to two days, or refrigerate for three to four days. Just let them cool completely first to avoid soggy crusts.
Freezing
To freeze, arrange the cooled pies in a single layer on a baking sheet and chill until solid. Then transfer to a zip-top freezer bag or airtight container—these will keep beautifully for up to two months. Thaw at room temperature or in the fridge before serving.
Reheating
To enjoy that just-baked taste and texture, pop your Mini Cherry Pies in a 325°F oven for about 5–10 minutes. This revives the flakiness of the crust and makes the cherry filling gooey once again—almost as good as fresh!
FAQs
Can I use homemade cherry pie filling?
Absolutely! While the canned version is super convenient and tasty, homemade cherry pie filling brings an extra burst of fresh flavor. Just make sure your filling isn’t too liquidy, so your Mini Cherry Pies hold together nicely.
Do I need to grease the muffin tin?
Using a nonstick muffin tin usually does the trick, but a very light spray of nonstick cooking spray or a brush of melted butter can guarantee those pies pop out easily. Make sure not to overdo it, as too much can affect the bottom crust’s texture.
Can I make these with other fruit fillings?
Definitely! The base recipe works wonders with blueberry, apple, peach, or even a mixed berry filling. Just follow the same steps and adjust the spices if you want to try something new. Mini Cherry Pies are delicious, but don’t be afraid to experiment.
How do I prevent soggy bottoms?
A quick trick is to avoid overly juicy fillings and not overfill the crusts. Baking the pies until they’re deeply golden also helps keep everything crisp. Let the pies rest a bit after baking so the structure sets before removing them from the tin.
Can I make Mini Cherry Pies ahead of time?
Yes! You can make and bake them the day before and store them in an airtight container. If you want to get ahead even more, prep and freeze the unbaked pies, then bake straight from the freezer—just add a few extra minutes to the baking time.
Final Thoughts
If you’re looking for a way to make any day feel a bit more special, you truly can’t go wrong with a batch of Mini Cherry Pies. They’re fun to make, endlessly charming to serve, and almost impossible to resist. I can’t wait for you to share these sweet little bites with your loved ones—go ahead and treat yourself!
Print
Mini Cherry Pies Recipe
- Total Time: 40 minutes
- Yield: 10–12 mini pies 1x
- Diet: Vegetarian
Description
These Mini Cherry Pies are perfect for a sweet treat. With a flaky crust and juicy cherry filling, they are easy to make and a delightful dessert for any occasion.
Ingredients
Ingredients:
- 1 package refrigerated pie crusts (2 crusts)
- 1 can (21 ounces) cherry pie filling
- 1 egg beaten
- 1 tablespoon water
- 1 tablespoon granulated sugar
Instructions
- Preheat Oven: Preheat oven to 375°F (190°C).
- Prepare Crusts: Unroll pie crusts on a lightly floured surface and cut out circles. Press each circle into the muffin tin.
- Add Filling: Spoon cherry pie filling into each crust.
- Add Top Crust: Create a lattice top or decorative shapes with remaining dough. Place over the filling.
- Egg Wash: Whisk egg with water, brush over crusts.
- Bake: Sprinkle with sugar and bake for 20–25 minutes until golden.
- Cool and Serve: Cool in pan for 10 minutes, then transfer to a wire rack.
Notes
- For a richer flavor, sprinkle cinnamon sugar over the cherry filling before baking.
- Pies can also be made with blueberry, apple, or peach filling.
- Prep Time: 15 minutes
- Cook Time: 25 minutes
- Category: Dessert
- Method: Baking
- Cuisine: American
Nutrition
- Serving Size: 1 mini pie
- Calories: 210
- Sugar: 13 g
- Sodium: 170 mg
- Fat: 9 g
- Saturated Fat: 3 g
- Unsaturated Fat: 5 g
- Trans Fat: 0 g
- Carbohydrates: 31 g
- Fiber: 1 g
- Protein: 2 g
- Cholesterol: 15 mg