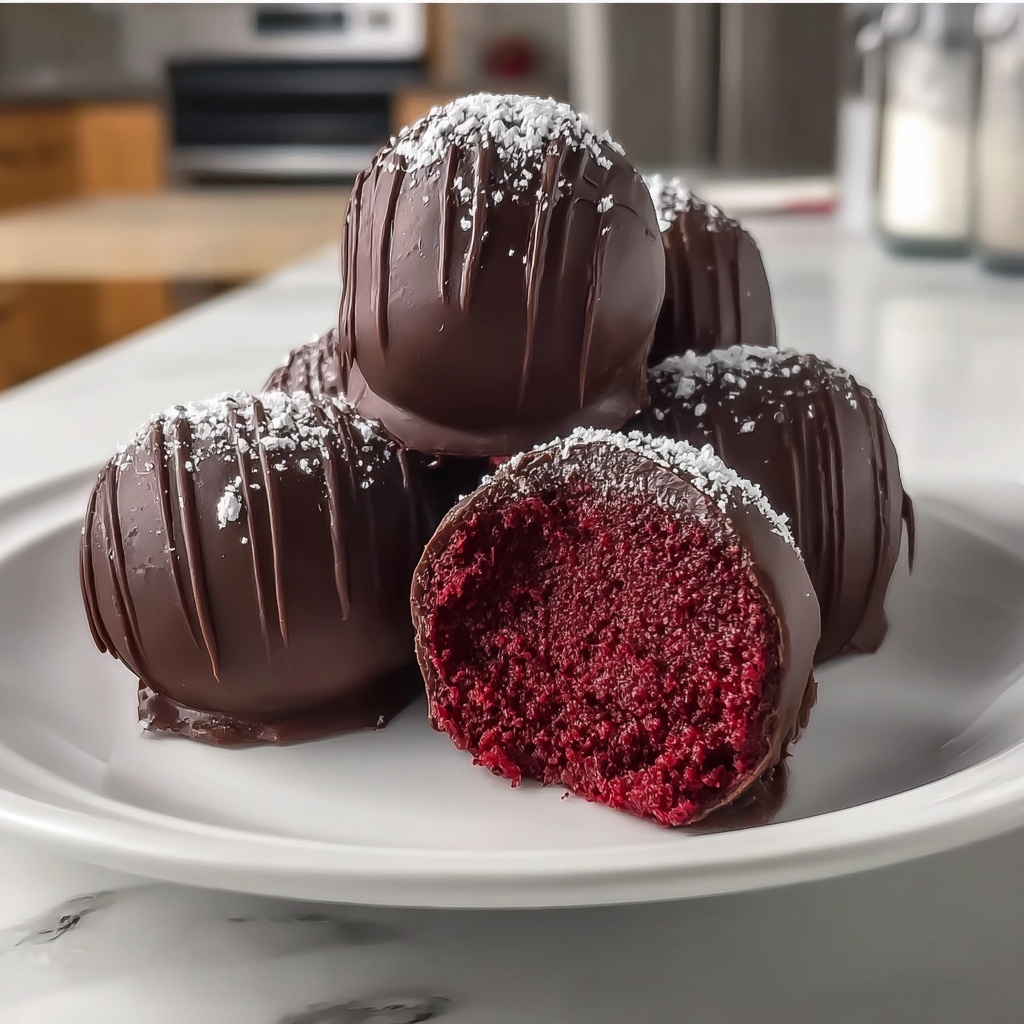
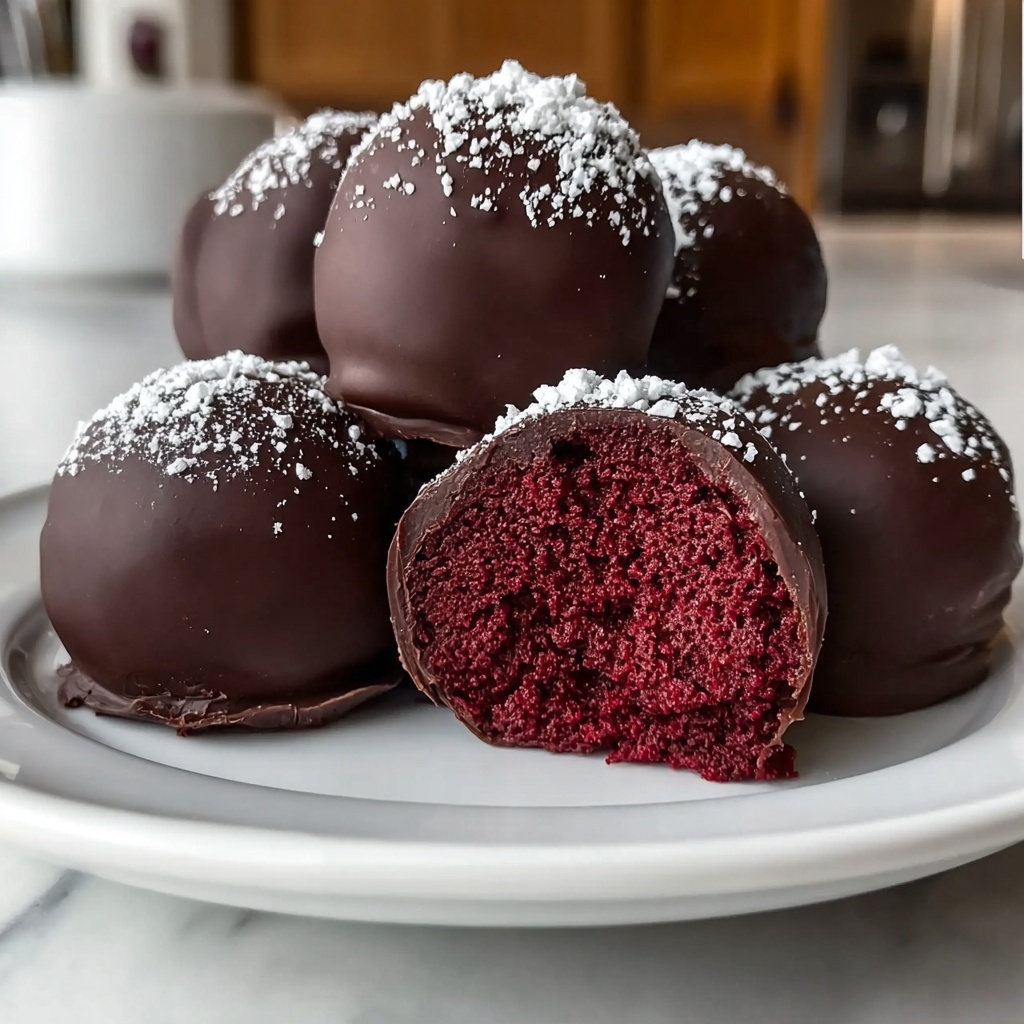
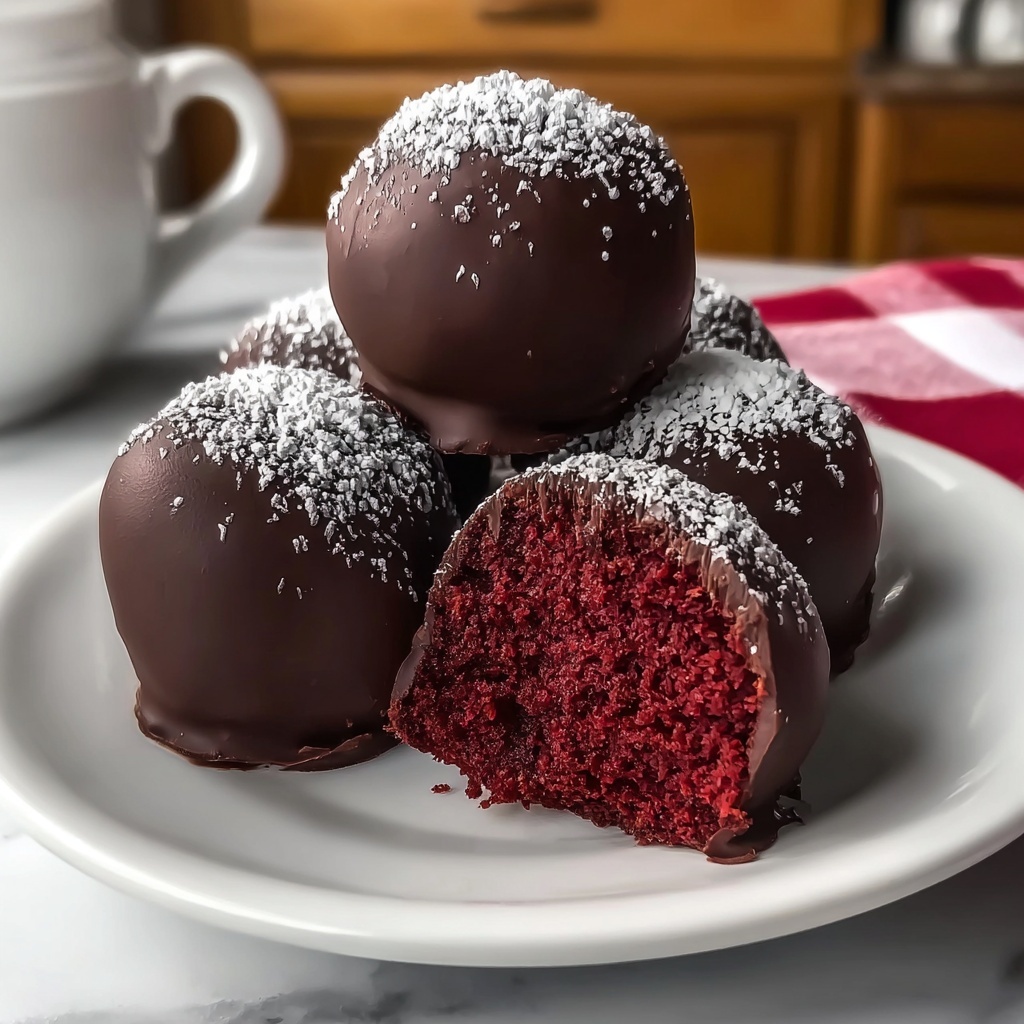
If you are craving a delightful dessert that is both rich and exceptionally easy to make, this No Bake Red Velvet Cake Balls Recipe is your new best friend. Imagine bite-sized bundles of moist red velvet cake mixed with luscious cream cheese and dipped in silky chocolate, creating a perfect harmony of flavors and textures without ever turning on your oven. Whether you’re prepping for a party, a quick treat, or a special occasion, these no bake delights are sure to become a household favorite that everyone will rave about.
Ingredients You’ll Need
The magic of this No Bake Red Velvet Cake Balls Recipe lies in its simplicity and the quality of its ingredients. Each one plays a crucial role: from the iconic red velvet cake mix delivering that vibrant color and nuanced flavor, to the cream cheese that adds creamy richness, and the chocolate chips that provide a luscious coating. Here’s what you need to gather before you start whipping up these irresistible cake balls.
- 1 cup red velvet cake mix: The base that gives both the cake balls their signature color and subtle cocoa flavor.
- 1/2 cup cream cheese, softened: Adds a tangy creaminess that balances the sweetness and keeps the mixture moist.
- 1/4 cup powdered sugar: Sweetens the mix without graininess, allowing for a smooth texture.
- 1 teaspoon vanilla extract: Enhances the overall flavor with a warm, inviting aroma.
- 1 cup chocolate chips: For the rich, glossy coating that makes each bite simply decadent.
How to Make No Bake Red Velvet Cake Balls Recipe
Step 1: Mix the Cake Base
Start by combining the red velvet cake mix, softened cream cheese, powdered sugar, and vanilla extract in a large bowl. Stir everything together until you achieve a smooth, uniform mixture. This blend is the heart of your No Bake Red Velvet Cake Balls Recipe, striking the perfect balance between sweet and tangy with that signature red velvet flair.
Step 2: Shape into Balls
Once your mixture is ready, it’s time for some hands-on fun. Roll the mixture into small, bite-sized balls using your hands. Aim for uniformity in size so they cook evenly when dipped in chocolate later. This step lets you get creative with portion sizes and adds a personal touch to your dessert experience.
Step 3: Chill to Set
Place the rolled cake balls into the refrigerator and chill them for 30 minutes. This resting period firms them up, making it easier to dip in the chocolate coating later on. It also helps the flavors to meld, so each bite is bursting with that luscious red velvet goodness.
Step 4: Melt the Chocolate
While your cake balls are chilling, melt the chocolate chips. You can do this by heating them gently in the microwave in short bursts, stirring frequently, or by using a double boiler for a smooth, glossy finish. Be careful not to overheat to keep the chocolate silky and perfect for dipping.
Step 5: Dip and Set
Now for the most satisfying part: dunk each chilled cake ball into the melted chocolate, making sure it is completely covered. Place them on a baking sheet lined with parchment paper. Let the chocolate set at room temperature or pop them back into the fridge until the coating is firm. Your No Bake Red Velvet Cake Balls Recipe is now ready for the spotlight!
How to Serve No Bake Red Velvet Cake Balls Recipe
Garnishes
To elevate your cake balls, consider sprinkling a pinch of crushed red velvet cake crumbs, white chocolate shavings, or even a dash of edible glitter on the chocolate coating before it sets. These garnishes not only add visual appeal but extra texture that complements the silkiness of the chocolate dip.
Side Dishes
While No Bake Red Velvet Cake Balls Recipe shines as a stand-alone treat, pairing them with a light dessert wine, a classic cup of coffee, or a refreshing glass of milk creates a delightful balance. For gatherings, serve alongside fresh berries or a creamy cheesecake for a decadent dessert spread.
Creative Ways to Present
Try arranging your cake balls in colorful cupcake liners or on decorative plates to make them pop at any event. You can also thread them onto skewers with alternating fruit for a playful dessert kabob that’s perfect for parties or kids’ celebrations. Presentation matters and these ideas make it easy to impress with minimal effort.
Make Ahead and Storage
Storing Leftovers
If you happen to have any leftovers from your No Bake Red Velvet Cake Balls Recipe, store them in an airtight container in the refrigerator. They’ll stay fresh for up to 5 days, giving you plenty of opportunities to enjoy that rich flavor without losing texture or taste.
Freezing
These cake balls freeze beautifully. Lay them out on a baking sheet to freeze individually first, then transfer to a freezer-safe container or bag. When stored properly, they can last up to 3 months, making them a perfect make-ahead dessert for unexpected guests or future celebrations.
Reheating
When you’re ready to enjoy frozen No Bake Red Velvet Cake Balls Recipe, simply let them thaw overnight in the refrigerator. Avoid microwaving to preserve their creamy texture, but if you want a slightly softer bite, leave them at room temperature for 15 to 20 minutes before serving.
FAQs
Can I use a different cake mix for this recipe?
While you can experiment with other flavors, red velvet is the star of this No Bake Red Velvet Cake Balls Recipe because of its unique flavor and color. Using other mixes will change the taste and appearance, but chocolate or vanilla cake mixes could work if you’re looking for a variation.
Is it necessary to chill the cake balls before dipping?
Yes, chilling the cake balls is essential because it firms them up, making the dipping process much easier and helping the chocolate to set smoothly without cracking or melting the cake inside.
What type of chocolate works best for coating?
Semi-sweet or milk chocolate chips are ideal for coating these cake balls. They melt easily and offer a lovely balance to the sweet, tangy cake mixture. White chocolate is an option if you want a different flavor and look, but it tends to be sweeter.
Can I add fillings or mix-ins to the cake balls?
Absolutely! Feel free to mix in chopped nuts, mini chocolate chips, or even a hint of liqueur to give your No Bake Red Velvet Cake Balls Recipe a unique twist. Just be sure to adjust the moisture content to maintain the right consistency for rolling.
How long do these cake balls last at room temperature?
Due to the cream cheese and chocolate contents, it’s best to keep these cake balls refrigerated and avoid leaving them out at room temperature for more than two hours to maintain freshness and food safety.
Final Thoughts
If you want a dessert that feels luxurious but requires minimal effort, you simply must try this No Bake Red Velvet Cake Balls Recipe. It’s a fun, hands-on treat that delivers on taste, texture, and that irresistible red velvet flair in every bite. Gather your ingredients, invite a friend to help, and watch these little delights disappear fast!
Print
No Bake Red Velvet Cake Balls Recipe
- Prep Time: 15 minutes
- Cook Time: 0 minutes
- Total Time: 45 minutes
- Yield: 12 servings
- Category: Dessert
- Method: No-Cook
- Cuisine: American
Description
Delight in the luscious sweetness of these No Bake Red Velvet Cake Balls, a simple yet indulgent treat made by blending moist red velvet cake mix with cream cheese, then coated in rich melted chocolate. Perfect for a quick dessert or party snack, these bite-sized delights offer pure bliss in every bite with minimal effort and no baking required.
Ingredients
Red Velvet Cake Ball Mixture
- 1 cup red velvet cake mix
- 1/2 cup cream cheese, softened
- 1/4 cup powdered sugar
- 1 teaspoon vanilla extract
Coating
- 1 cup chocolate chips
Instructions
- Mix Ingredients: In a large bowl, combine the red velvet cake mix, softened cream cheese, powdered sugar, and vanilla extract. Use a spoon or your hands to thoroughly mix until the mixture becomes smooth and evenly blended, forming a dough-like consistency.
- Form Balls: Roll the mixture into small, bite-sized balls using your hands. Aim for uniform sizes to help ensure even chilling and coating.
- Chill: Place the cake balls on a tray or plate and refrigerate them for 30 minutes. This step firms them up, making the next step easier.
- Melt Chocolate: Melt the chocolate chips in a microwave-safe bowl by heating in 20-30 second intervals, stirring between each, or melt them gently using a double boiler over simmering water until smooth.
- Coat Cake Balls: Dip each chilled cake ball into the melted chocolate, ensuring it is fully covered. Place the coated balls on a baking sheet lined with parchment paper or a silicone mat.
- Set Chocolate: Allow the chocolate to set at room temperature or in the refrigerator until firm, about 15-20 minutes. Once set, the cake balls are ready to serve and enjoy.
Notes
- Make sure the cream cheese is softened to room temperature for easier mixing.
- Use parchment paper or a silicone baking mat to prevent sticking when chocolate coating sets.
- You can substitute chocolate chips with white chocolate or colored candy melts to customize appearance and flavor.
- Store cake balls in an airtight container in the refrigerator for up to 5 days.
- Bring the cake balls to room temperature before serving for best texture and flavor.


