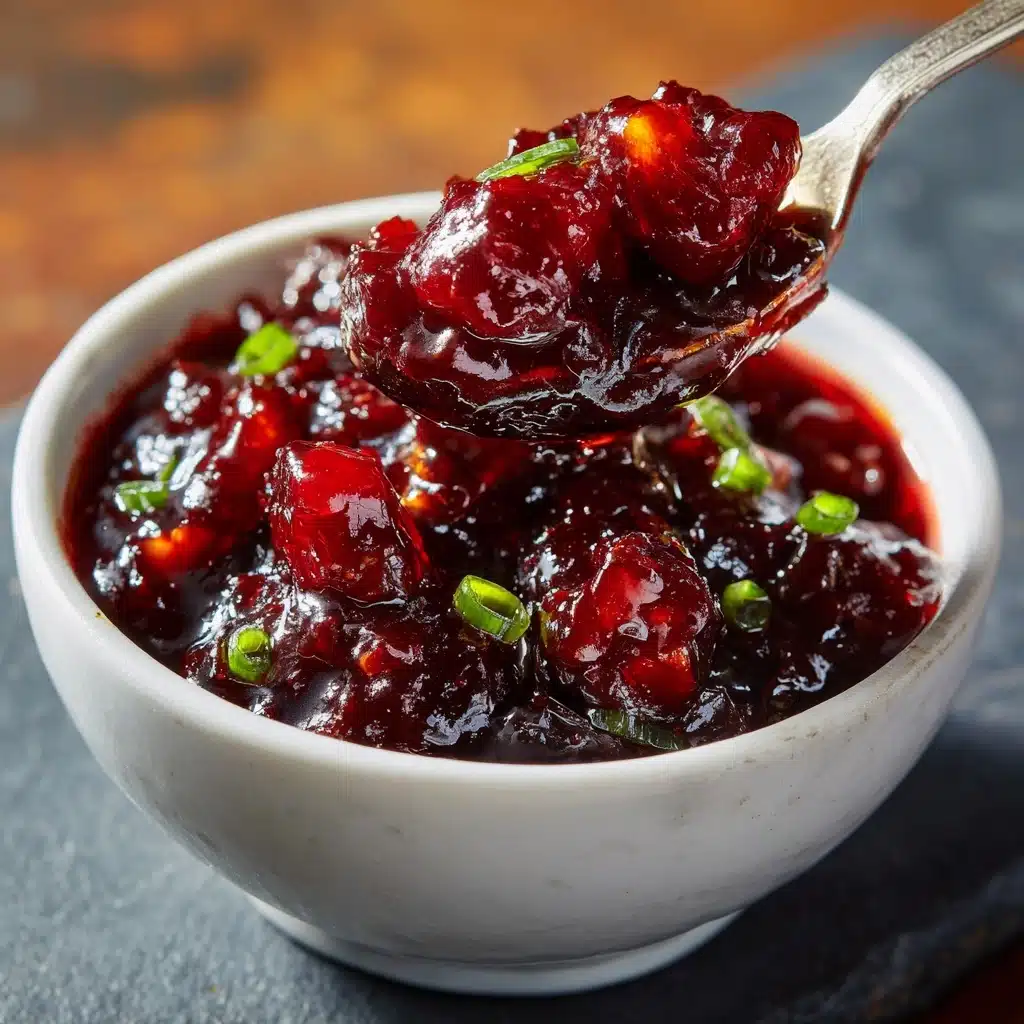
Restaurant Style Sweet and Sour Sauce Recipe
If you’ve ever wished you could capture that irresistibly tangy, glossy sauce from your favorite takeout spot, look no further: this Restaurant Style Sweet and Sour Sauce ticks every box. It’s not just simple to make; it’s a dazzling dance of flavors that brings together tropical pineapple juices, punchy vinegar, and just the right hint of savory umami. Whether you’re dunking crispy egg rolls or drizzling over homemade stir-fry, you’ll fall for this unforgettable homemade staple—and you won’t believe how easy it is to whip up in your own kitchen.
Ingredients You’ll Need
-
Ingredients:
- 1 cup pineapple juice
- 1/2 cup rice vinegar
- 1/2 cup ketchup
- 2/3 cup granulated sugar
- 3 tablespoons soy sauce
- 2 tablespoons cornstarch mixed with 3 tablespoons water
How to Make Restaurant Style Sweet and Sour Sauce
Step 1: Combine Your Base Ingredients
Start by grabbing your favorite medium-sized saucepan. Pour in the pineapple juice, rice vinegar, ketchup, sugar, and soy sauce, all at once. Using a whisk, blend everything together until the sugar dissolves and you have a vibrant, uniform mixture. This step feels like magic—the scent already hints at what’s to come!
Step 2: Bring to a Simmer
Crank up the heat to medium and let your mixture slowly come to a gentle simmer. Keep a close eye on it, stirring once or twice. The simmering helps marry all those flavors beautifully and lets some of the sharper acid edge mellow into pure tangy goodness.
Step 3: Whisk in the Cornstarch Slurry
In a small bowl, use a fork or whisk to thoroughly blend the cornstarch with water. When your sauce base is simmering, slowly pour in the slurry in a steady stream, whisking the sauce constantly. You’ll see it start to thicken and turn glossy in just a minute or two.
Step 4: Cook Until Glossy and Thickened
Continue to cook the sauce over medium heat, whisking frequently, for about 3 to 5 minutes. You’ll know it’s done when the sauce can coat the back of a spoon and has that iconic restaurant shine. Remove from the heat, and give yourself a quick taste—adjust if needed.
Step 5: Cool and Serve
Let your freshly made Restaurant Style Sweet and Sour Sauce cool for a few minutes before serving or storing. This brief pause lets the flavors settle and the texture set perfectly, so every drizzle or dip delivers peak flavor.
How to Serve Restaurant Style Sweet and Sour Sauce

Garnishes
For that authentic flair, try topping your Restaurant Style Sweet and Sour Sauce with a sprinkle of finely chopped green onions or a scant dusting of toasted sesame seeds. Both add a fresh pop of color and an extra sprinkle of flavor. If you’re feeling fancy, a few curls of julienned bell pepper look gorgeous alongside the sauce.
Side Dishes
This sauce is a perfect dip for crispy egg rolls, fried wontons, or chicken nuggets, but don’t stop there! It’s equally at home paired with steamed dumplings, tofu bites, or even as a drizzle over vegetable stir-fry. It’s an easy upgrade for simple rice or noodles, instantly elevating your meal into that craveable, takeout-style experience.
Creative Ways to Present
Take things up a notch by serving your sauce in small ramekins with appetizer platters, swirling a little onto sushi rolls, or drizzling over grilled shrimp skewers for a playful presentation. For a party, try spooning some over cocktail meatballs or using it as a dip on a DIY skewer bar. The bright color always draws oohs and aahs!
Make Ahead and Storage
Storing Leftovers
Restaurant Style Sweet and Sour Sauce stores like a dream. Simply pour any extra into a glass jar or airtight container and tuck it into the fridge. It keeps perfectly for up to a week, making it easy to add a splash of flavor to quick lunches or busy weeknight dinners.
Freezing
If you’d like to make a big batch, this sauce freezes beautifully. Just let it cool completely, then transfer to a freezer-safe container. Thaw in the refrigerator overnight before reheating. Note that it may separate slightly upon thawing, but a good stir will bring it right back to life.
Reheating
To rewarm, gently heat the Restaurant Style Sweet and Sour Sauce in a small pot, stirring often until heated through and smooth. If the sauce has thickened too much, just add a splash of water or pineapple juice to loosen. It can even be microwaved in short bursts, stirring between each.
FAQs
Can I make Restaurant Style Sweet and Sour Sauce gluten-free?
Yes! Just swap in your favorite gluten-free soy sauce or tamari, and the rest of the ingredients are naturally gluten-free. You won’t miss a thing in terms of taste or texture.
Is it possible to make this sauce less sweet?
Absolutely. You can reduce the amount of sugar by a couple of tablespoons if you prefer a tangier, less sweet sauce. Feel free to experiment until you hit your ideal balance.
Can I use apple cider vinegar instead of rice vinegar?
You can, in a pinch, but rice vinegar really gives the most authentic flavor for that Restaurant Style Sweet and Sour Sauce taste. Apple cider vinegar will add a touch of its own fruitiness, so the profile will shift slightly, but it will still be tasty!
How do I make the sauce a brighter red like in restaurants?
A few drops of natural red food coloring can be added after thickening, just before cooling. Be sure to stir thoroughly for an even color—it’s purely for aesthetics, so totally optional.
Can I double the recipe for a big party?
Definitely! This recipe scales up easily. Just make sure your saucepan is large enough, and allow a bit more time for the sauce to thicken when making a bigger batch.
Final Thoughts
There’s something extra rewarding about mastering a classic like Restaurant Style Sweet and Sour Sauce at home. Each time you serve it, whether for a weeknight dinner or a lively gathering, you’ll taste just how much love and flavor went into every vibrant spoonful. Give it a try—you’ll wonder how you ever did without it!
Print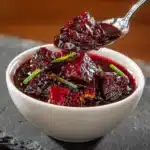
Restaurant Style Sweet and Sour Sauce Recipe
- Total Time: 15 minutes
- Yield: 2 cups 1x
- Diet: Vegan, Gluten-Free
Description
Learn how to make a delicious Restaurant Style Sweet and Sour Sauce at home with this easy recipe. This tangy and sweet sauce is perfect for dipping egg rolls, chicken, or drizzling over stir-fries.
Ingredients
Ingredients:
- 1 cup pineapple juice
- 1/2 cup rice vinegar
- 1/2 cup ketchup
- 2/3 cup granulated sugar
- 3 tablespoons soy sauce
- 2 tablespoons cornstarch mixed with 3 tablespoons water
Instructions
- Step 1: In a medium saucepan over medium heat, whisk together pineapple juice, rice vinegar, ketchup, sugar, and soy sauce until combined.
- Step 2: Bring the mixture to a simmer. Slowly add the cornstarch slurry while whisking continuously.
- Step 3: Cook for 3–5 minutes until the sauce thickens and becomes glossy. Remove from heat and let cool slightly before serving.
Notes
- For a brighter red color, you can add a few drops of natural red food coloring.
- This sauce keeps well in the refrigerator for up to a week in an airtight container.
- Perfect for dipping egg rolls, chicken, or drizzling over stir-fries.
- Prep Time: 5 minutes
- Cook Time: 10 minutes
- Category: Sauce, Condiment
- Method: Stovetop
- Cuisine: Chinese-American
Nutrition
- Serving Size: 2 tablespoons
- Calories: 40
- Sugar: 9 g
- Sodium: 120 mg
- Fat: 0 g
- Saturated Fat: 0 g
- Unsaturated Fat: 0 g
- Trans Fat: 0 g
- Carbohydrates: 10 g
- Fiber: 0 g
- Protein: 0 g
- Cholesterol: 0 mg