Romantic Cake Pops Recipe
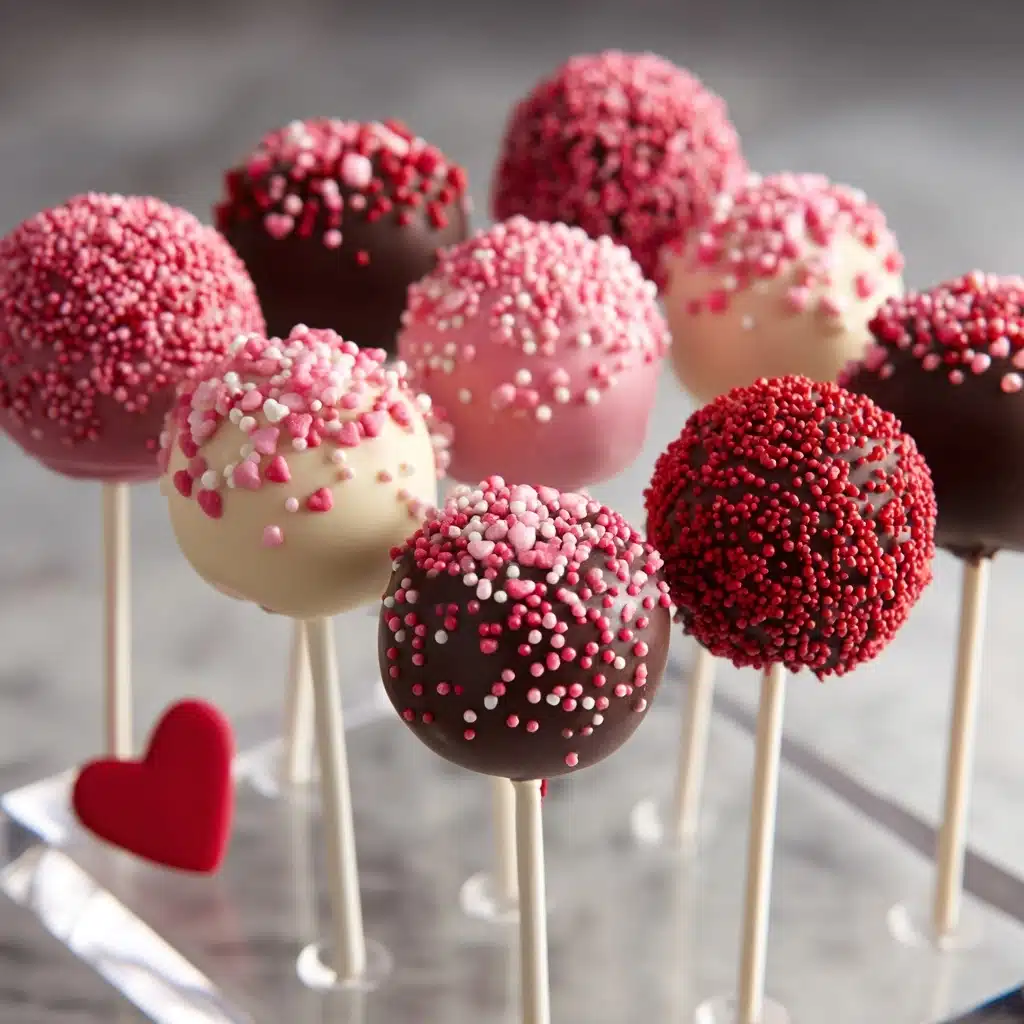
These Romantic Cake Pops are a joyful blend of fun, flavor, and a touch of whimsy, perfect for sharing with someone special (or treating yourself!). With their eye-catching colors, irresistible chocolate coating, and soft, cake-meets-frosting centers, they make the ultimate edible Valentine, anniversary surprise, or anytime celebration dessert. Whether you’re surprising a sweetheart, dazzling guests, or simply indulging your creative side, these easy bites of bliss bring a pop of romance to any occasion.
Ingredients You’ll Need

Ingredients You’ll Need
The beauty of Romantic Cake Pops lies in their simplicity. Each ingredient plays a starring role—from the tender cake base to the dreamy chocolate shell and sparkly decorations, every piece brings color, flavor, or just a little magic to these adorable treats.
- Vanilla or Red Velvet Cake Mix: This forms the soft, fluffy backbone of each cake pop, giving you the option of classic white or bold, red romance. Bake it according to the package for a perfect start.
- Cream Cheese or Buttercream Frosting: Just half a cup binds the cake crumbs together and delivers that creamy, rich texture we all love in a cake pop. Cream cheese adds tang, buttercream keeps it especially sweet.
- Chocolate Melting Wafers (white or milk): These are easy to melt and give your Romantic Cake Pops their gorgeous, glossy shell—plus, they set up beautifully for both visual appeal and neat bites.
- Red, Pink, and White Sprinkles or Candy Decorations: Vibrant sprinkles make your cake pops instantly festive and let you personalize each treat for Valentine’s Day, anniversaries, or weddings.
- Lollipop Sticks: Essential for that classic cake pop presentation, making each treat easy to dip, decorate, and eat without a mess.
- Optional Edible Glitter or Gold Dust: For a true touch of romance, add shimmer and sparkle; your cake pops will look (and feel!) extra special.
How to Make Romantic Cake Pops
Step 1: Bake and Cool the Cake
Follow the instructions on your chosen cake mix box and bake the cake in advance. Once it’s baked, let it cool completely—this stage is crucial! Warm cake won’t crumble or stick together properly, so patience here truly pays off for perfectly textured Romantic Cake Pops.
Step 2: Crumble and Mix
Once your cake is cool, use your hands to crumble it into fine, fluffy crumbs in a large mixing bowl. Add the frosting and mix thoroughly—you want everything to blend until the mixture feels like soft dough that clings together easily, yet is not too sticky. Imagine making little hearts with your hands!
Step 3: Shape into Balls
Scoop out tablespoon-sized portions and roll each gently between your palms to form smooth, uniform balls. Place each one on a parchment-lined baking sheet. Don’t rush this part—the neater the balls, the more polished your Romantic Cake Pops will look in the end!
Step 4: Chill for Perfect Dipping
Pop your tray of cake balls in the refrigerator for at least one hour, or the freezer for about 20 minutes, until they are firm. This step ensures they hold their shape when you insert the sticks and dip them in chocolate. Trust me, a firm pop is your best friend for smooth coating.
Step 5: Melt the Chocolate
In a microwave-safe bowl, melt your chocolate wafers in 30-second bursts, stirring between each, until silky-smooth. If you want, mix white and milk chocolate for a marbled dip! Make sure you don’t overheat the chocolate—gentle melting is the key to an even coating on your Romantic Cake Pops.
Step 6: Insert Sticks and Dip
Dip the tip of each lollipop stick about a half-inch into the melted chocolate, then gently insert it halfway into the center of each cake ball. This “glue” helps keep the stick snugly in place. Next, dip each pop straight down into the chocolate, coating the entire ball. Gently tap off any excess for a thin, even shell.
Step 7: Decorate with Love
While the chocolate is still wet, shower each pop with sprinkles or a dusting of edible glitter and gold dust. Stand them upright in a Styrofoam block or cake pop stand so they set beautifully. In just minutes, your creations will harden into the most delightful romantic treats.
How to Serve Romantic Cake Pops
Garnishes
Add a dramatic finish by sprinkling extra edible glitter, gold dust, or a final flourish of themed sprinkles over the tops right before serving. If you’re feeling creative, pipe a swirl of white chocolate or even write initials for a personalized touch on each Romantic Cake Pop.
Side Dishes
Serve alongside a rich mug of hot chocolate, a glass of bubbly prosecco, or a sweet berry coulis for dipping. Fresh strawberries, raspberries, or a small assortment of chocolate-dipped fruit match beautifully—elevating your cake pops into a full-on dessert event.
Creative Ways to Present
Arrange your Romantic Cake Pops in a vintage teacup, a bouquet-style vase, or an elegant dessert box for maximum wow factor. Try bundling them in cellophane with a ribbon for edible gifts, or position them atop a simple round cake for the ultimate centerpiece. These sweets are as much art as dessert!
Make Ahead and Storage
Storing Leftovers
Keep leftover Romantic Cake Pops in an airtight container at cool room temperature for 2 days, or in the fridge for up to one week. Their chocolate coating helps seal in the freshness, but make sure to separate layers with wax paper if you’re stacking them to prevent sticking or smudging.
Freezing
To freeze, simply wrap each cake pop individually in plastic wrap, then place in a freezer-safe bag or container for up to two months. Thaw overnight in the refrigerator and let them come to room temperature before serving—they’ll taste just as enchanting as the day you made them.
Reheating
There’s no need to reheat these treats, but if you like your chocolate a little softer, let refrigerated Romantic Cake Pops sit at room temperature for 15–20 minutes. Avoid microwaving, as this can melt the coating and compromise their signature snap.
FAQs
Can I make Romantic Cake Pops with homemade cake and frosting?
Absolutely! Using your favorite homemade cake recipe or fresh buttercream/cream cheese frosting can add a personal touch and even more flavor. Just make sure your cake is fully cooled and your frosting isn’t too runny.
How can I get a perfectly smooth chocolate coating on my cake pops?
Chilling the cake balls thoroughly before dipping, and using high-quality melting wafers, will help your Romantic Cake Pops look bakery-perfect. Also, gently tap the stick on the side of the bowl to remove excess chocolate rather than swirling—it keeps the coating even.
Can I use dark chocolate instead of white or milk?
Yes, you can! Dark chocolate adds a rich, bittersweet touch, which contrasts beautifully with sweet cake and romantic toppings. Be sure to use melting wafers or add a dab of coconut oil to standard chocolate chips for the smoothest dip.
What can I use if I don’t have a cake pop stand?
A block of Styrofoam, a colander turned upside down, or an empty egg carton with holes poked in it will all do the trick for standing your freshly dipped Romantic Cake Pops while they set. Creativity in the kitchen wins again!
Are there flavor variations you recommend for special occasions?
Definitely! Swap in a dash of almond, raspberry, or rose extract to the cake or frosting for a fragrant twist, or add a little citrus zest. You can even roll the finished pops in coconut flakes or finely chopped nuts for some surprise texture.
Final Thoughts
If you’re looking to bring a little extra sparkle and sweetness to your next celebration, these Romantic Cake Pops are guaranteed to wow every lucky taster. They’re fun, foolproof, festive, and endlessly customizable—so gather your sprinkles and get ready to fall in love, one bite at a time!
Print
Romantic Cake Pops Recipe
- Total Time: 1 hour 15 minutes
- Yield: 24 cake pops 1x
- Diet: Vegetarian
Description
These Romantic Cake Pops are the perfect sweet treat for special occasions like Valentine’s Day, anniversaries, or weddings. They are easy to make and can be customized with different flavors and decorations.
Ingredients
Cake Pops:
- 1 box vanilla or red velvet cake mix (plus ingredients listed on the box)
- 1/2 cup cream cheese frosting or buttercream frosting
Coating and Decorations:
- 12 ounces white or milk chocolate melting wafers
- Red, pink, and white sprinkles or candy decorations
- Lollipop sticks
- Optional edible glitter or gold dust
Instructions
- Bake the Cake: Prepare and bake the cake according to package instructions. Let it cool completely.
- Prepare Cake Mixture: Crumble the cake into fine crumbs in a large bowl. Add the frosting and mix until it holds together like dough.
- Shape Cake Balls: Scoop out tablespoon-sized portions and roll into smooth balls. Place on a parchment-lined baking sheet and refrigerate or freeze until firm.
- Coat with Chocolate: Melt the chocolate wafers and dip the tip of each lollipop stick into the chocolate, then insert it halfway into each cake ball. Dip each cake pop into the melted chocolate, coating completely.
- Decorate: Immediately decorate with sprinkles, glitter, or gold dust. Place upright to set.
Notes
- Flavor the cake or frosting with almond, raspberry, or rose extract for a romantic touch.
- These cake pops are ideal for Valentine’s Day, anniversaries, or wedding favors.
- Prep Time: 45 minutes
- Cook Time: 30 minutes
- Category: Dessert
- Method: No-Bake (after baking cake)
- Cuisine: American
Nutrition
- Serving Size: 1 cake pop
- Calories: 160
- Sugar: 14g
- Sodium: 105mg
- Fat: 8g
- Saturated Fat: 5g
- Unsaturated Fat: 2g
- Trans Fat: 0g
- Carbohydrates: 20g
- Fiber: 0g
- Protein: 1g
- Cholesterol: 15mg