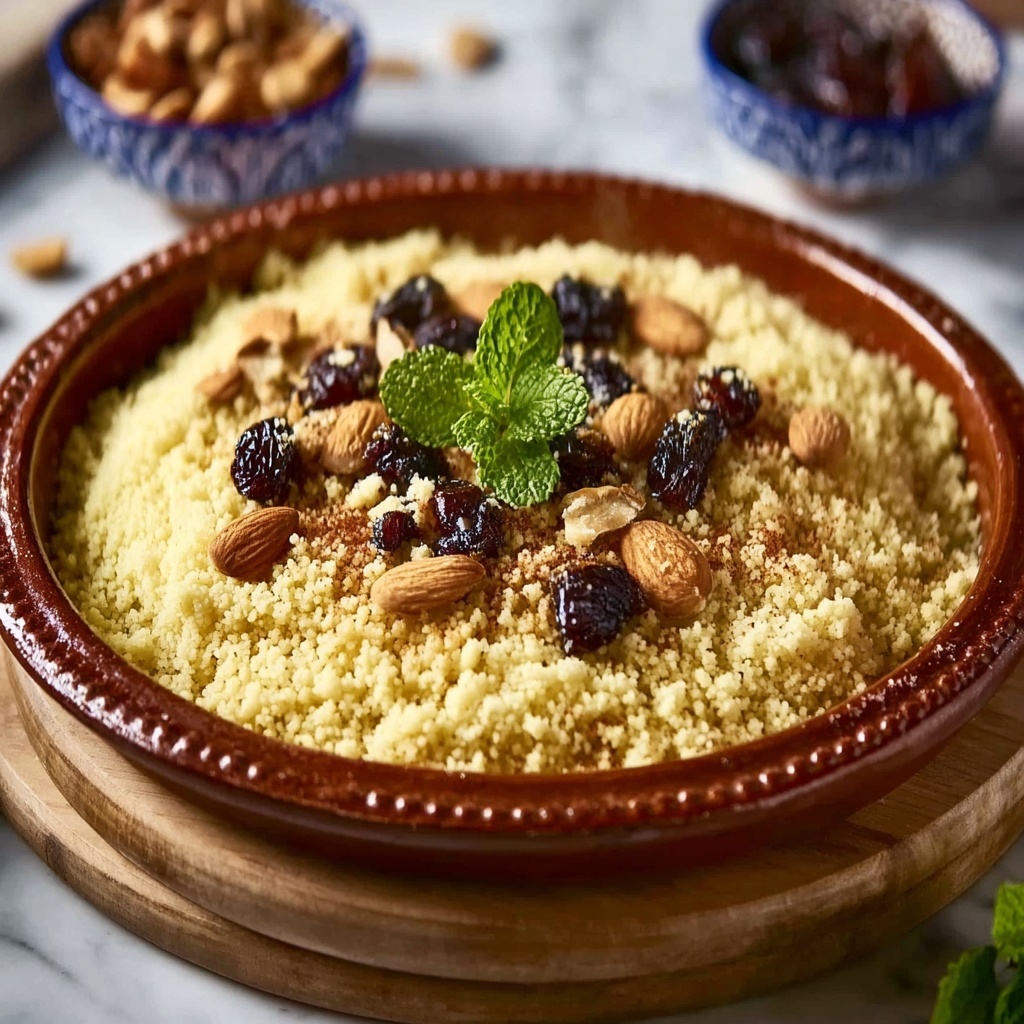
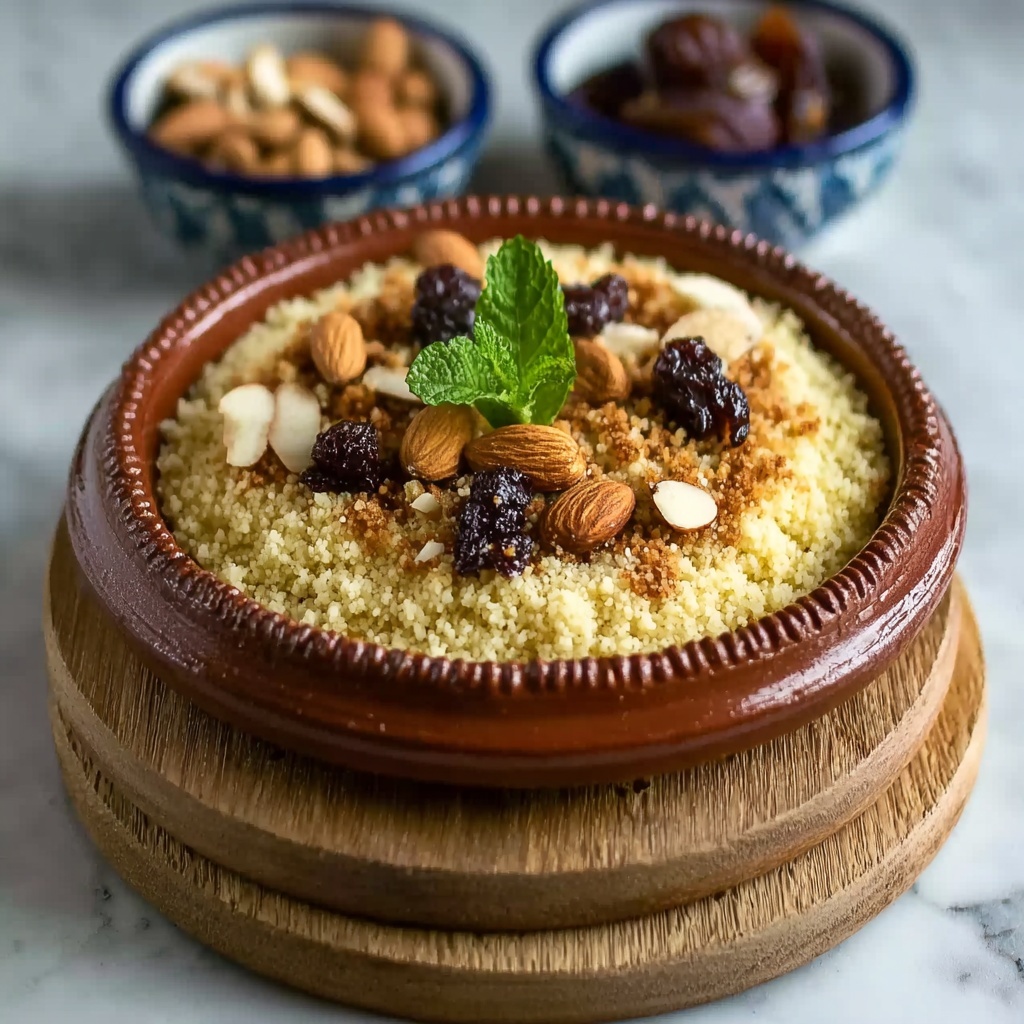
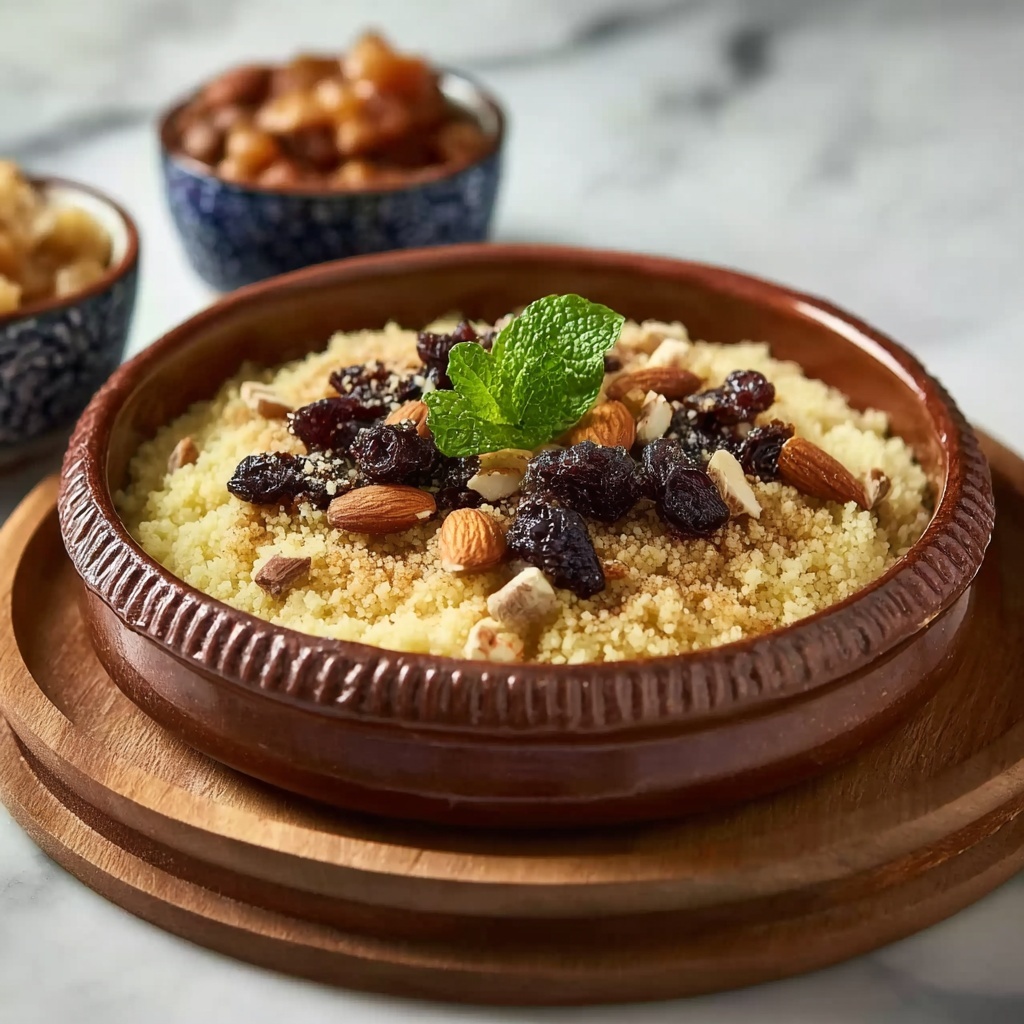
If you’ve been craving something truly special and heartwarming, then you’re in for a treat with the Tamina Sahrawiya: Semolina Pastries with Nut and Dried Fruit Filling Recipe. This is not just any pastry; it’s a tender, golden semolina dough filled with a sweet, fragrant mixture of nuts and dried fruits, wrapped in a cozy honey-drizzled embrace. Each bite offers a delightful balance of texture and flavor that feels like a warm hug from a close friend, perfect for sharing over tea or as a comforting snack any time of day.
Ingredients You’ll Need
This recipe calls for a handful of simple, wholesome ingredients that each bring their own magic to the final dish. From the grainy, slightly nutty semolina flour to the sweet notes of dried fruit and the fragrant warmth of cinnamon, these essentials work together to create a pastry that’s both rustic and refined.
- Semolina flour (2 cups): Provides the perfect texture and a light golden color to the dough.
- Salt (1 teaspoon): Balances sweetness and enhances the overall flavor.
- Sugar (1 tablespoon): Adds just a touch of sweetness to the dough itself.
- Warm water (1 cup): Helps bring the dough together smoothly and makes kneading easier.
- Olive oil (1 tablespoon): Keeps the dough tender and adds subtle richness.
- Baking powder (1 teaspoon): Gives a slight lift to the dough, making the pastries light yet sturdy.
- Ground cinnamon (1 teaspoon): Infuses the filling with a warm, comforting spice.
- Chopped nuts (1/2 cup, almonds or walnuts): Adds a satisfying crunch and nutty flavor.
- Raisins or dried apricots (1/2 cup, chopped): Brings a natural sweetness and chewy texture to the filling.
- Honey (for drizzling): The perfect finishing touch that sweetens and shines on top.
How to Make Tamina Sahrawiya: Semolina Pastries with Nut and Dried Fruit Filling Recipe
Step 1: Mix Your Dry Ingredients
Start by whisking together the semolina flour, salt, sugar, and baking powder in a large bowl. Making sure these dry ingredients are well combined ensures that each bite has an even flavor and texture, setting a solid foundation for your dough.
Step 2: Combine with Liquid Ingredients
Slowly pour in the warm water and olive oil while stirring continuously. This gradual mixing helps avoid lumps and allows the dough to come together evenly, creating a smooth consistency that’s easy to work with.
Step 3: Knead for Texture
Turn the dough onto a lightly floured surface and knead for about 5 minutes until it feels smooth and elastic. This step develops the structure in the dough, resulting in pastries that hold their shape while remaining tender once cooked.
Step 4: Let the Dough Rest
Cover your dough ball with a damp cloth and let it rest for 30 minutes. This resting period is crucial because it allows the semolina to absorb moisture and relax, which makes rolling and shaping the dough so much easier.
Step 5: Shape the Dough into Discs
Divide the rested dough into small balls about the size of a golf ball. Then, gently flatten each ball into a roughly 1/4 inch thick disc. These discs will be the perfect little canvases for your nut and dried fruit filling.
Step 6: Cook the Pastry Bases
Heat a non-stick skillet over medium heat and cook each dough disc for 3 to 4 minutes on each side, until they develop a golden brown color and a lovely aroma. This step ensures a slightly crisp exterior with a tender inside.
Step 7: Prepare the Nut and Dried Fruit Filling
While the discs cool slightly, mix your chopped nuts with the raisins or dried apricots in a small bowl. The cinnamon can be added here to enhance the filler’s warmth and fragrance.
Step 8: Fill and Fold Your Pastries
Place a spoonful of the nut and fruit mixture in the center of each cooled disc, then fold the dough over to create a charming half-moon shape. Press the edges gently to seal the filling inside, guarding against any escape during serving.
Step 9: The Finishing Touch
Before serving, drizzle each pastry generously with honey. This glossy finish adds sweetness and a slight stickiness that perfectly complements the nutty and fruity filling.
How to Serve Tamina Sahrawiya: Semolina Pastries with Nut and Dried Fruit Filling Recipe
Garnishes
Try topping your pastries with a sprinkle of finely chopped pistachios or a dusting of powdered cinnamon. These little touches add visual interest and elevate the overall taste experience.
Side Dishes
Pair these pastries with a steaming cup of mint tea or black tea infused with cardamom. The refreshing herbal notes and mild spice in the drinks complement the sweet richness of the tamina perfectly.
Creative Ways to Present
Arrange these pastries on a rustic wooden platter lined with parchment paper, garnished with fresh orange slices or pomegranate seeds for a pop of color. You can also serve them warm wrapped in a soft linen napkin to keep the cozy, inviting vibe alive.
Make Ahead and Storage
Storing Leftovers
If you have any leftovers, place them in an airtight container at room temperature for up to two days. This will keep the pastries from drying out while preserving their delightful texture.
Freezing
You can freeze the pastries after cooking but before adding the honey drizzle. Wrap each pastry individually in plastic wrap and store them in a freezer-safe bag for up to one month. When you’re ready to enjoy, thaw overnight in the fridge.
Reheating
To reheat, warm the pastries gently in a toaster oven or skillet over low heat until heated through. Drizzle with honey again for that fresh-from-the-kitchen taste, and enjoy the full magic of your Tamina Sahrawiya all over again.
FAQs
Can I use other nuts in Tamina Sahrawiya?
Absolutely! While almonds and walnuts are traditional, you can experiment with pecans, hazelnuts, or even pistachios depending on your preference. Just be sure to chop them finely for an even filling.
What if I don’t have dried apricots?
No worries! Raisins, dates, or finely chopped dried figs all work beautifully in this recipe. These dried fruits bring natural sweetness and delightful chewiness that enrich the filling.
Is it possible to make this recipe vegan?
Yes! The dough itself is naturally vegan. Just use a plant-based honey alternative or maple syrup for drizzling, and you’ll have a vegan-friendly version that’s just as delicious.
Can I bake instead of pan-frying the dough discs?
While the traditional method is pan-frying for that lovely golden crust, baking at 375°F (190°C) for 10-12 minutes can also work if you want a hands-off approach. Keep an eye on them to avoid overbrowning.
How do I store Tamina Sahrawiya if I want to prepare them in advance?
You can prepare the dough and filling separately, then assemble the pastries just before cooking. Dough can be refrigerated for up to 24 hours, making it easy to spread out the work without compromising freshness.
Final Thoughts
There’s something truly comforting and joyful about making and sharing the Tamina Sahrawiya: Semolina Pastries with Nut and Dried Fruit Filling Recipe. It’s a recipe that invites you to slow down, savor the aromas filling your kitchen, and enjoy sweet moments with loved ones. So go ahead, give it a try—you might just find your new favorite pastry to cherish for years to come.
Print
Tamina Sahrawiya: Semolina Pastries with Nut and Dried Fruit Filling Recipe
- Prep Time: 15 minutes
- Cook Time: 20 minutes
- Total Time: 50 minutes
- Yield: 6 servings
- Category: Breakfast, Snack
- Method: Frying
- Cuisine: North African
Description
Tamina Sahrawiya is a delightful traditional North African semolina-based treat, known for its hearty texture and sweet nutty filling. This recipe combines semolina dough, enriched with warm water and olive oil, filled with a mixture of chopped nuts and dried fruits, then pan-cooked to golden perfection and drizzled with honey for a luscious finish. Ideal for a breakfast or snack, this recipe offers a delicious taste of Sahrawi culinary heritage with a satisfying combination of cinnamon-spiced semolina and sweet, fruity filling.
Ingredients
Dough Ingredients
- 2 cups semolina flour
- 1 teaspoon salt
- 1 tablespoon sugar
- 1 teaspoon baking powder
- 1 cup warm water
- 1 tablespoon olive oil
- 1 teaspoon ground cinnamon
Filling Ingredients
- 1/2 cup chopped nuts (almonds or walnuts)
- 1/2 cup raisins or dried apricots (chopped)
Topping
- Honey for drizzling
Instructions
- Mix Dry Ingredients: In a large mixing bowl, combine the semolina flour, salt, sugar, baking powder, and ground cinnamon. Stir well to ensure all dry ingredients are evenly distributed.
- Add Wet Ingredients: Gradually pour in the warm water and olive oil into the dry blend, stirring continuously until the mixture forms a cohesive dough.
- Knead the Dough: Transfer the dough to a lightly floured surface and knead for about 5 minutes until it becomes smooth and elastic in texture.
- Rest the Dough: Cover the dough with a damp cloth and let it rest for 30 minutes to develop flavor and improve texture.
- Divide and Shape: After resting, divide the dough into small balls roughly the size of golf balls.
- Flatten Balls: Flatten each ball into a disc approximately 1/4 inch thick, preparing them for cooking.
- Cook the Semolina Discs: Preheat a non-stick skillet over medium heat. Cook each disc for 3-4 minutes on each side until they turn golden brown and are thoroughly cooked.
- Cool Slightly: Remove the cooked discs from the skillet and allow them to cool slightly to handle comfortably.
- Prepare Filling: In a small bowl, combine the chopped nuts with the chopped raisins or dried apricots, mixing them evenly.
- Fill and Fold: Place a spoonful of the nut and dried fruit mixture in the center of each disc, then fold the dough over to form a half-moon shape, sealing in the filling.
- Drizzle Honey: Just before serving, drizzle honey generously over each filled disc for added sweetness and flavor enhancement.
Notes
- You can substitute the nuts with any preferred variety such as pistachios or pecans for flavor variation.
- Ensure the water is warm but not hot to activate the baking powder without killing it.
- Resting the dough is essential to allow the semolina to hydrate properly and improve texture.
- If the dough feels too sticky, lightly flour your hands during shaping to avoid sticking.
- Serve warm for the best taste and texture experience.
- Honey drizzle is optional but highly recommended as it balances the nutty flavors beautifully.


