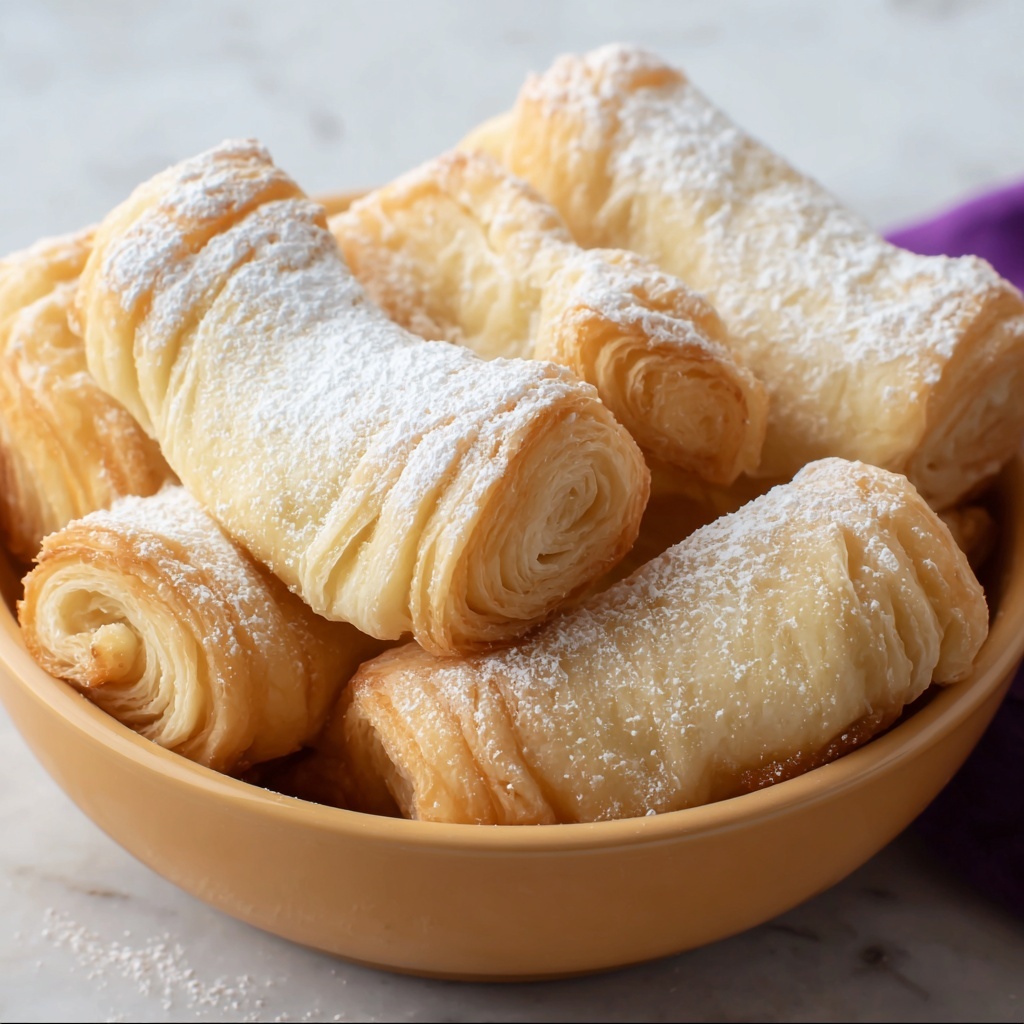
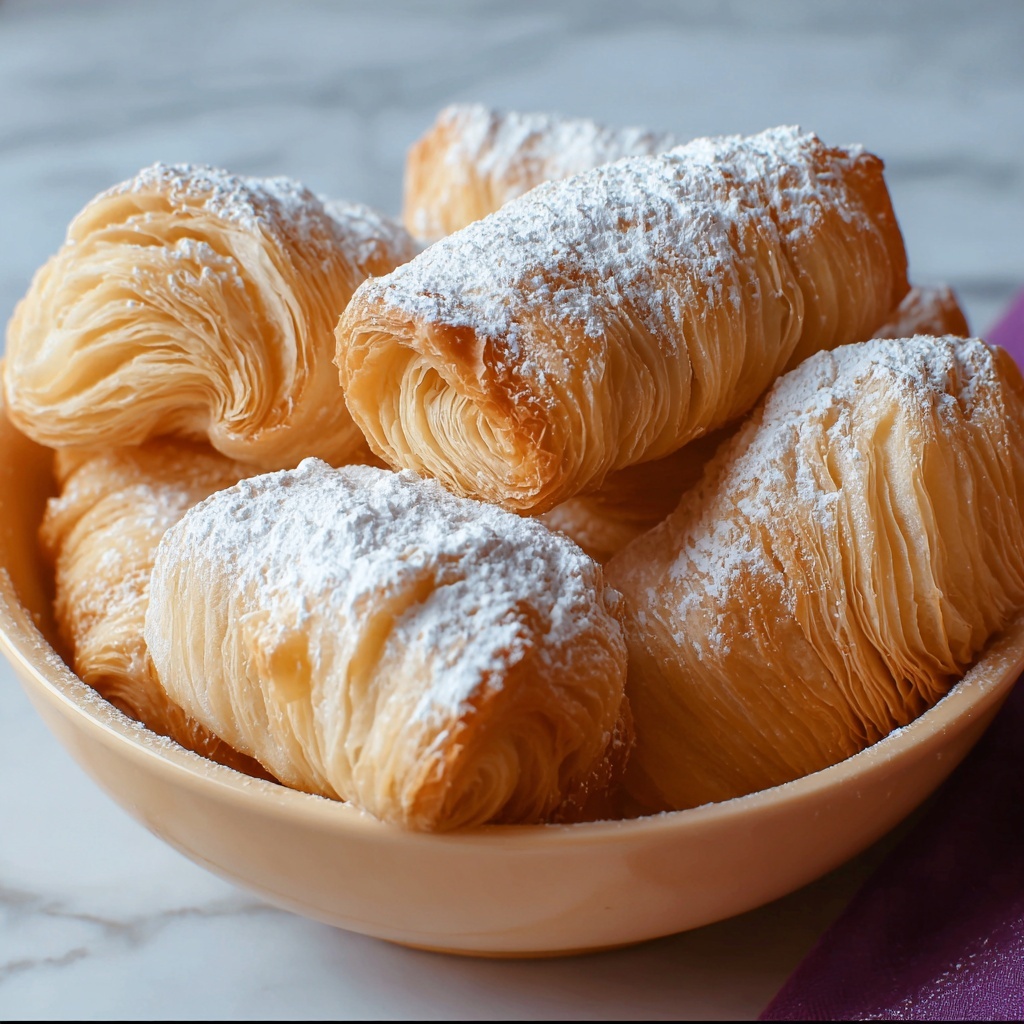
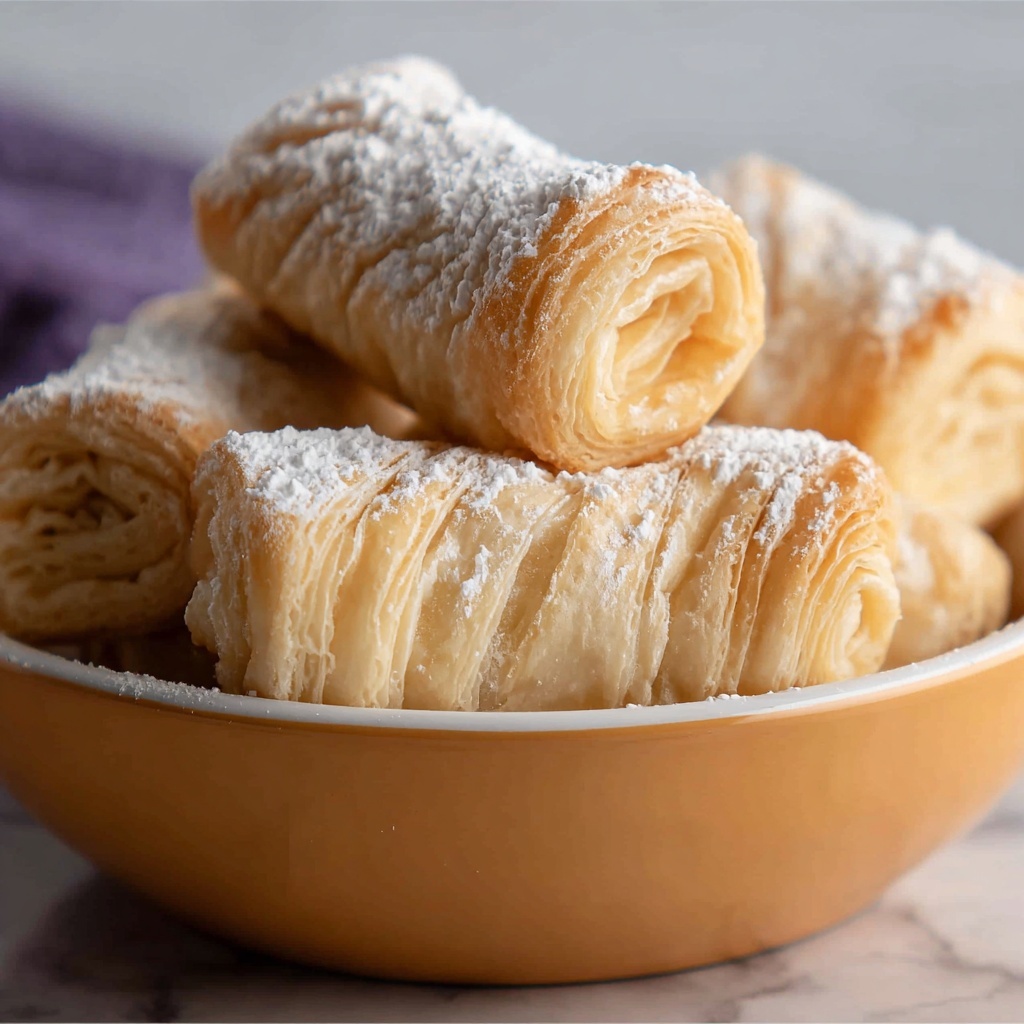
If you have a sweet tooth and love traditional Latin American treats, you are in for a real delight with this Traditional Canillitas de Leche Recipe. These small, melt-in-your-mouth Guatemalan sweets boast a creamy, honey-infused flavor that’s both comforting and nostalgic. Their delicate texture and subtle sweetness make them a perfect treat to share with family and friends or to savor as a special indulgence. With simple ingredients and straightforward steps, you’ll discover how rewarding it is to bring this delightful dessert to your table.
Ingredients You’ll Need
Gathering the right ingredients is half the fun with this Traditional Canillitas de Leche Recipe. Each component plays a vital role in creating the candy’s rich flavor, smooth texture, and lovely color. From the golden sweetness of honey to the creamy condensed milk, these essentials come together in harmony.
- ½ cup of honey: Adds natural sweetness and a subtle floral note that balances the milkiness.
- 4 cups of powdered milk: Provides the creamy, melt-in-your-mouth texture that defines the candy.
- 1 ½ cans of condensed milk (sweetened): Boosts richness and sweetness, creating that signature caramel undertone.
- 1 teaspoon of vanilla extract: Enhances the overall flavor with warm, aromatic hints.
- ½ cup of powdered sugar: Helps achieve the perfect smoothness and adds a delicate touch of sweetness.
- Cornstarch (for kneading): Prevents sticking and makes shaping the candies a breeze.
How to Make Traditional Canillitas de Leche Recipe
Step 1: Combine the Ingredients Over Low Heat
Start by placing the honey, powdered milk, condensed milk, vanilla extract, and powdered sugar in a saucepan. Gently heat the mixture over low heat for about 30 seconds, stirring continuously. This brief heating helps the ingredients meld together without cooking the mixture too aggressively, preserving the delicate flavors.
Step 2: Mix to Achieve the Perfect Consistency
Once combined, increase your mixer speed to medium and blend the mixture for approximately one minute. You want to reach a stiff, dough-like consistency that holds its shape well. This step is crucial, as it determines the final texture of your canillitas and ensures they will be firm yet tender when you bite into them.
Step 3: Knead the Mixture with Cornstarch
Dust your working surface with cornstarch to prevent sticking, then turn the mixture out onto it. Knead the sweet dough with your hands, incorporating the cornstarch as needed to keep it manageable. This tactile part of the process connects you with the candy and readies it for shaping.
Step 4: Shape and Wrap Your Canillitas
Once kneaded, start forming small, finger-sized pieces of candy. These traditional “canillitas” are named after their slender shape that resembles tiny fingers. Wrap each piece individually in cellophane or any airtight wrapping to keep them fresh and make for charming little packages perfect for gifting.
Step 5: Let Your Canillitas Cool and Set
Allow the wrapped candies to cool completely at room temperature. As they set, they develop a perfect tender texture that melts easily in your mouth. Once cooled, your Traditional Canillitas de Leche are ready to be enjoyed or shared with loved ones!
How to Serve Traditional Canillitas de Leche Recipe
Garnishes
While canillitas are delightful on their own, consider sprinkling a tiny dash of cinnamon or cocoa powder for a touch of warmth and color. You can also roll them lightly in extra powdered sugar for a lovely, elegant finish that adds a subtle extra sweetness.
Side Dishes
Traditional Canillitas de Leche pair wonderfully with a hot cup of coffee or rich, warm tea. Their gentle sweetness balances a slightly bitter brew, creating a perfect afternoon treat. They also make a sweet companion to fresh fruit or light pastries if you’re hosting a casual get-together.
Creative Ways to Present
Elevate your presentation by placing your canillitas in decorative paper mini-cups or arranging them on rustic wooden platters. For special occasions, tie small bundles with colorful ribbons or place them in pretty tins. They make charming party favors that guests will love taking home.
Make Ahead and Storage
Storing Leftovers
If you find yourself with leftovers, no worries! Traditional Canillitas de Leche keep well at room temperature for several days when stored in an airtight container. The wrapping helps maintain their freshness and prevents them from drying out or sticking together.
Freezing
You can freeze these treats to enjoy later. Wrap them securely in plastic wrap and place them in a freezer-safe container. When you’re ready to enjoy, thaw them at room temperature gently—their texture remains surprisingly intact after freezing.
Reheating
Reheating isn’t generally necessary for canillitas, but if you prefer them softer, let them sit out for a bit to warm slightly. Avoid microwave reheating, as it can change their texture and make them overly sticky. A gentle warming by hand is just perfect.
FAQs
What exactly are canillitas de leche?
Canillitas de leche are traditional Guatemalan milk candies, known for their soft, creamy texture and sweetness derived from powdered and condensed milk combined with honey. They resemble little fingers, which is where their name comes from.
Can I use fresh milk instead of powdered milk?
Powdered milk is key to achieving the right texture in this recipe. Using fresh milk may alter the firmness and consistency, making it harder to shape the candies properly. For best results, stick to powdered milk as called for.
Is it necessary to wrap each candy individually?
Wrapping each canillita helps keep them fresh and prevents them from sticking together. It also makes them perfect for sharing or gifting. While not absolutely required, it’s highly recommended for both storage and presentation.
How long does it take to make the canillitas?
From start to finish, making traditional canillitas de leche usually takes about 55 minutes, including preparation and setting time. It’s a simple but rewarding process that’s worth the wait.
Can I add other flavors to this recipe?
Absolutely! While the traditional recipe calls for vanilla, you can experiment with a pinch of cinnamon, nutmeg, or even a splash of rum extract to create your flair on this classic. Just be sure to adjust quantities to keep the texture balanced.
Final Thoughts
Making the Traditional Canillitas de Leche Recipe is like embracing a warm hug from Guatemalan culinary heritage. It’s a sweet journey that’s simple yet filled with delightful flavors and texture that everyone will adore. I encourage you to try this recipe soon—you might just find a new favorite treat to cherish and share!
Print
Traditional Canillitas de Leche Recipe
- Prep Time: 10 minutes
- Cook Time: 10 minutes
- Total Time: 20 minutes
- Yield: 24 servings
- Category: Candy
- Method: Stovetop
- Cuisine: Guatemalan
- Diet: Vegetarian
Description
Traditional Guatemalan Canillitas de Leche are sweet, creamy milk candies made with powdered milk, condensed milk, honey, and vanilla. These delightful treats are quick to prepare and perfect for sharing, wrapped individually to keep their soft texture and rich flavor intact.
Ingredients
Main Ingredients
- ½ cup honey
- 4 cups powdered milk
- 1½ cans sweetened condensed milk
- 1 teaspoon vanilla extract
- ½ cup powdered sugar
For Kneading
- Cornstarch (as needed to prevent sticking)
Instructions
- Combine ingredients: In a saucepan over low heat, mix the honey, powdered milk, condensed milk, vanilla extract, and powdered sugar for 30 seconds to start dissolving and heating the mixture gently.
- Mix to stiff consistency: Increase the heat to medium and continue mixing vigorously for about 1 minute until the mixture thickens and reaches a stiff, dough-like consistency suitable for shaping.
- Knead dough: Lightly dust a clean surface with cornstarch and transfer the mixture onto it. Knead the dough carefully, adding more cornstarch as needed to prevent sticking, until smooth and pliable.
- Shape the canillitas: Divide the dough into small portions and shape each into traditional canillitas, which are small, elongated candy shapes. Wrap each candy individually with cellophane or other suitable wrapping to maintain freshness and shape.
- Cool and serve: Allow the wrapped canillitas de leche to cool completely at room temperature. Once cooled, they are ready to enjoy as a delightful sweet treat.
Notes
- Use cornstarch sparingly when kneading to avoid making the dough too dry.
- Ensure the mixture doesn’t overheat during cooking to prevent burning.
- Canillitas de leche can be stored in an airtight container for up to two weeks.
- Wrap candies individually to maintain freshness and prevent sticking.
- For a firmer texture, chill the shaped candies after wrapping.

