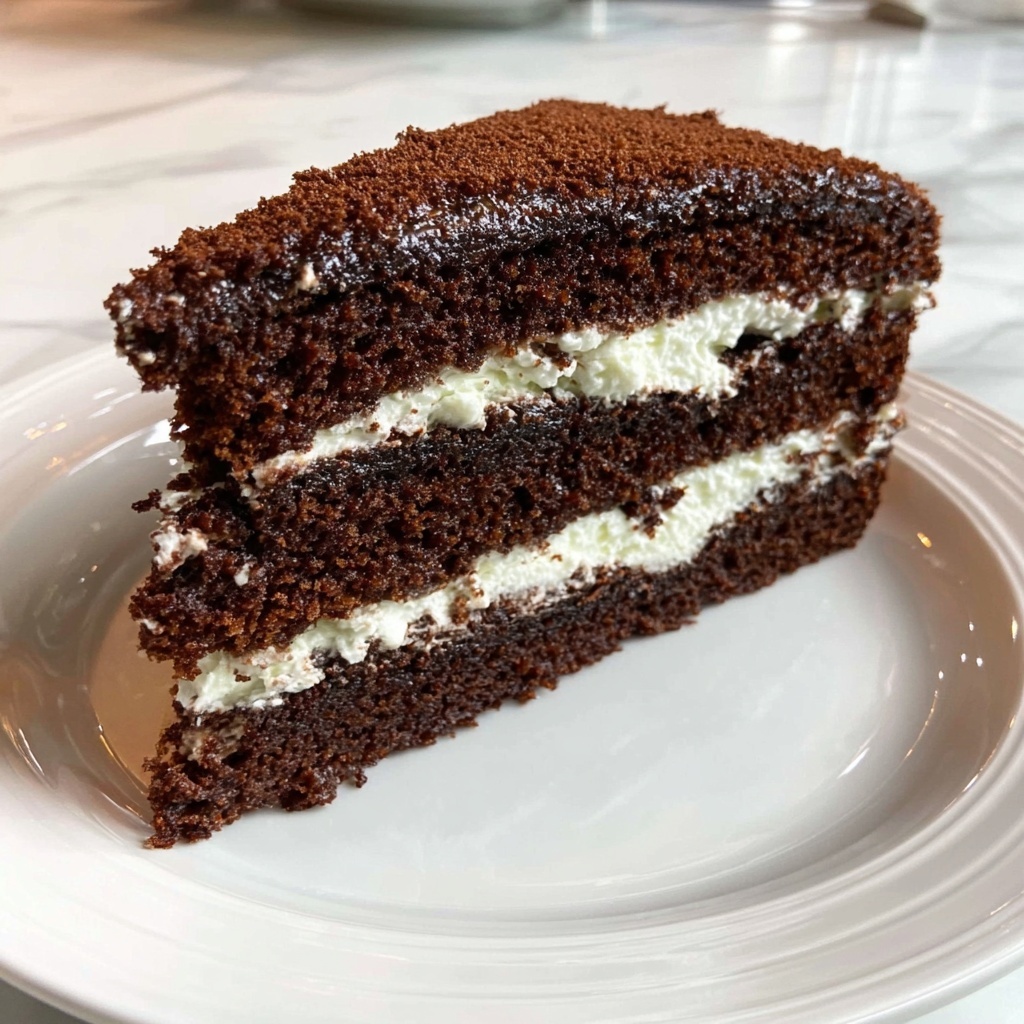
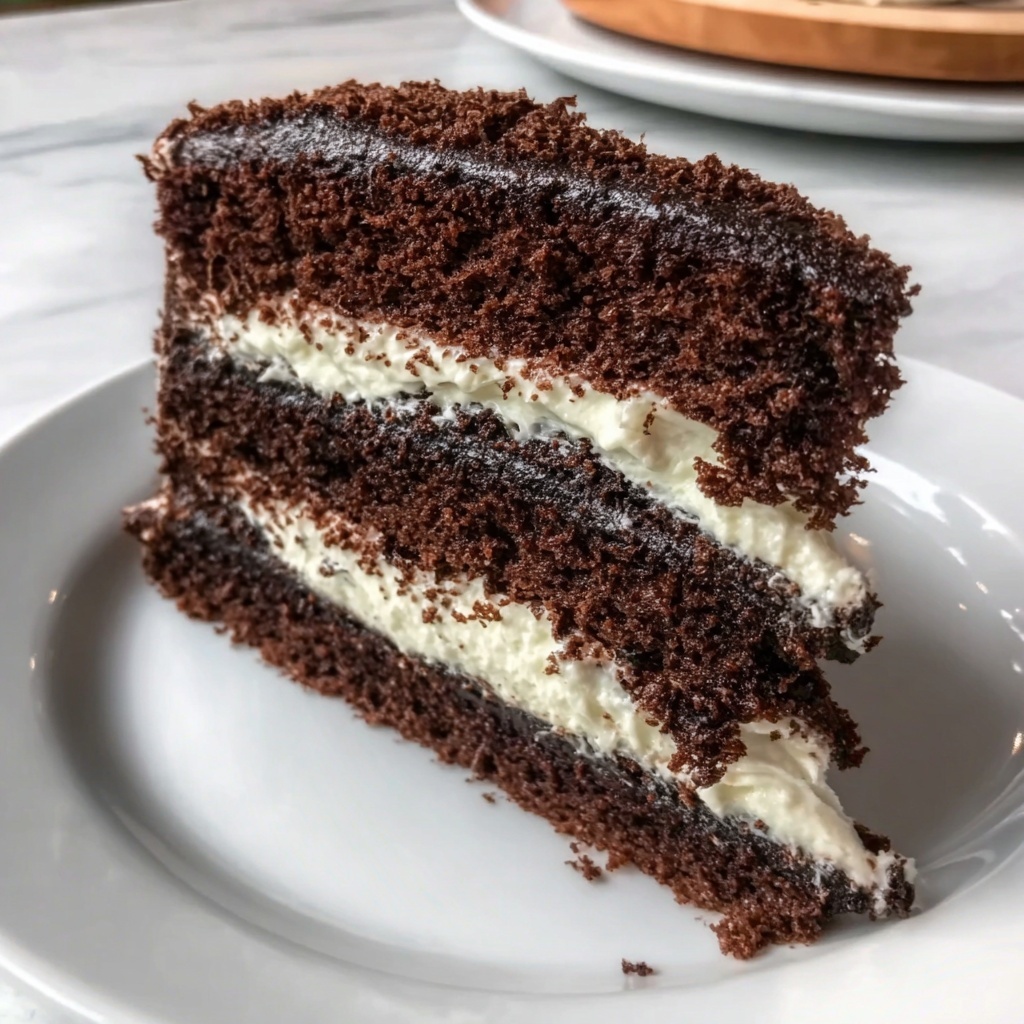
If you’re craving an irresistibly moist, chocolatey treat, then you are in for a real delight with this Hoho Cake Recipe: 5 Steps to Pure Chocolate Bliss Recipe. This cake is a luscious celebration of rich cocoa, fluffy textures, and creamy fillings that come together effortlessly to create a dessert that feels both comforting and indulgent. Whether you’re baking for a special occasion or just a cozy night in, this recipe turns simple ingredients into pure chocolate heaven.
Ingredients You’ll Need
Gathering the right ingredients is the secret to nailing the perfect chocolate cake. Each component here brings something special — from the deep cocoa flavor to the lightness in texture, not forgetting the smooth, dreamy whipped cream that ties it all together.
- 2 cups all-purpose flour: Provides the perfect base structure for your cake to rise and stay tender.
- 1 ¾ cups sugar: Balances the chocolate’s natural bitterness with just the right amount of sweetness.
- ¾ cup cocoa powder: Packs in the rich chocolate flavor, the real heart of this recipe.
- 1 ½ teaspoons baking powder: Helps the cake rise for that light, fluffy texture you’ll love.
- 1 ½ teaspoons baking soda: Works alongside baking powder to give a perfect crumb and tenderness.
- 1 teaspoon salt: Enhances all the chocolate flavors and balances the sweetness.
- 2 large eggs: Adds moisture and binds all the ingredients beautifully.
- 1 cup milk: Keeps the batter smooth and adds richness.
- ½ cup vegetable oil: Makes the cake delightfully moist without weighing it down.
- 2 teaspoons vanilla extract: Lifts the chocolate with a warm aroma and subtle sweetness.
- 1 cup boiling water: Intensifies the chocolate flavor and ensures a silky batter.
- 2 cups heavy cream: Whipped into a luscious frosting that’s light yet decadently creamy.
- ¼ cup powdered sugar: Sweetens and stabilizes the whipped cream filling.
- 1 teaspoon vanilla extract (for filling): Adds depth to the whipped cream, making each bite unforgettable.
How to Make Hoho Cake Recipe: 5 Steps to Pure Chocolate Bliss Recipe
Step 1: Prepare Your Oven and Pans
Start by setting your oven to a cozy 350°F (175°C) so it’s perfectly heated when you’re ready to bake. Grease and lightly flour two 9-inch round cake pans to ensure your cakes release easily and keep that flawless shape everyone loves.
Step 2: Mix Your Dry Ingredients
In a large bowl, combine the flour, sugar, cocoa powder, baking powder, baking soda, and salt. This dry mix forms the chocolatey foundation, so take a moment to whisk everything together until evenly blended, ensuring each bite bursts with balanced flavor.
Step 3: Bring in the Wet Ingredients
Add the eggs, milk, vegetable oil, and vanilla extract to your dry mixture. Stir them together until the batter becomes smooth and velvety. This step is all about creating a luscious base for your cake that bakes into moist, tender layers.
Step 4: Finish the Batter with Boiling Water
Carefully stir in the boiling water last; it might seem unusual, but this trick intensifies the cocoa and gives the batter a silky texture. Your mix will be thinner than typical cake batter—don’t worry, that’s exactly how it should look for maximum moistness.
Step 5: Bake and Cool
Divide the batter evenly between your prepared pans and pop them into the oven. After 30 to 35 minutes, use a toothpick to check—if it comes out clean, your cakes are perfectly baked. Let them cool in the pans for 10 minutes before transferring to wire racks. Patience here rewards you with perfectly set layers!
Step 6: Whip the Cream Filling
While your cakes cool completely, whip up the heavy cream with powdered sugar and vanilla until it forms stiff peaks. This fluffy frosting is light enough to complement but rich enough to enchant your taste buds when spread between and over the cake layers.
Step 7: Assemble Your Cake
Place one cake layer on your favorite serving dish and gently spread a thick layer of whipped cream on top. Add the second layer, then generously frost the top and sides with the remaining whipped cream. Chill for at least 30 minutes to let all those beautiful flavors meld together—then get ready to indulge!
How to Serve Hoho Cake Recipe: 5 Steps to Pure Chocolate Bliss Recipe

Garnishes
Elevate your Hoho cake by adding simple yet stunning garnishes like fresh berries, shaved dark chocolate, or a light dusting of cocoa powder. These touches not only add color but also complement the deep chocolate and creamy filling perfectly.
Side Dishes
Pair your Hoho Cake with a scoop of vanilla ice cream or a fresh fruit salad to contrast the richness and keep the dessert experience fresh and balanced. A cup of strong coffee or a smooth latte also creates a harmonious flavor duo that’s hard to beat.
Creative Ways to Present
For a fun twist, serve your Hoho Cake in individual glass parfaits layered with cake pieces and whipped cream or turn the cake into mini cupcakes for a playful, shareable treat. Presentation is part of the joy, so tailor it to your style and occasion!
Make Ahead and Storage
Storing Leftovers
Leftover cake is a gift! Keep it covered and chilled in the refrigerator, ideally in an airtight container, to preserve freshness and moisture. It will stay delicious for up to 3 days, making it easy to enjoy a slice anytime without extra baking.
Freezing
If you want to stretch the joy, you can freeze the cake layers separately, wrapped tightly in plastic wrap and foil. When you’re ready, thaw them overnight in the fridge before frosting and assembling. This way, you can savor the Hoho Cake Recipe: 5 Steps to Pure Chocolate Bliss Recipe whenever the craving strikes.
Reheating
Chocolate cake is best served cool or at room temperature, but if you prefer it slightly warm, gently microwave a slice for 10-15 seconds. This warms the cake without melting the whipped cream too much, creating a lovely, cozy bite.
FAQs
Can I use almond milk instead of regular milk?
Absolutely! Almond milk is a great substitute in this recipe. It won’t change the texture much and will keep the cake moist while adding a subtle nutty flavor if you enjoy that.
What’s the reason for adding boiling water to the batter?
The boiling water activates the cocoa powder’s flavor, making it richer and deeper. It also helps create a smoother, more fluid batter that bakes into an exceptionally moist cake.
Can I make this cake gluten-free?
You can experiment with gluten-free all-purpose flour blends, but be aware that texture may vary slightly. For best results, choose a blend that includes xanthan gum or similar binding agents.
Is the whipped cream stable enough for decorating?
The whipped cream in this recipe is flavorful and light but not as stable as buttercream for intricate decorating. It’s perfect for smooth frosting and layering but should be served within a day or two.
How long should I chill the cake before serving?
At least 30 minutes of chilling is recommended to let the whipped cream set nicely and the flavors marry. If you have more time, a couple of hours in the fridge makes slicing even easier and enhances the taste.
Final Thoughts
There is nothing quite like the joy of baking a cake that feels like a warm hug wrapped in chocolate. This Hoho Cake Recipe: 5 Steps to Pure Chocolate Bliss Recipe is simple, yet incredibly rewarding—turning basic pantry staples into a show-stopping dessert you’ll want to make again and again. So, grab your mixing bowl and get ready to fill your kitchen with the most delightful chocolate aroma. You won’t regret it!
Print
Hoho Cake Recipe: 5 Steps to Pure Chocolate Bliss Recipe
- Prep Time: 20 minutes
- Cook Time: 35 minutes
- Total Time: 1 hour 15 minutes
- Yield: 10 servings
- Category: Dessert
- Method: Baking
- Cuisine: American
- Diet: Vegetarian
Description
This Hoho Cake recipe delivers pure chocolate bliss with moist and rich chocolate layers complemented by a smooth whipped cream frosting. Crafted with simple pantry ingredients and baked to perfection, it’s an irresistible dessert perfect for any special occasion or chocolate craving.
Ingredients
Cake Ingredients
- 2 cups all-purpose flour
- 1 ¾ cups sugar
- ¾ cup cocoa powder
- 1 ½ teaspoons baking powder
- 1 ½ teaspoons baking soda
- 1 teaspoon salt
- 2 large eggs
- 1 cup milk
- ½ cup vegetable oil
- 2 teaspoons vanilla extract
- 1 cup boiling water
Whipped Cream Frosting
- 2 cups heavy cream
- ¼ cup powdered sugar
- 1 teaspoon vanilla extract (for filling)
Instructions
- Preheat Oven: Preheat your oven to 350°F (175°C) to prepare for baking the cake layers.
- Prepare Pans: Grease and flour two 9-inch round cake pans to prevent the cake from sticking.
- Mix Dry Ingredients: In a large bowl, combine the all-purpose flour, sugar, cocoa powder, baking powder, baking soda, and salt, mixing thoroughly to evenly distribute all dry ingredients.
- Add Wet Ingredients: Add the eggs, milk, vegetable oil, and vanilla extract to the dry mixture. Mix until well combined, ensuring a smooth batter.
- Incorporate Boiling Water: Carefully stir in the boiling water to the batter. This will thin the batter and help achieve a moist cake texture while ensuring it is smooth.
- Pour Batter into Pans: Divide the batter evenly between the two prepared cake pans, smoothing the tops.
- Bake: Bake in the preheated oven for 30-35 minutes or until a toothpick inserted in the center comes out clean, indicating the cakes are cooked through.
- Cool Cakes: Allow the cakes to cool in the pans for 10 minutes, then transfer them to wire racks to cool completely, ensuring the frosting does not melt.
- Prepare Whipped Cream Frosting: In a separate bowl, whip the heavy cream with powdered sugar and vanilla extract until stiff peaks form, creating a light and fluffy frosting.
- Assemble Cake: Place one cake layer on a serving plate and spread a generous layer of whipped cream on top.
- Add Second Layer and Frost: Place the second cake layer on top, then cover the top and sides of the cake with the remaining whipped cream.
- Chill Before Serving: Refrigerate the assembled cake for at least 30 minutes to allow the frosting to set and flavors to meld before serving.
Notes
- Ensure the boiling water is added carefully to avoid cooking the eggs prematurely.
- For an extra moist cake, do not overbake; start checking for doneness at 30 minutes.
- Use chilled heavy cream for easier whipping and better volume.
- The cake can be stored covered in the refrigerator for up to 3 days.
- Optional: Garnish with chocolate shavings or fresh berries for added decoration.


