
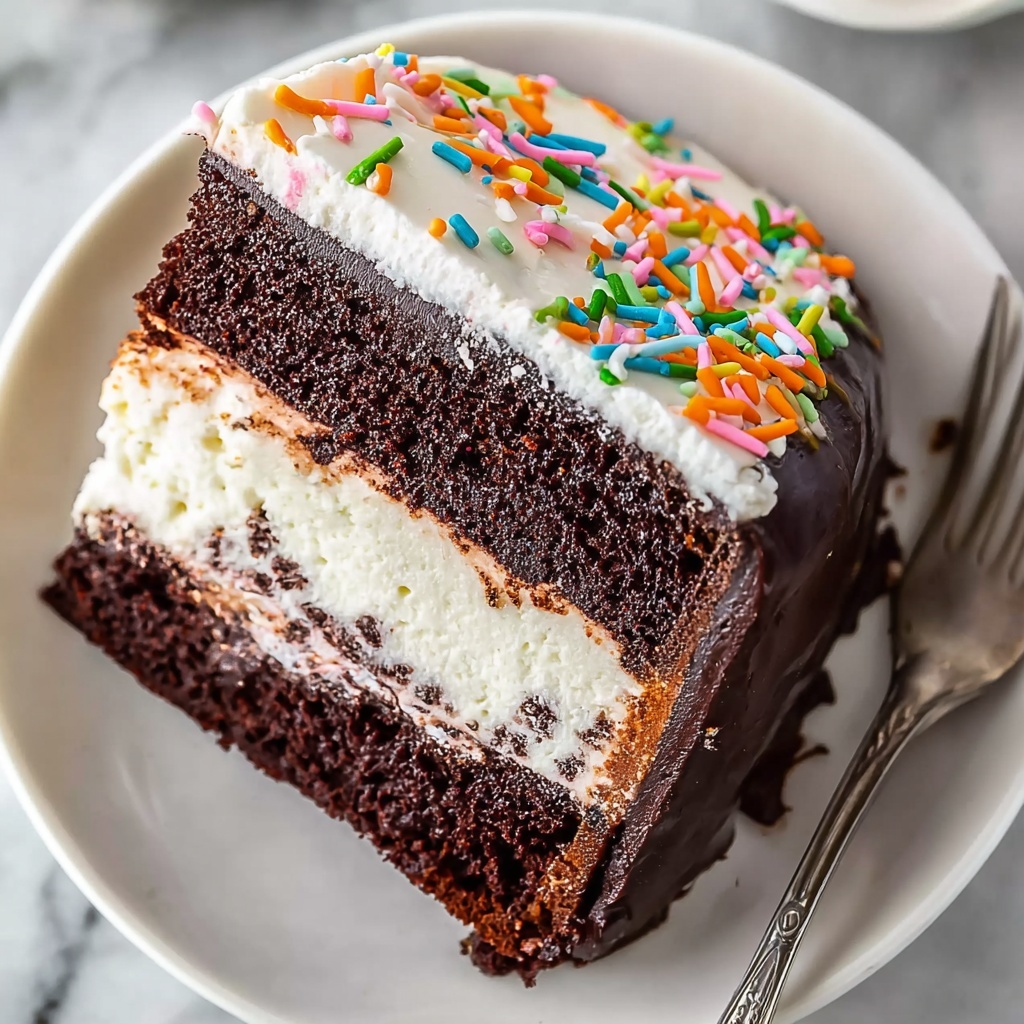
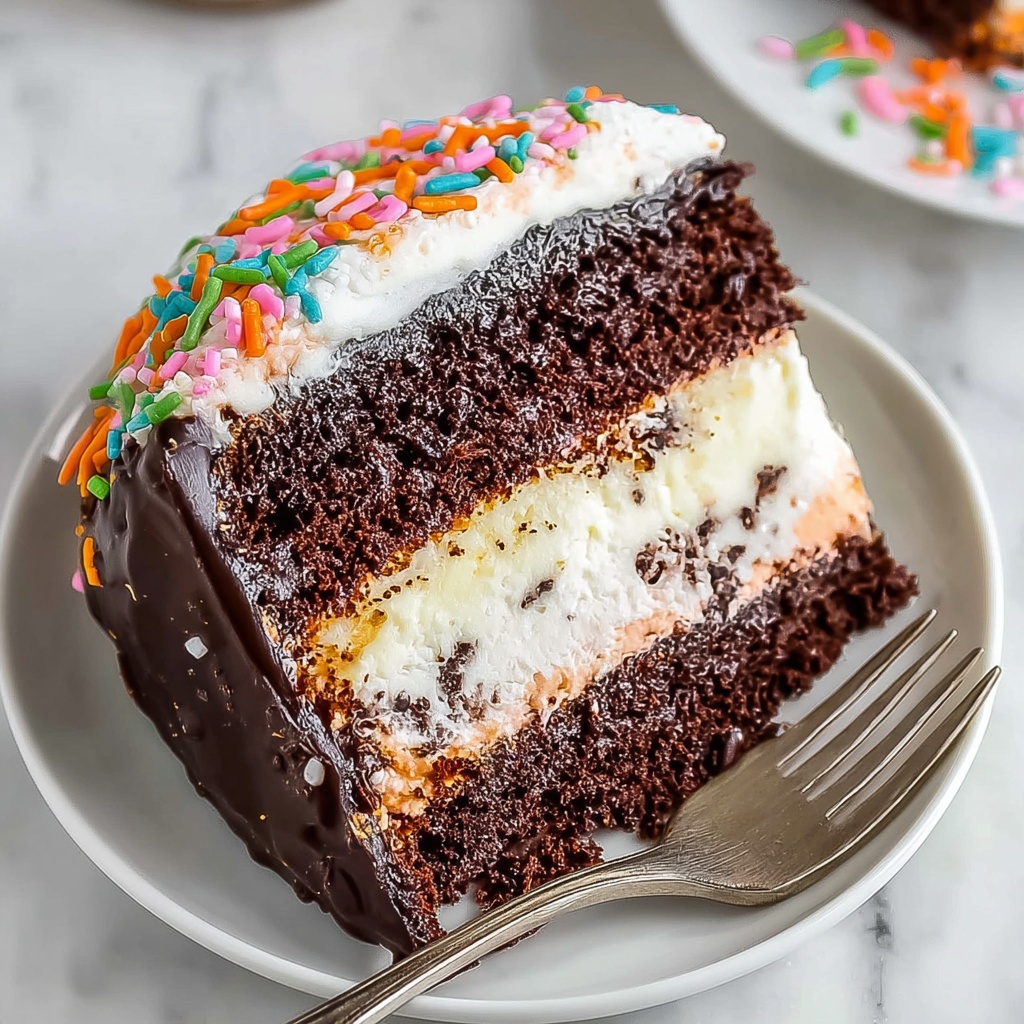
If you are craving a spectacular dessert that combines the creamy richness of ice cream with the satisfying crunch of a cookie crust, this Homemade Ice Cream Cake Recipe is exactly what you need. It’s a delightful layered treat that feels special enough for celebrations yet simple enough to make anytime you want to wow your friends and family. The interplay of chocolate and vanilla ice cream with the fudge layer and whipped topping creates a flavor and texture harmony that’s utterly irresistible. Trust me, once you try this, ice cream cake will become your new favorite go-to dessert!
Ingredients You’ll Need
The beauty of this cake is in its simplicity. Each ingredient is essential, from the cookie crust that offers a satisfying crunch, to the creamy ice cream layers providing that classic cool sweetness, and the fudge for a rich, gooey surprise. Here’s everything you’ll gather before making magic happen:
- 24 chocolate sandwich cookies, crushed: These form the crunchy, chocolaty base that contrasts perfectly with the creamy layers above.
- 5 tablespoons unsalted butter, melted: This binds the cookie crust together and adds a subtle richness.
- 1.5 quarts chocolate ice cream, slightly softened: The first luscious ice cream layer that delivers deep cocoa flavor.
- 1.5 quarts vanilla ice cream, slightly softened: This balances the chocolate with creamy, smooth vanilla goodness.
- 3/4 cup hot fudge sauce: A decadent drizzle that adds gooey texture and intense chocolate flavor.
- 1 1/2 cups whipped topping or homemade whipped cream: Light and airy, it’s the perfect crowning touch.
- 1/4 cup chocolate shavings or sprinkles: Adds a decorative and delicious finishing touch to your cake.
- Optional crushed cookies or chopped candy pieces: For extra texture and personalized flair on top.
How to Make Homemade Ice Cream Cake Recipe
Step 1: Prepare the Crust
Start by lining a 9-inch springform pan or a deep cake pan with parchment paper to prevent sticking and make removal easy. Combine the crushed chocolate sandwich cookies with the melted butter until every crumb is coated. Then press this mixture firmly into the bottom of your pan to create a compact, solid crust. Pop it into the freezer for 15 minutes so it can set while you prep the next layers.
Step 2: Layer the Chocolate Ice Cream
Take the slightly softened chocolate ice cream and spread it evenly over your chilled crust. Smoothing the top with a spatula ensures a flat and even layer. Place the pan back in the freezer for 30 minutes until the chocolate ice cream layer is firm enough to hold the fudge sauce without mixing.
Step 3: Add the Fudge Layer
Warm the hot fudge sauce gently just until it’s easily spreadable—this makes for a smooth, even layer. Pour the fudge over the chocolate ice cream and spread it out gently with a spatula. Freeze again for 15 minutes so the fudge sets into a sticky, luscious layer that adds a rich surprise in every bite.
Step 4: Add the Vanilla Ice Cream Layer
Now soften your vanilla ice cream slightly and spread it evenly on top of the hardened fudge. This top ice cream layer provides a creamy contrast to the chocolate below. Cover the pan tightly with plastic wrap and freeze for at least 4 hours or overnight to ensure the whole cake is thoroughly firm.
Step 5: Finish with Whipped Topping and Garnishes
Before serving, remove the cake carefully from the pan and spread the whipped topping or homemade whipped cream over the top and sides for a cloud-like finish. Sprinkle on chocolate shavings, sprinkles, or your choice of crushed cookies and chopped candies for a colorful, joyful presentation that will impress everyone at your table.
How to Serve Homemade Ice Cream Cake Recipe
Garnishes
A beautiful presentation can make this cake feel extra special. Fresh chocolate shavings add elegance and melt-in-your-mouth richness, while sprinkles bring a touch of fun and color. For extra texture, add crushed cookies or chopped candy pieces that provide delightful crunches with each bite.
Side Dishes
Serve your homemade ice cream cake with fresh berries or a drizzle of raspberry sauce for a tart contrast to the sweet layers. A scoop of your favorite ice cream on the side or a cup of hot coffee complements the cold cake wonderfully, balancing flavors and temperatures.
Creative Ways to Present
Try layering this cake in clear glass trifle bowls for a stunning visual effect of each layer. You can also create mini individual ice cream cakes in small jars or molds, perfect for parties where guests want their own personal slice of delight. Don’t be afraid to experiment with different ice cream flavors or add swirls of caramel or fruit compote inside for surprising twists.
Make Ahead and Storage
Storing Leftovers
Simply keep any leftover cake in an airtight container or tightly wrapped in plastic wrap to prevent freezer burn and absorption of other odors. It will stay fresh and delicious for up to one week, so you can enjoy it long after the initial celebration.
Freezing
This Homemade Ice Cream Cake Recipe is perfect for making ahead of time. Freeze your finished cake tightly wrapped in plastic wrap followed by a layer of foil for extra protection. It can be frozen for several weeks, making it a stress-free dessert option ready for any occasion.
Reheating
Since this is an ice cream cake, there is no need to reheat. Simply let it sit at room temperature for a few minutes before slicing for clean cuts. Avoid letting it thaw too long to maintain the perfect texture and temperature balance when serving.
FAQs
Can I use different ice cream flavors in this recipe?
Absolutely! The Homemade Ice Cream Cake Recipe is wonderfully flexible. Feel free to swap out the vanilla and chocolate with any favorite ice cream flavors you love, such as cookies and cream, strawberry, or mint chocolate chip. The key is to soften the ice cream so it layers well.
How do I get clean slices when serving the cake?
For the best results, dip your knife in warm water, then wipe it dry before slicing. This simple trick helps the knife glide through the cake smoothly without smudging the layers.
Can I make this cake without a springform pan?
Yes, a deep cake pan lined generously with parchment paper works perfectly. Just be sure the sides are high enough to hold the ice cream layers securely.
Is it possible to use store-bought whipped topping instead of homemade?
Definitely. Store-bought whipped topping is a great shortcut and still adds that fluffy, light finish. If you want a fresher taste, homemade whipped cream is easy to make and tastes amazing.
How long should I freeze the cake before serving?
For the best texture and firmness, freeze the cake for at least 4 hours or overnight. This allows all the layers to set properly and makes slicing much easier.
Final Thoughts
This Homemade Ice Cream Cake Recipe is pure joy in dessert form—simple enough to make at home but impressive enough to steal the spotlight at any gathering. The layers of chocolate and vanilla ice cream, rich fudge, crunchy crust, and light whipped topping come together to create a luscious treat that everyone will love. Give it a try and see how quickly this becomes a favorite in your dessert repertoire!
Print
Homemade Ice Cream Cake Recipe
- Prep Time: 20 minutes
- Cook Time: 0 minutes
- Total Time: 4 hours 20 minutes
- Yield: 10 servings
- Category: Dessert
- Method: Freezing
- Cuisine: American
- Diet: Vegetarian
Description
A decadent homemade ice cream cake featuring layers of chocolate and vanilla ice cream with a chocolate cookie crust, hot fudge layer, and whipped topping. Perfect for a no-bake dessert that is ideal for birthdays or special occasions.
Ingredients
For the crust:
- 24 chocolate sandwich cookies, crushed
- 5 tablespoons unsalted butter, melted
For the filling:
- 1.5 quarts chocolate ice cream, slightly softened
- 1.5 quarts vanilla ice cream, slightly softened
For the fudge layer:
- 3/4 cup hot fudge sauce
For the topping:
- 1 1/2 cups whipped topping or homemade whipped cream
- 1/4 cup chocolate shavings or sprinkles
- Optional crushed cookies or chopped candy pieces
Instructions
- Prepare the crust: Line a 9-inch springform pan or deep cake pan with parchment paper. In a bowl, combine the crushed chocolate sandwich cookies with the melted butter, mixing until evenly coated. Press the mixture firmly into the bottom of the pan to create an even crust layer. Place the pan in the freezer for 15 minutes to set the crust.
- Add chocolate ice cream layer: Spread the softened chocolate ice cream evenly over the chilled crust, smoothing the surface with a spatula. Freeze the pan for 30 minutes to let this layer firm up.
- Apply fudge layer: Warm the hot fudge sauce slightly to make it spreadable, then carefully pour and spread it over the chocolate ice cream layer in an even layer. Return the pan to the freezer for 15 minutes to set the fudge.
- Add vanilla ice cream layer: Spread the softened vanilla ice cream over the fudge layer, smoothing it evenly with a spatula. Cover the cake tightly with plastic wrap and freeze for at least 4 hours or overnight, until completely firm.
- Finish and serve: Before serving, remove the cake from the pan and spread whipped topping or homemade whipped cream evenly over the top and sides. Garnish with chocolate shavings, sprinkles, or optional crushed cookies or chopped candy pieces. Slice with a knife dipped in warm water, wiping between cuts for clean slices. Serve immediately.
Notes
- You can substitute the ice cream flavors with your favorites such as cookies and cream, strawberry, or mint chocolate chip for variety.
- For cleaner, neater slices, dip your knife in warm water and wipe it dry between each cut.


